Creating a Next.js PostgreSQL full-stack application
This guide will show you how to create a full-stack app with Next.js and PostgreSQL on the Coherence platform.
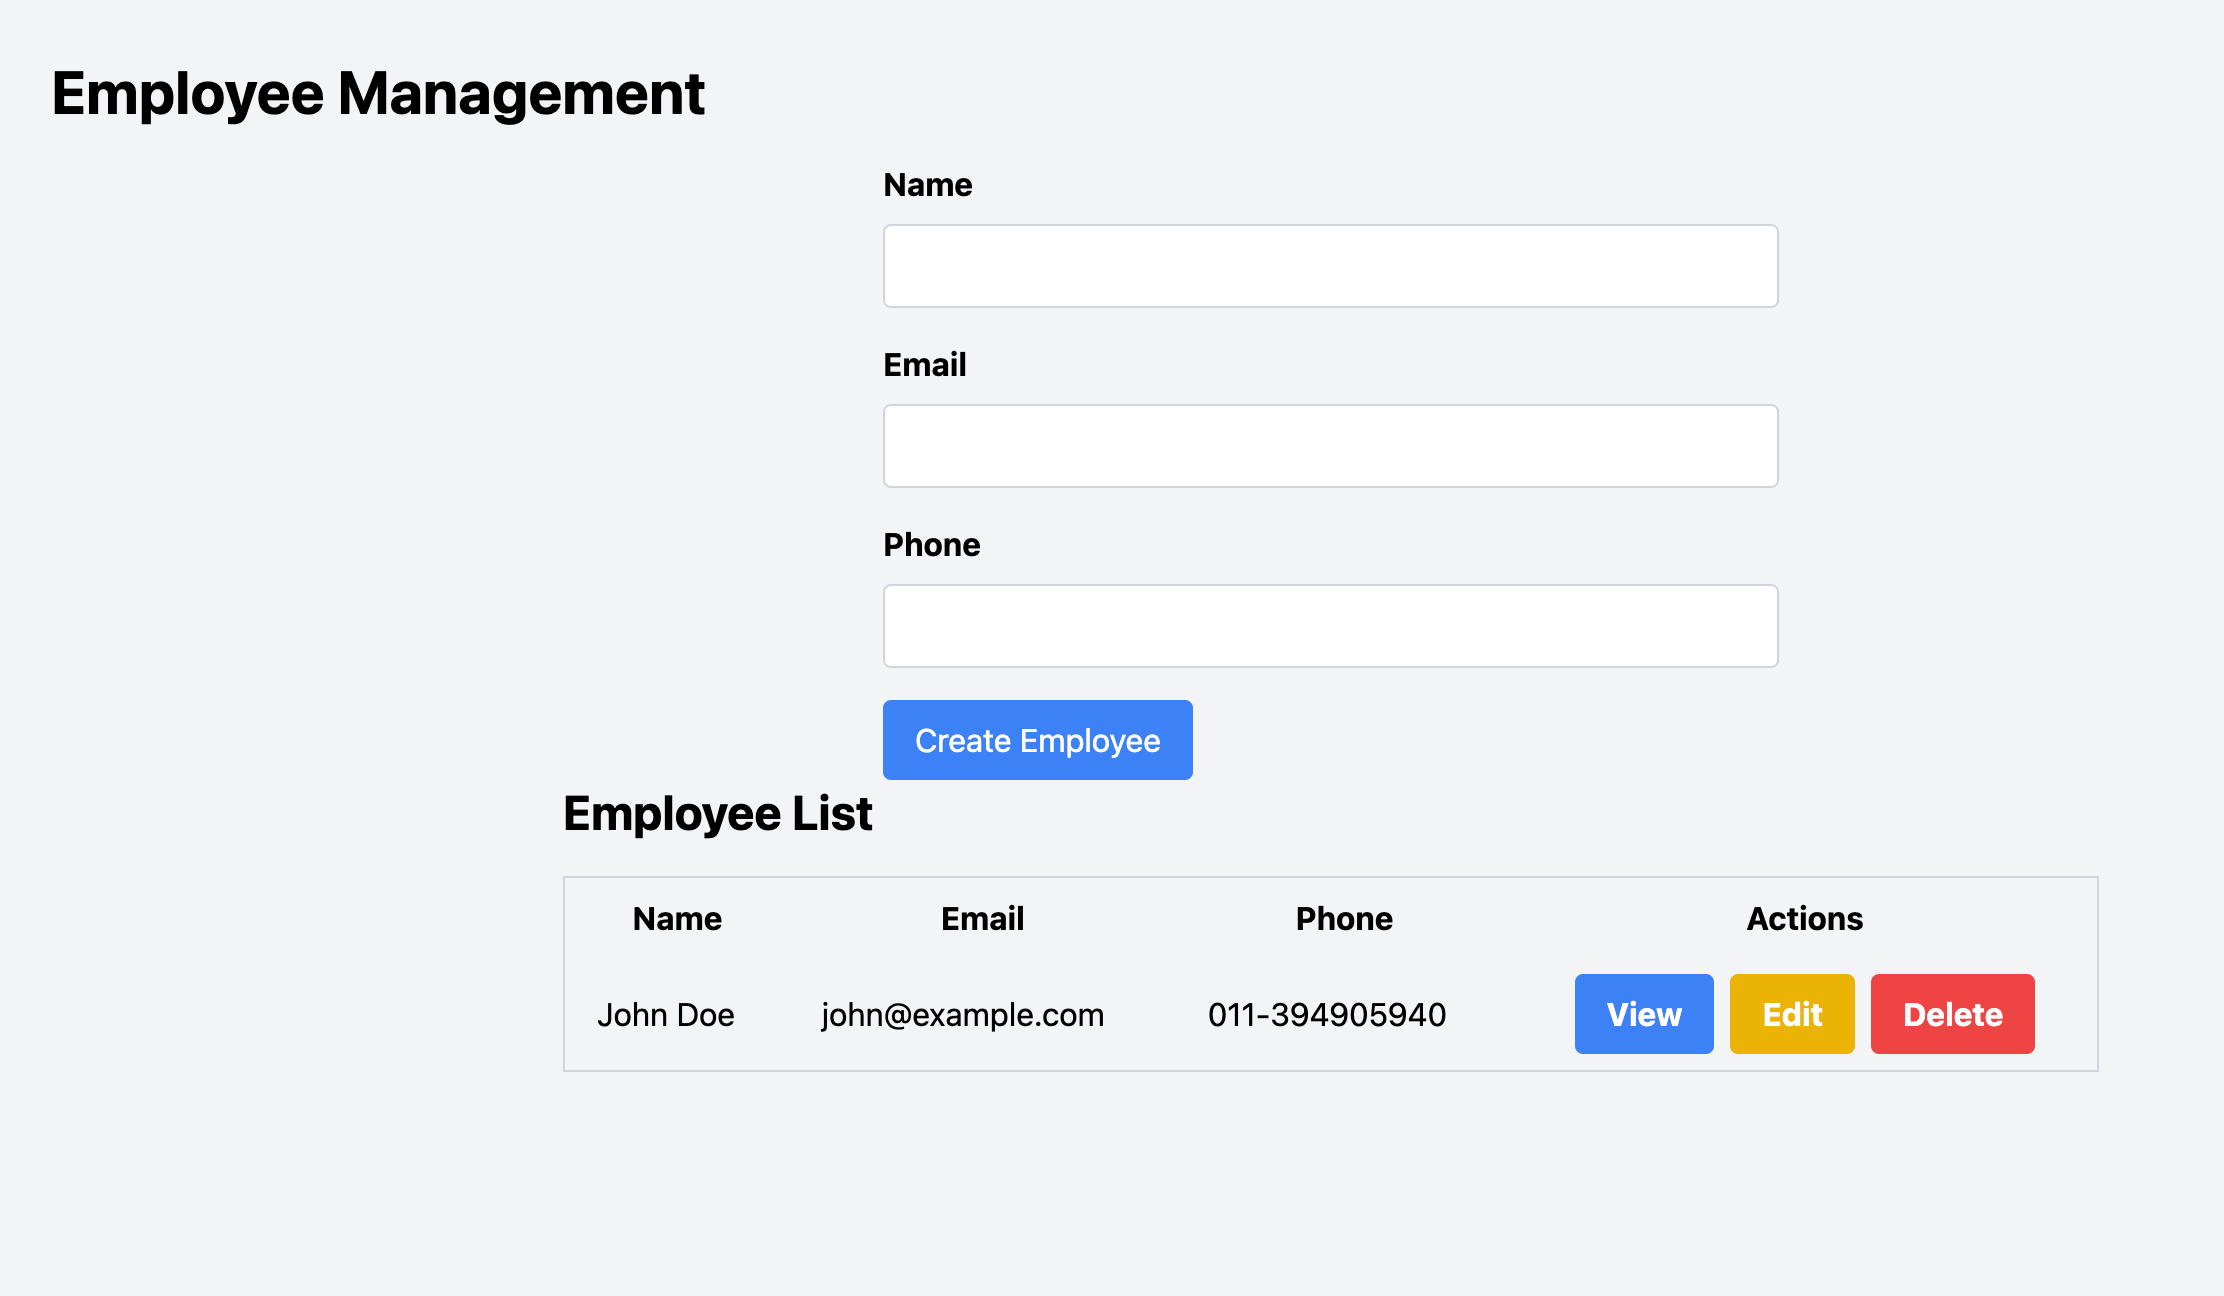
Using Express, we'll build a small Next.js CRUD application to manage and display employee contact details stored in a PostgreSQL database and deploy and manage the app in a cloud environment from Coherence.
Prerequisites
To follow this guide, you'll need:
- A Coherence account. Follow our guide to creating a Coherence account.
- Some familiarity with creating an app on the Coherence platform and authorizing Coherence to access your GitHub repository. Follow our guide to creating an app on Coherence for more details.
- An AWS account.
- Docker installed on your machine. We'll use Docker and Docker Compose to test the application locally. If you prefer to run the application directly on your machine, you'll need Node.js and PostgreSQL installed.
Getting started
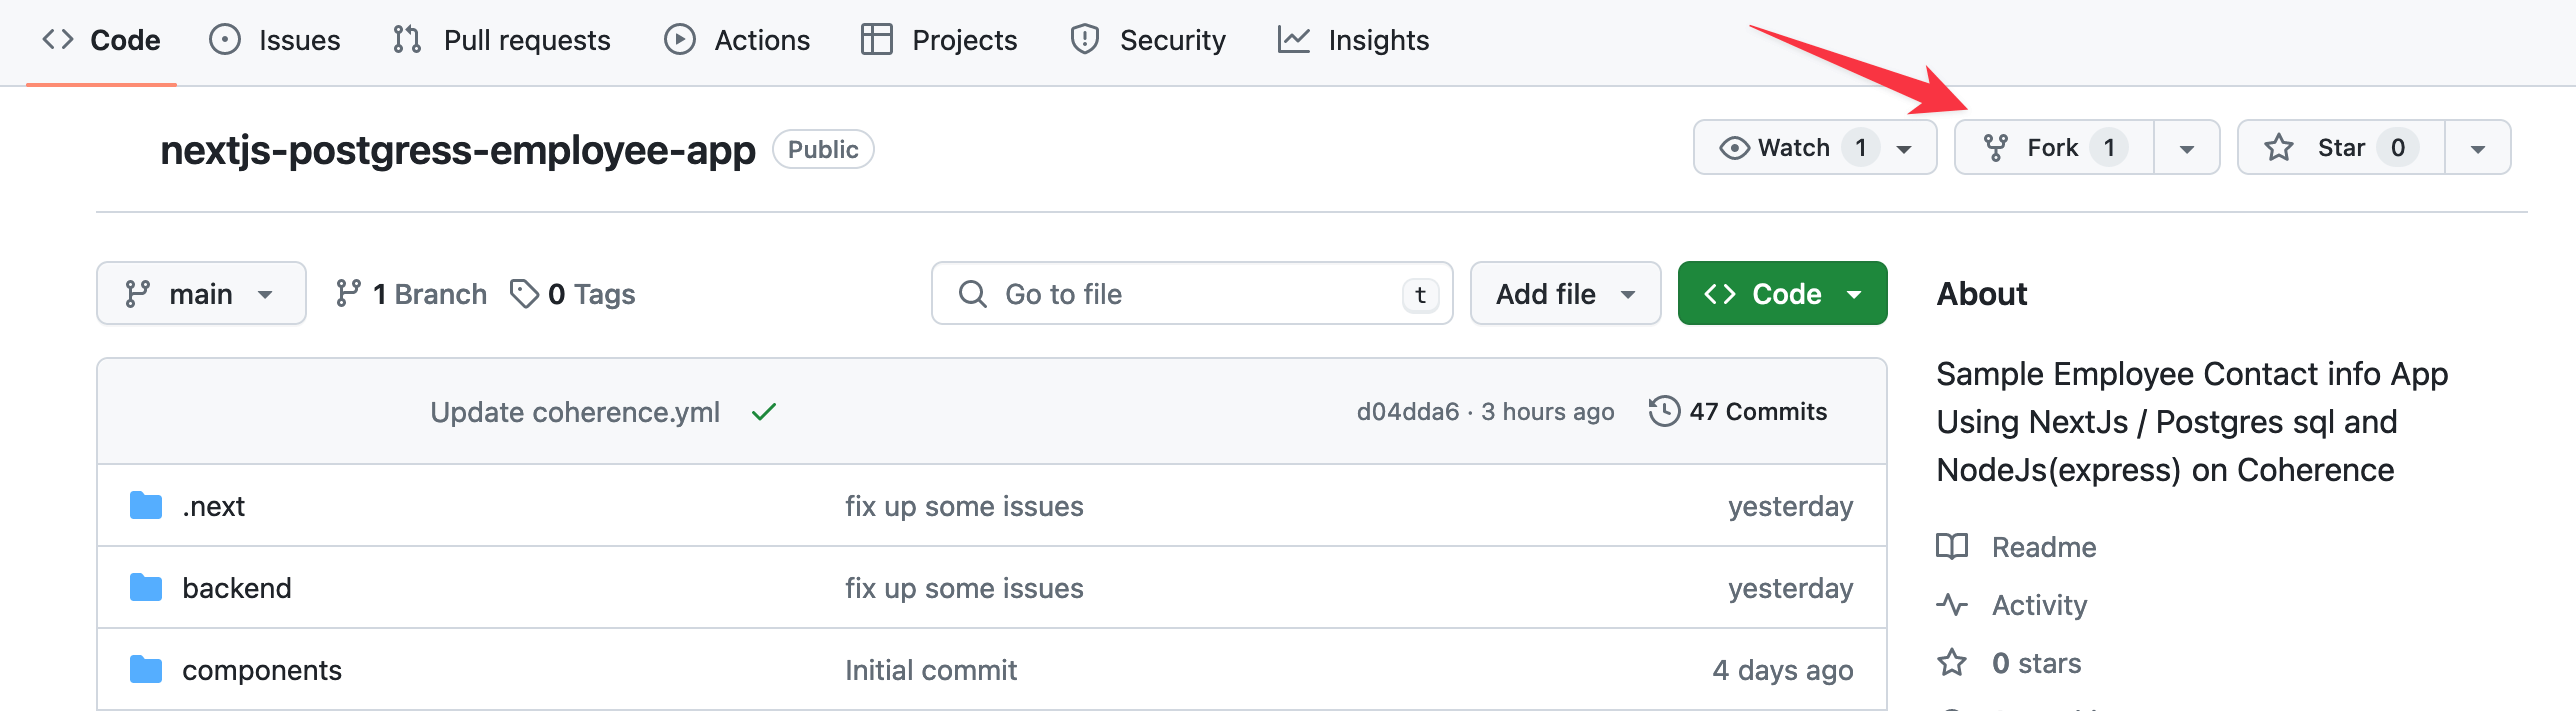
Start by forking the example app repository on GitHub. Select the Fork button on the top right of the GitHub repository page and then select Create Fork on the screen that follows.
In your working directory, clone and start the application with the following commands, replacing <your_github_username> with your GitHub username.
git clone https://github.com/<your_github_username>/nextjs-postgress-employee-app.git
cd nextjs-postgress-employee-app
docker-compose up
The application should now be accessible at http://localhost:3000.
The application consists of the following parts:
- A Next.js frontend.
- An Express backend that connects to a PostgreSQL database.
- Database model migration scripts.
- A Dockerfile and
docker-compose.ymlconfiguration file. - A
coherence.ymlconfiguration file.
The frontend
The frontend is a Next.js web app you can use to enter employee information to be stored in the database. The web app communicates with the database using API endpoints in the backend.
The backend
The backend is an Express API that communicates with the PostgreSQL database to store information.
The Dockerfile
The frontend uses the Dockerfile below to copy the project configurations to the required locations and install project packages.
FROM node:18
WORKDIR /app
COPY package*.json ./
RUN npm install
COPY . .
RUN npm run build
EXPOSE 3000
CMD ["npm", "start"]
After the project builds, port 3000 is exposed and the start command is executed.
The docker-compose.yml file
The Docker Compose configuration file defines the app and database services for the project Docker containers.
version: '3'
services:
  app:
    build:
      context: .
      dockerfile: Dockerfile
    ports:
      - '3000:3000'
    depends_on:
      - db
    environment:
      - DATABASE_URL=postgres://postgres:password@db:5432/employees
    command: >
      sh -c "npm install wait-on && npx wait-on tcp:db:5432 && npm run migrate up && npm run build && npm start"
  db:
    image: postgres:14
    environment:
      - POSTGRES_PASSWORD=password
      - POSTGRES_DB=employees
      - POSTGRES_HOST_AUTH_METHOD=md5
    ports:
      - '5432:5432'
    volumes:
      - ./psql_data:/var/lib/postgresql/data
The docker-compose up command builds the app image and starts up the app and database containers. Here, we use the wait-on library to set the app container to wait for the database to start accepting connections on port 5432.
Deploying the app to production
Log in to your Coherence account and select New application.
Enter the new app name, GitHub repository URL, and integration branch, and click Continue.
Install the Coherence GitHub app if you haven't already, and authorize Coherence to access your repo on GitHub. Click Continue.
For more detailed instructions on creating an application on Coherence, see our guide.
Creating the coherence.yml config file
If your project contains a coherence.yml file, Coherence will detect it. Alternatively, you will have the opportunity to create the coherence.yml file from a template.
Select the Next.js template and copy the configuration below to it.
backend:
  dev:
    - npm
    - run
    - dev
  prod:
    - npm
    - run
    - start
  type: backend
  url_path: /api
  migration:
    - npm
    - run
    - migrate
    - up
  resources:
    - name: db1
      type: database
      engine: postgres
      version: 14
  local_packages:
    - node_modules
frontend:
  dev:
    - npm
    - run
    - dev
  prod:
    - npm
    - run
    - start
  type: backend
  build:
    - npm
    - run
    - build
  install:
    - npm
    - install
  url_path: /
  repo_path: .
  local_packages:
    - node_modules
In this coherence.yml file, we configure the Coherence services the app needs: the API and database for the backend and the Next.js application for the frontend. Note that we add migration to the backend to create the initial database tables.
Take a look at the Coherence docs for more information on Coherence services and the coherence.yml file.
Connecting to AWS
Follow the detailed steps in our guide to connect an application to AWS. In brief, the steps are:
- On the Preview tab, click the Add Preview cloud button.
- Choose Amazon AWS as the cloud provider and enter your AWS account ID and the region where the application should be hosted.
- Create an IAM role in your AWS account with a custom policy as provided on the Coherence platform.
- Assign administrator privileges to the IAM role.
Next we'll import environment variables.
Importing environment variables
In the import variables screen, add the following environment variables for the database name and connection string to the PostgreSQL database:
PG_DATABASE_NAME=employees
PG_DATABASE_URL=postgres://postgres:password@localhost:5432/employees
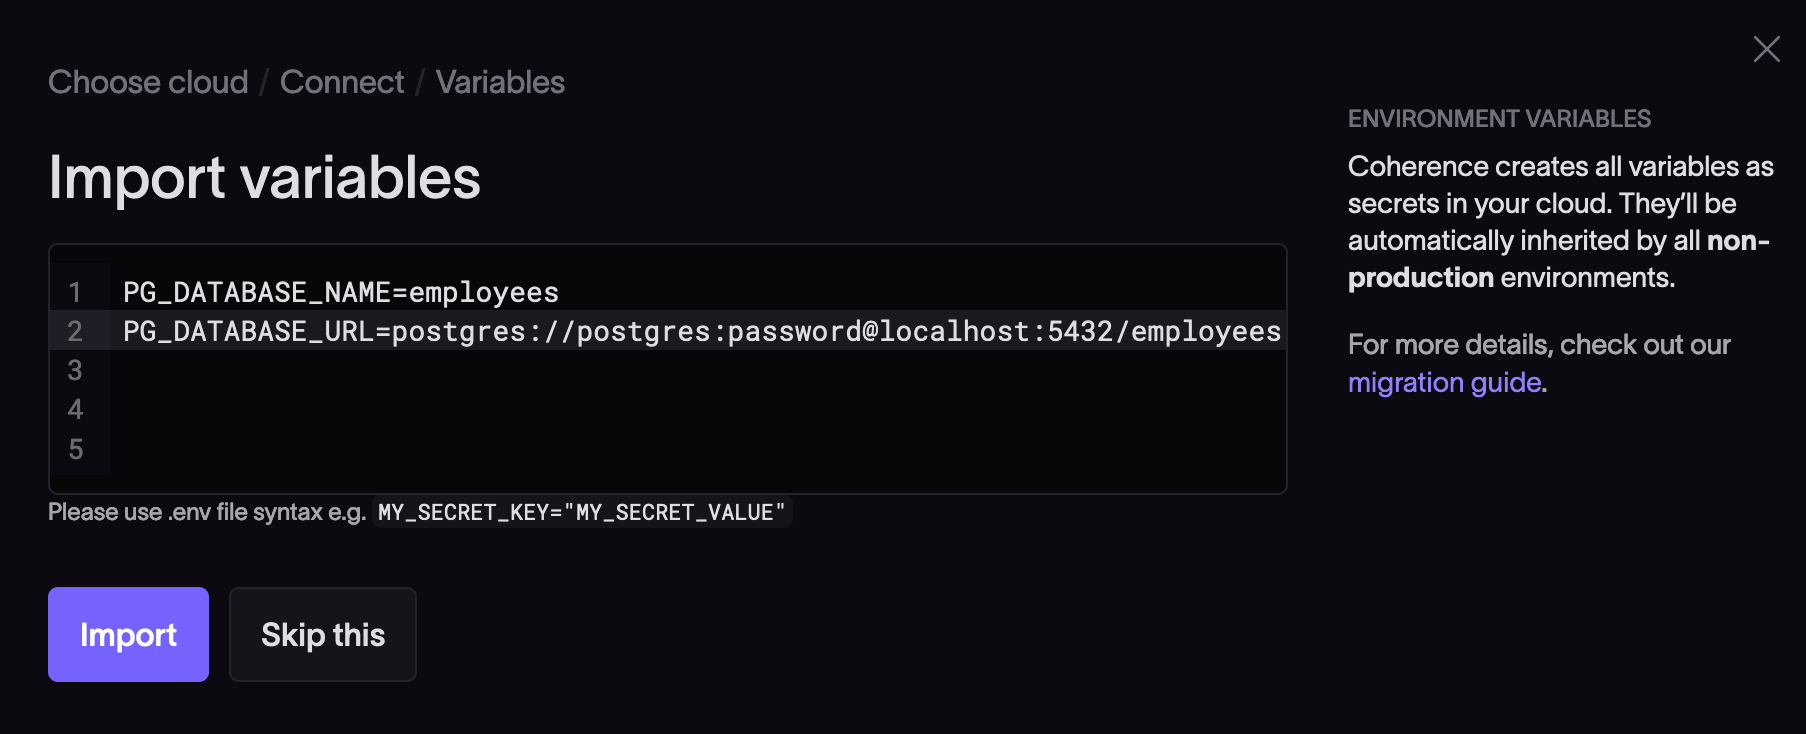
Click Import.
Coherence will prompt you to confirm the infrastructure configuration in your AWS environment. Check all the checkboxes for the services the app needs and click Continue to create the infrastructure on AWS.
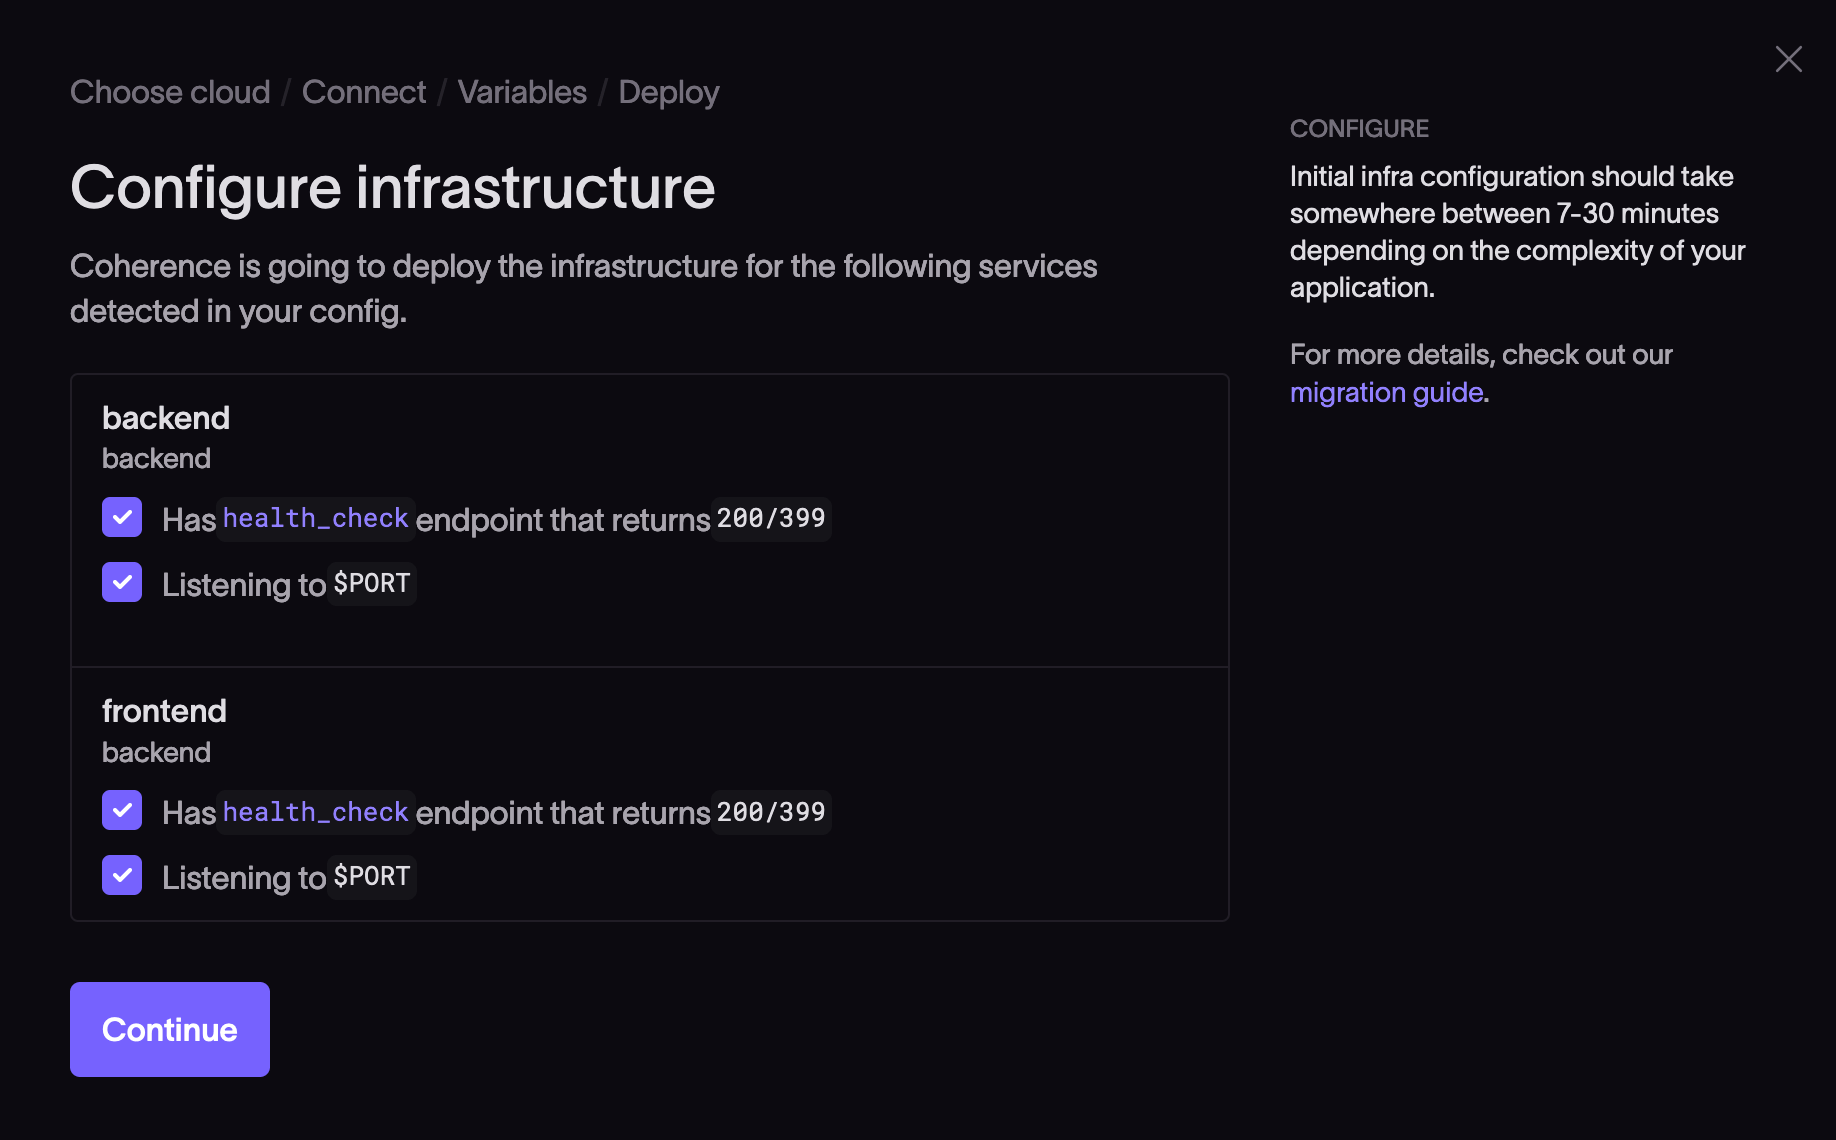
When the infrastructure is configured, you should see the following screen.
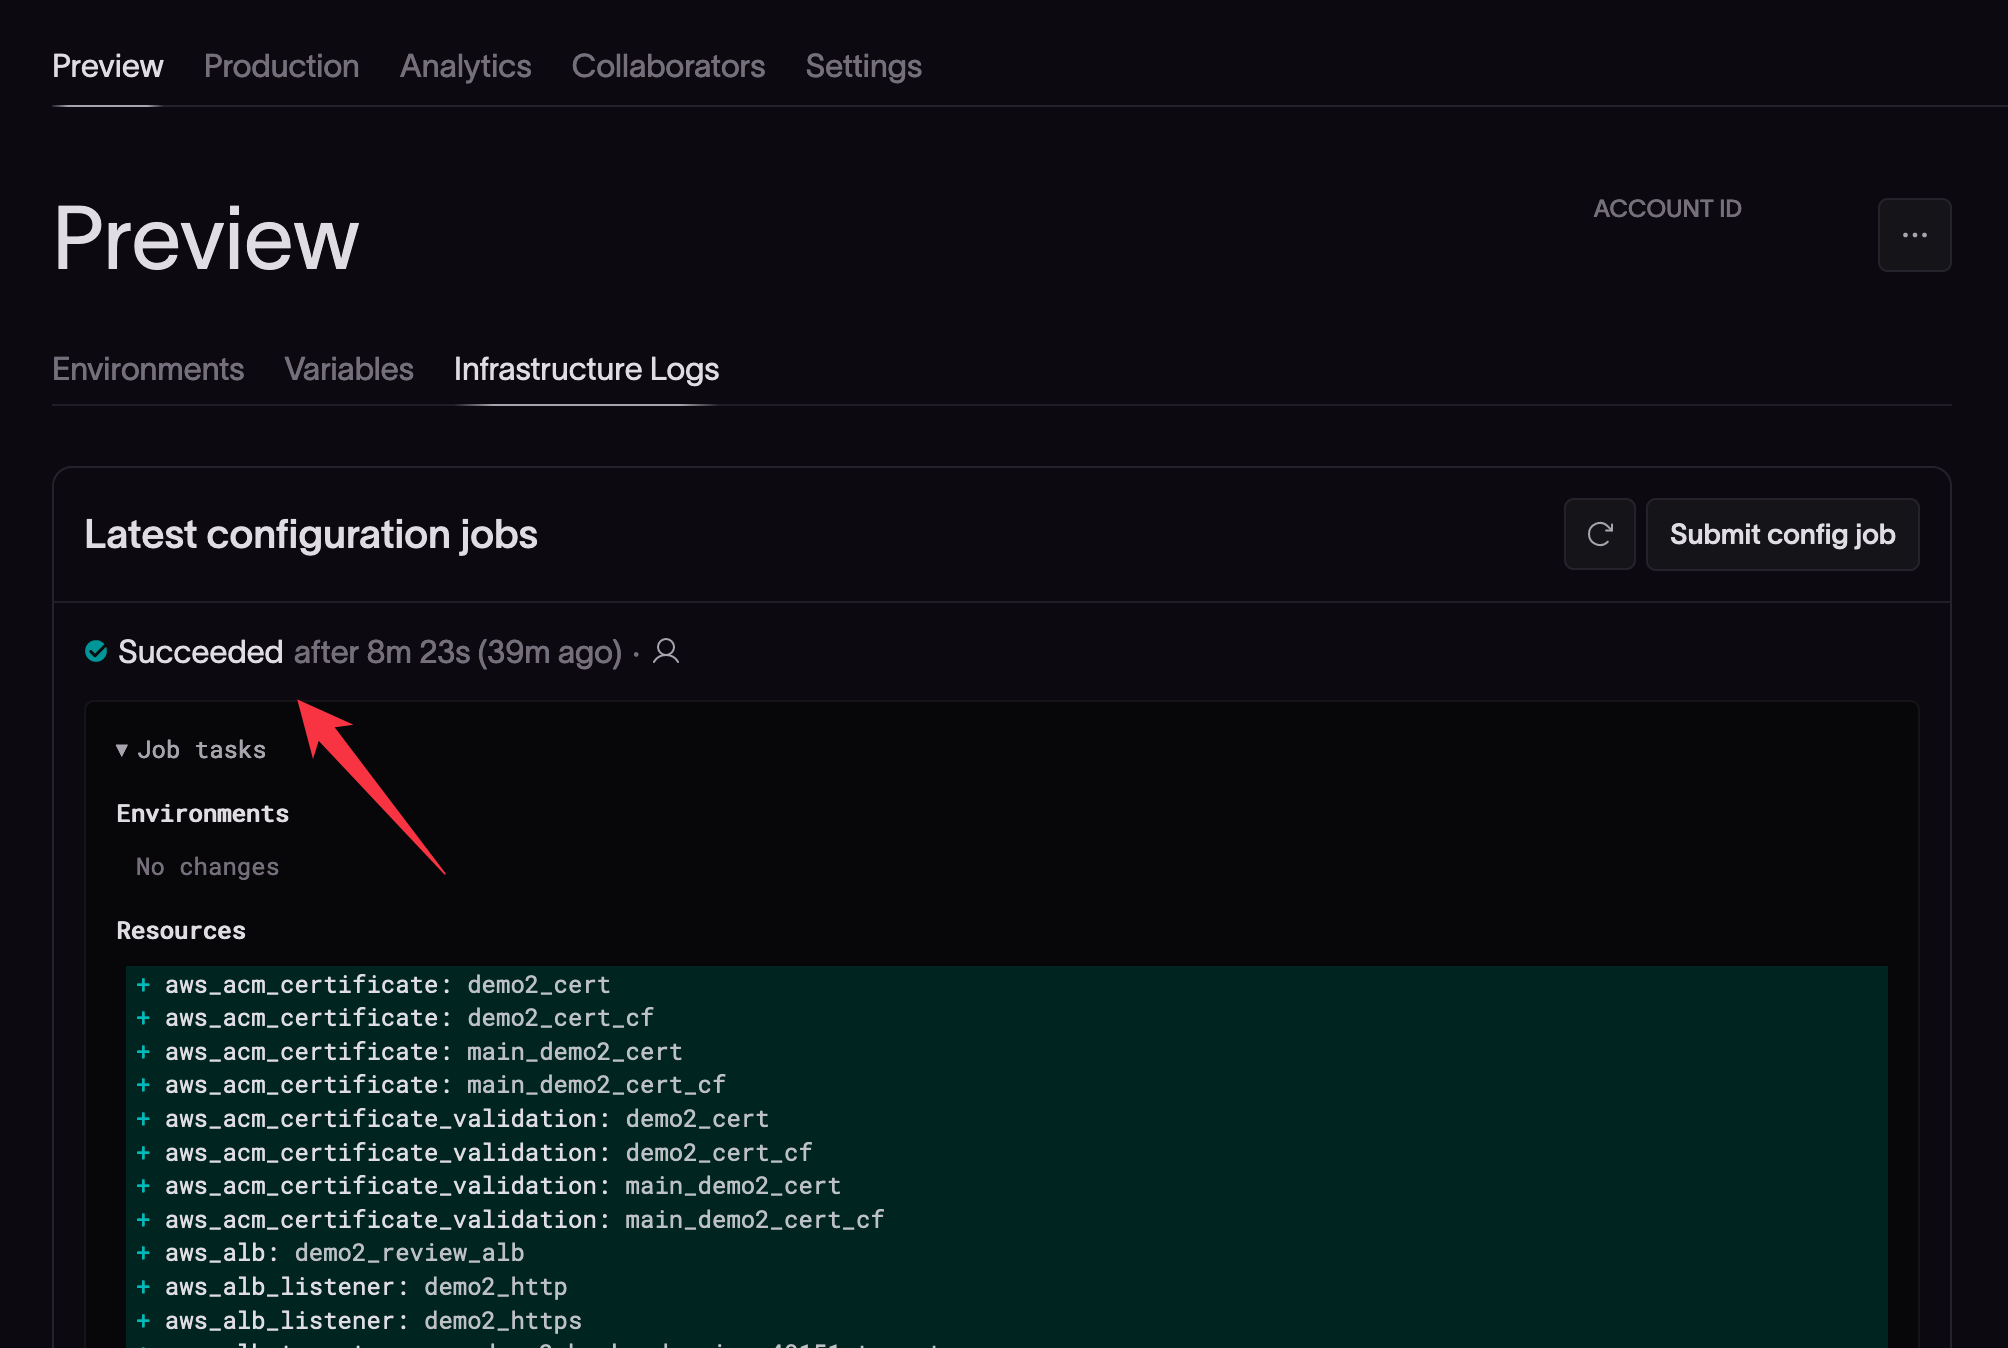
A successful build preview pipeline is required to ensure the application is working as expected before you deploy the app to production. If the build is not successful, view the infrastructure logs to help you fix any errors and retry.
Viewing build details
After a successful build, navigate to the Environments tab and click on your integration branch item to view details about the build.
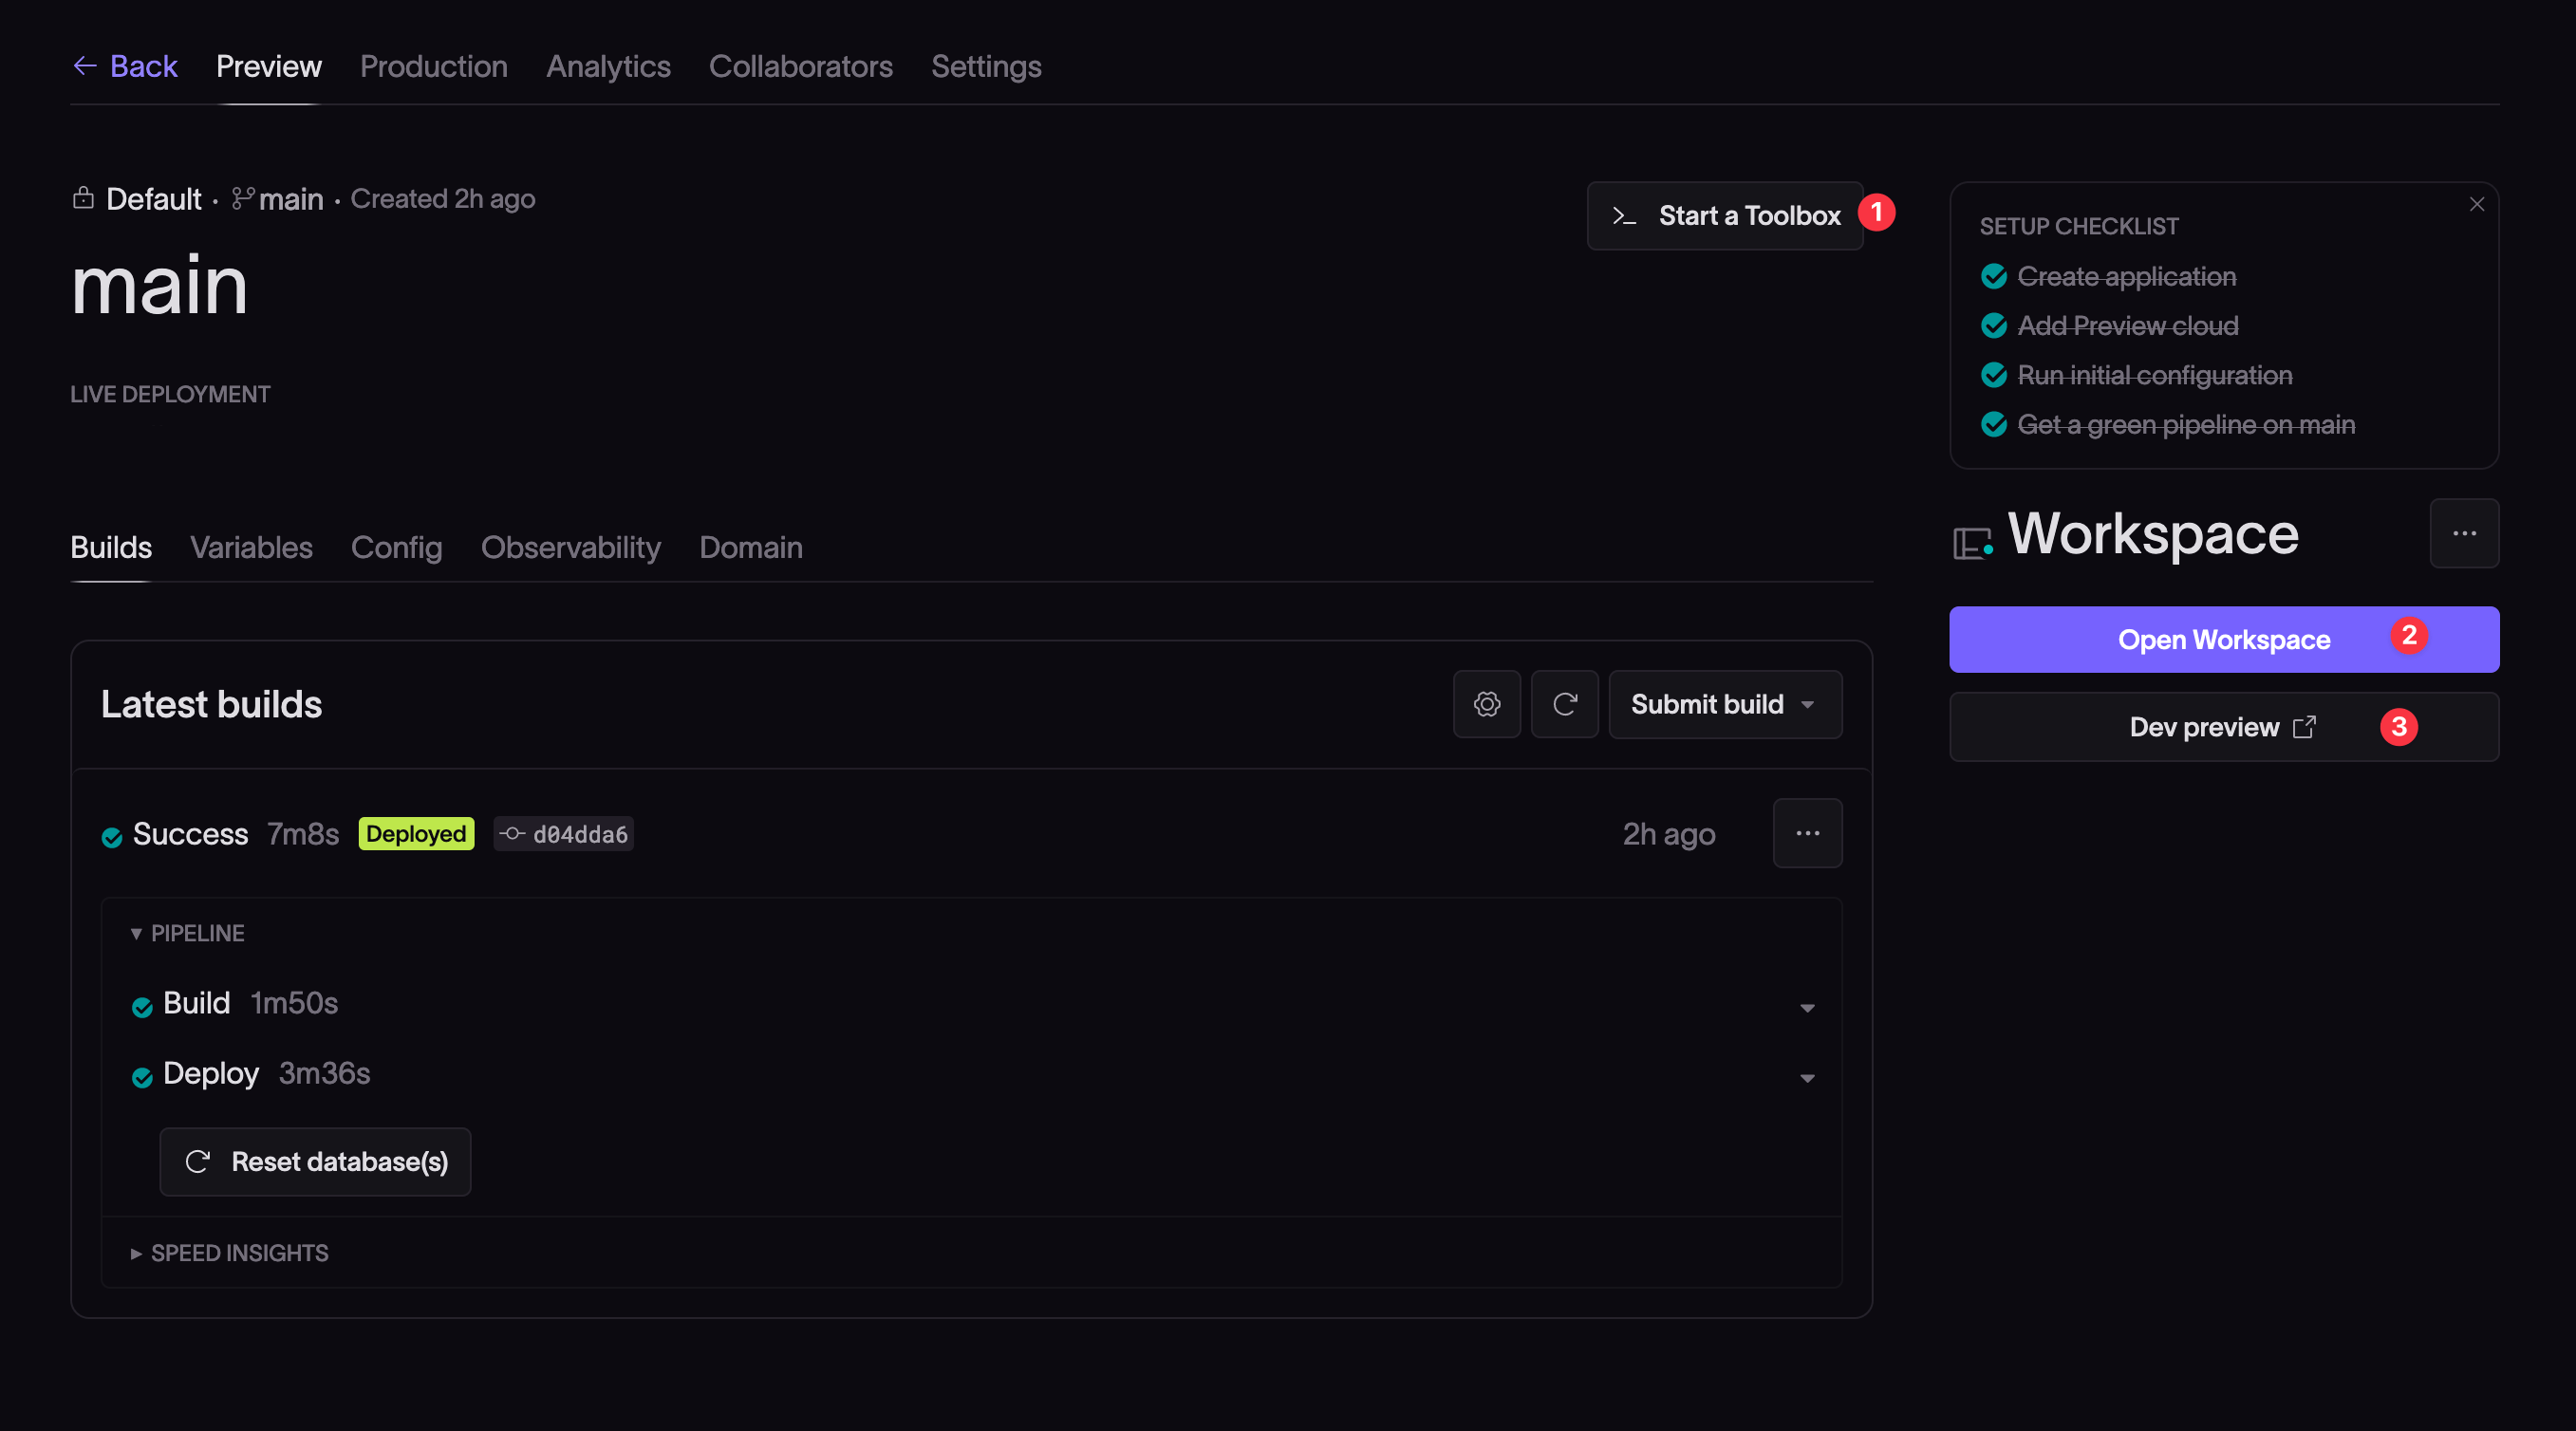
From the Builds view, you can:
- Start a Toolbox to run one-off tasks against services. See the Toolbox guide for more info.
- Select Open Workspace to create a web-based VS Code environment to access your project
- Test and preview your project by clicking the Dev preview button.
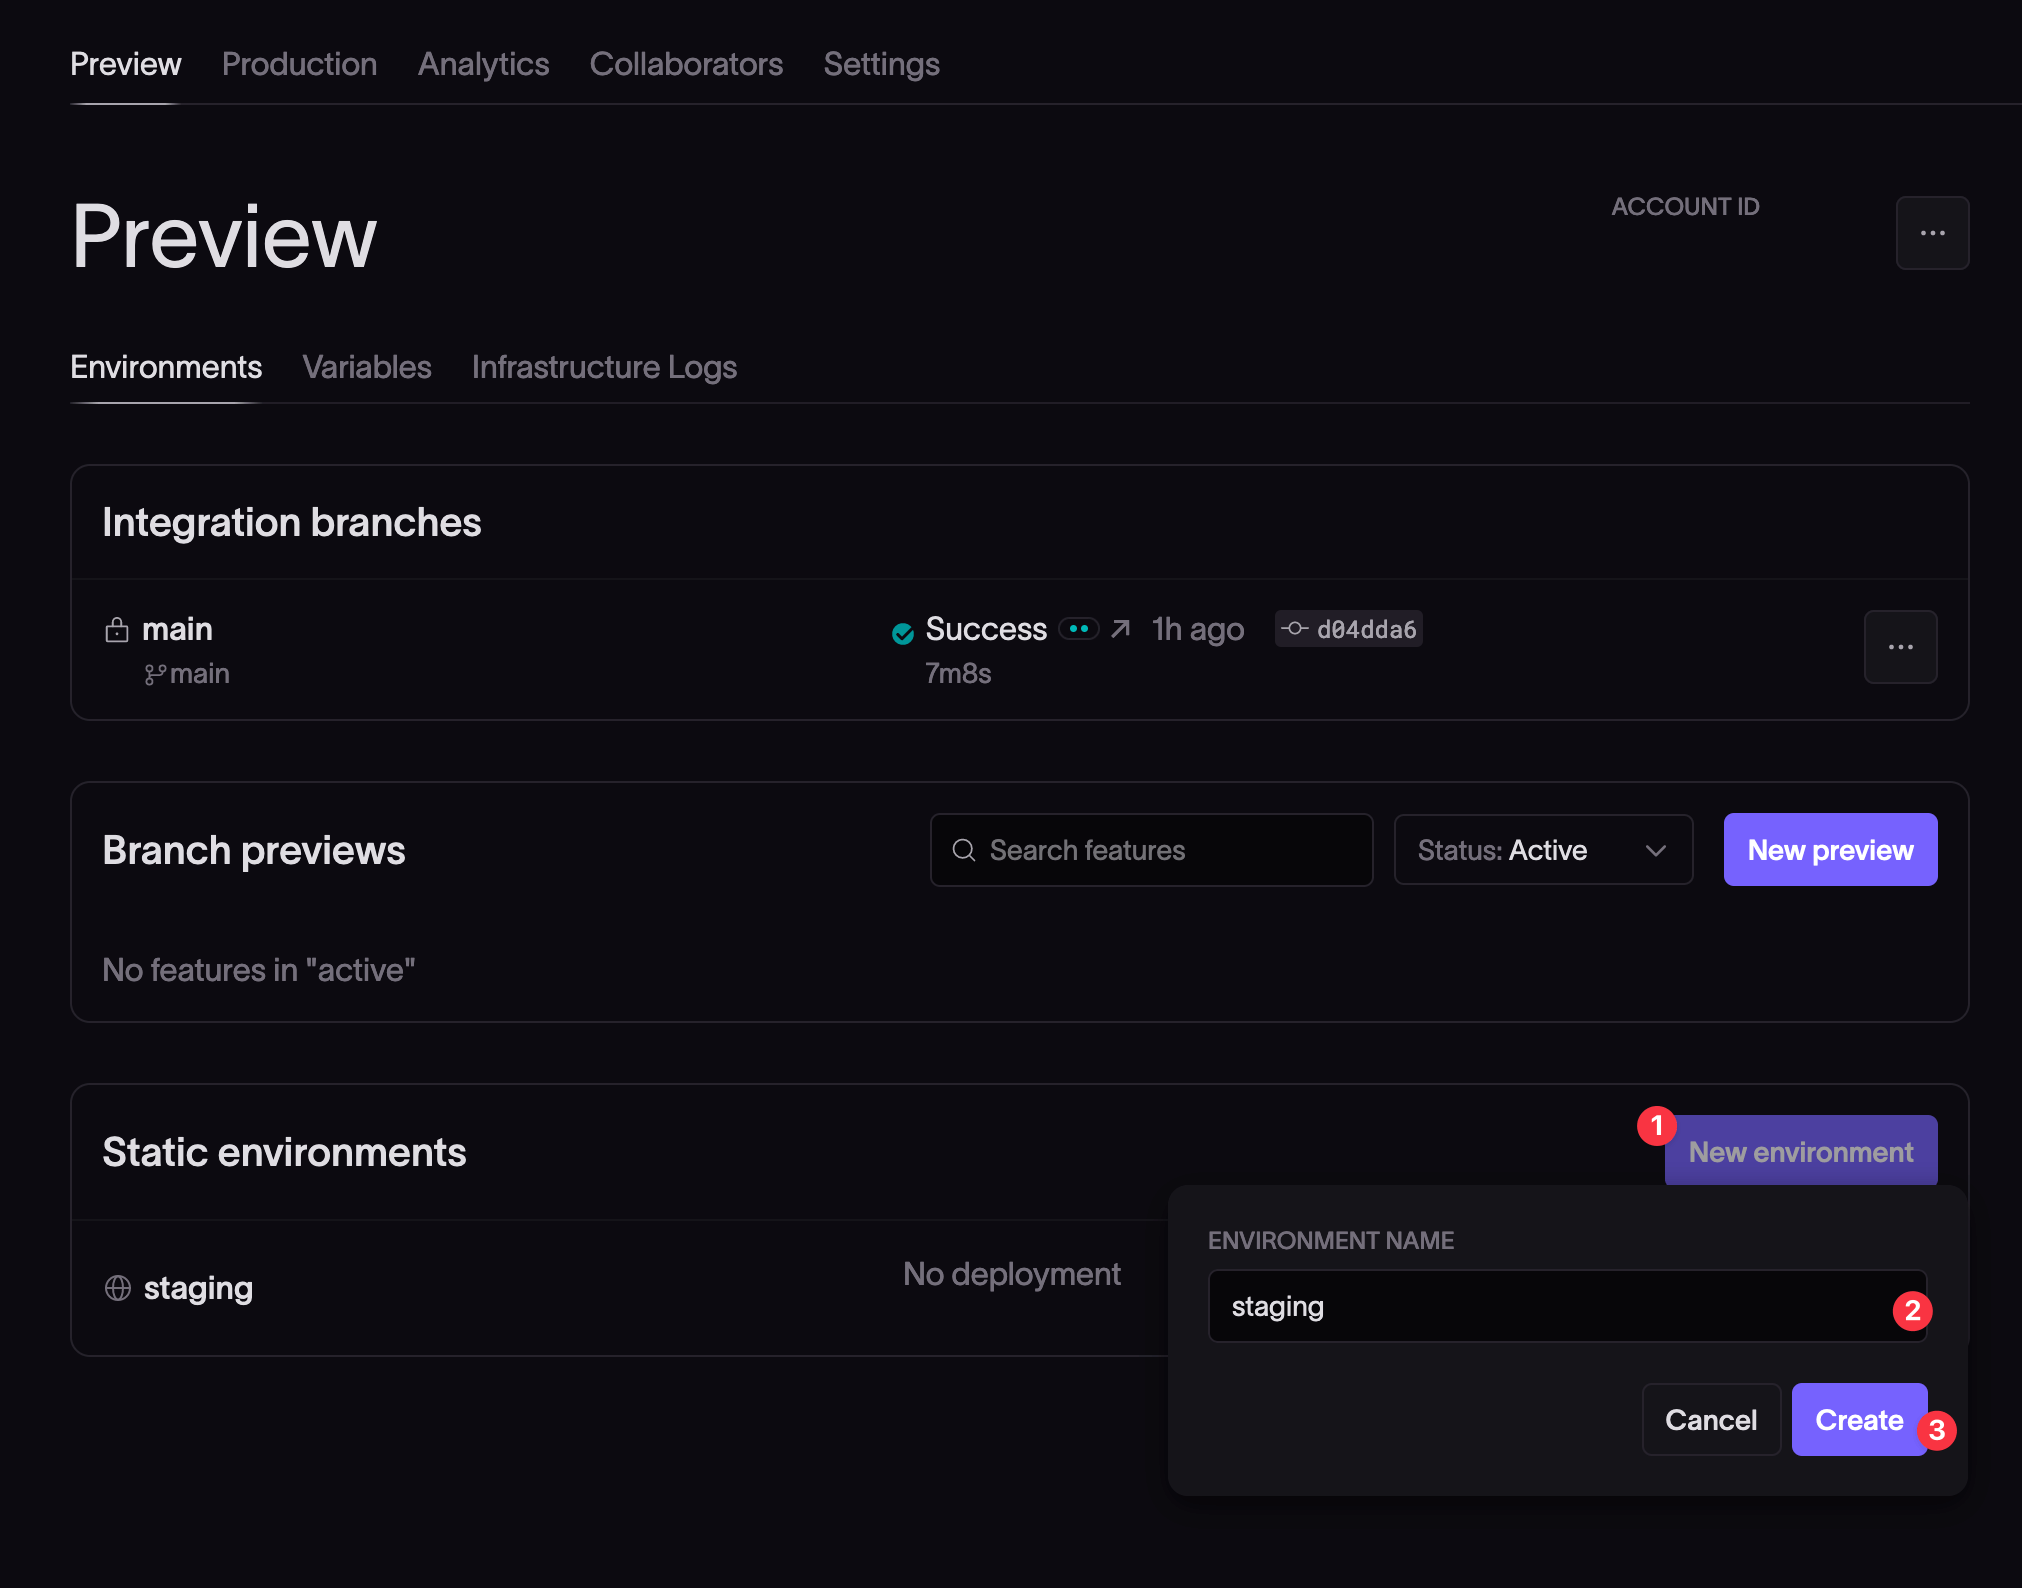
Configuring a static environment
Now you can configure a static environment, for example, a staging environment.
In the Preview tab, under Static environments, click New environment. Give the environment a name and click Create.
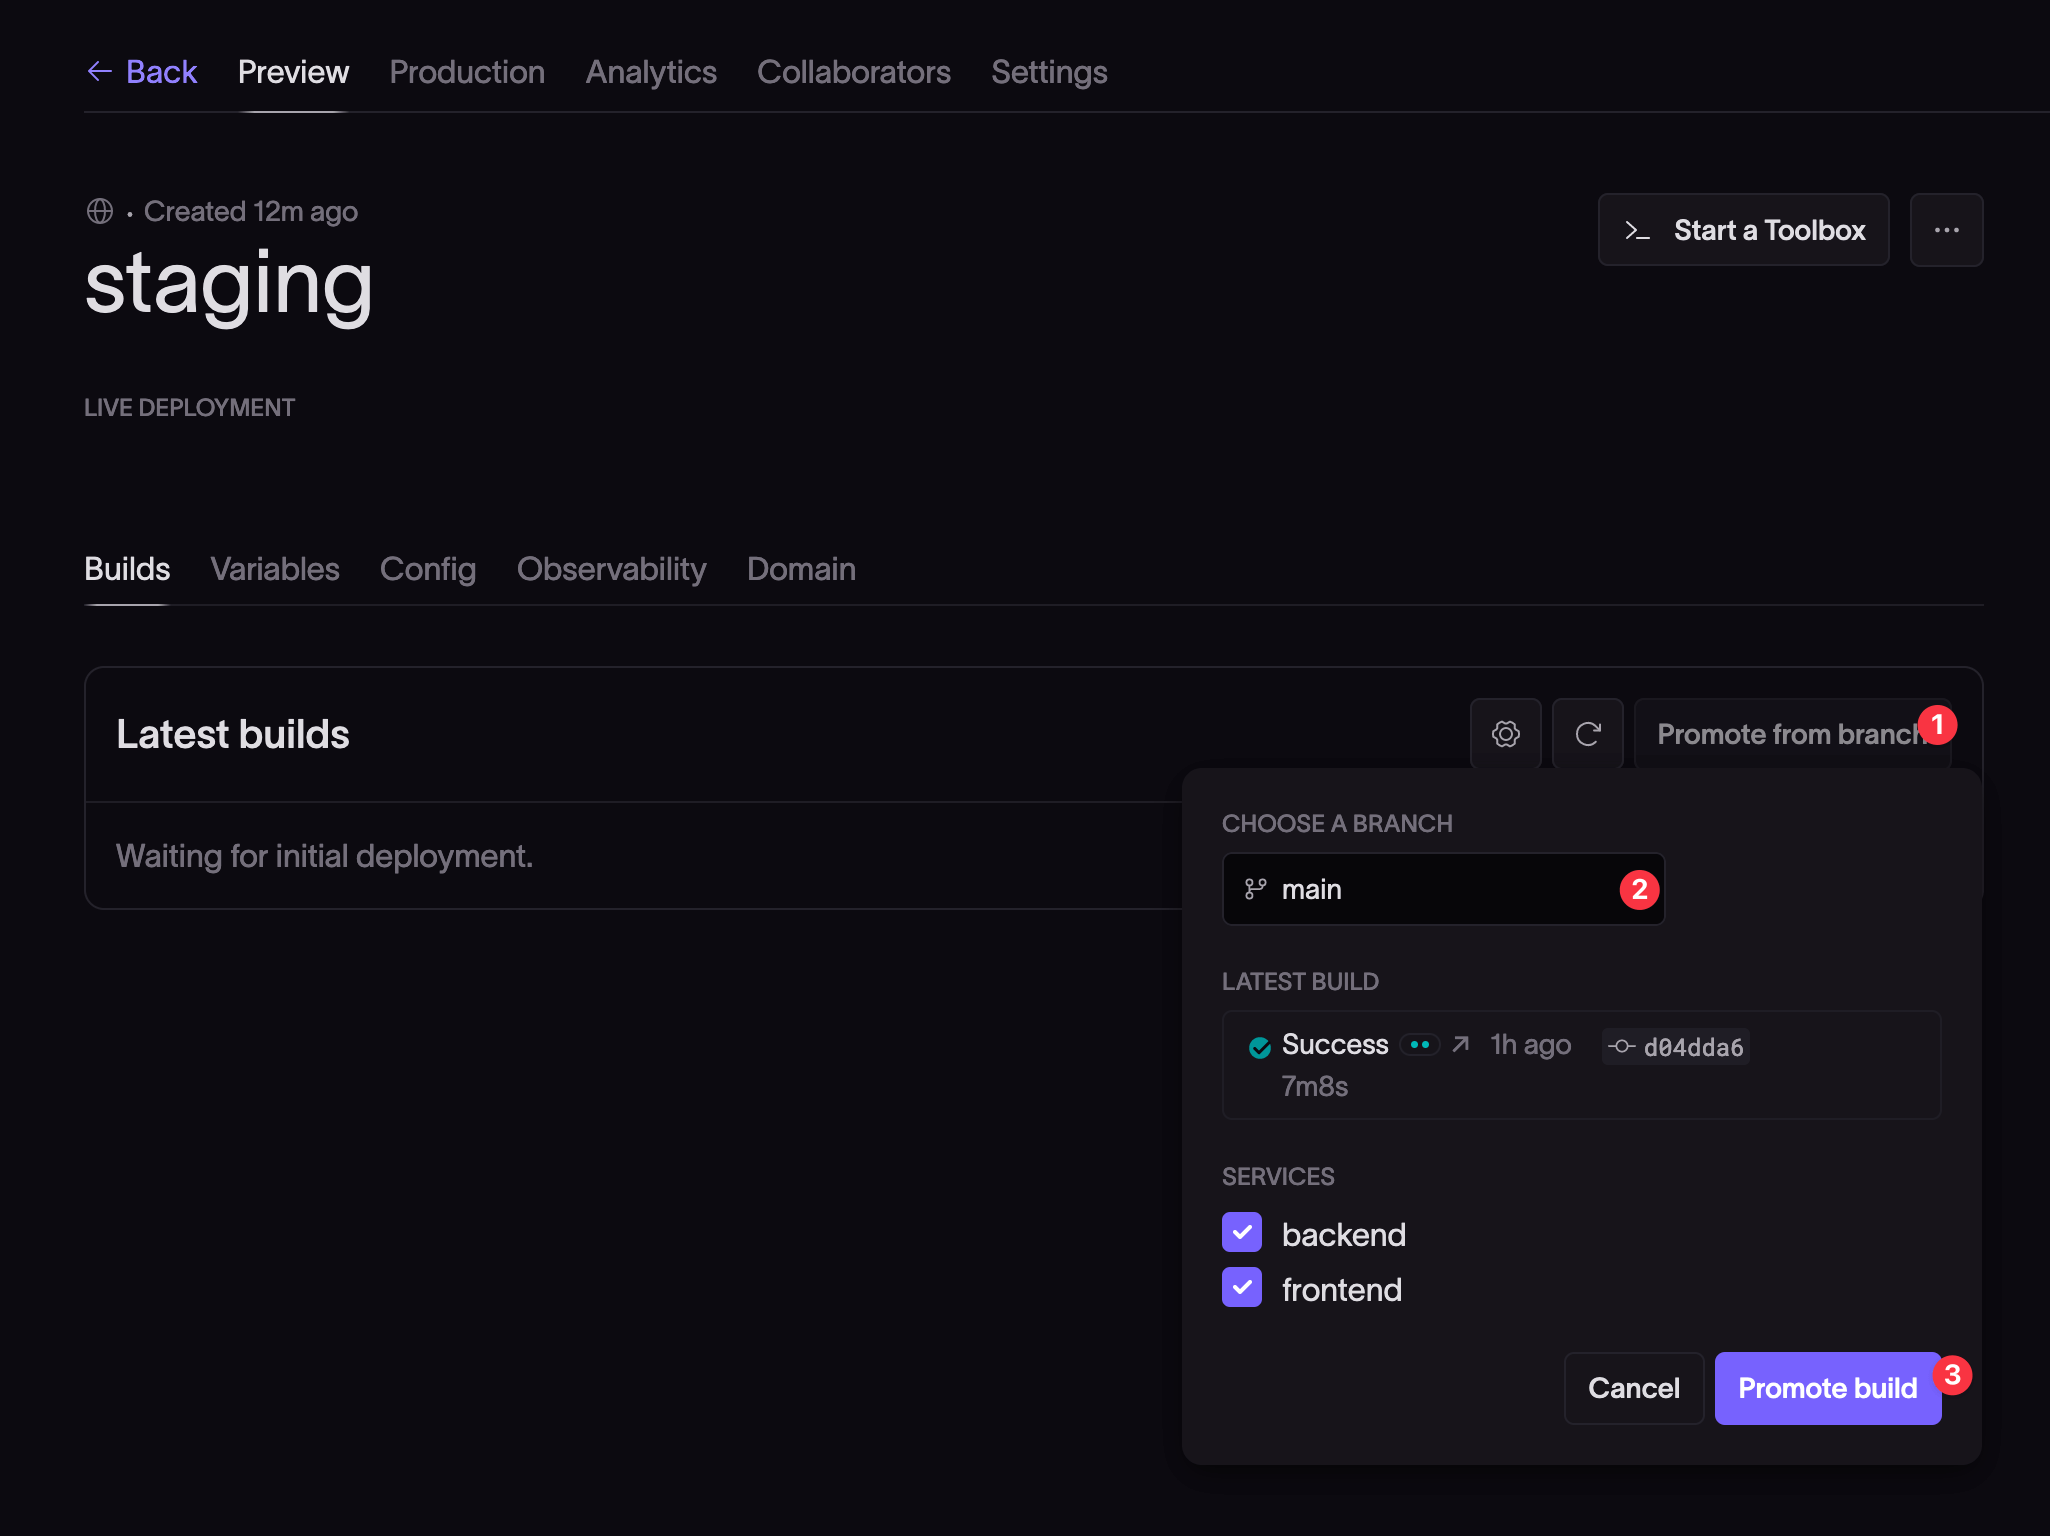
On the environment page that follows, click the Promote from branch button. Choose the branch you used for the preview build and click Promote build.
Configuring the production environment
Following a successful preview or staging build pipeline, you can set up a production environment under the Production tab.
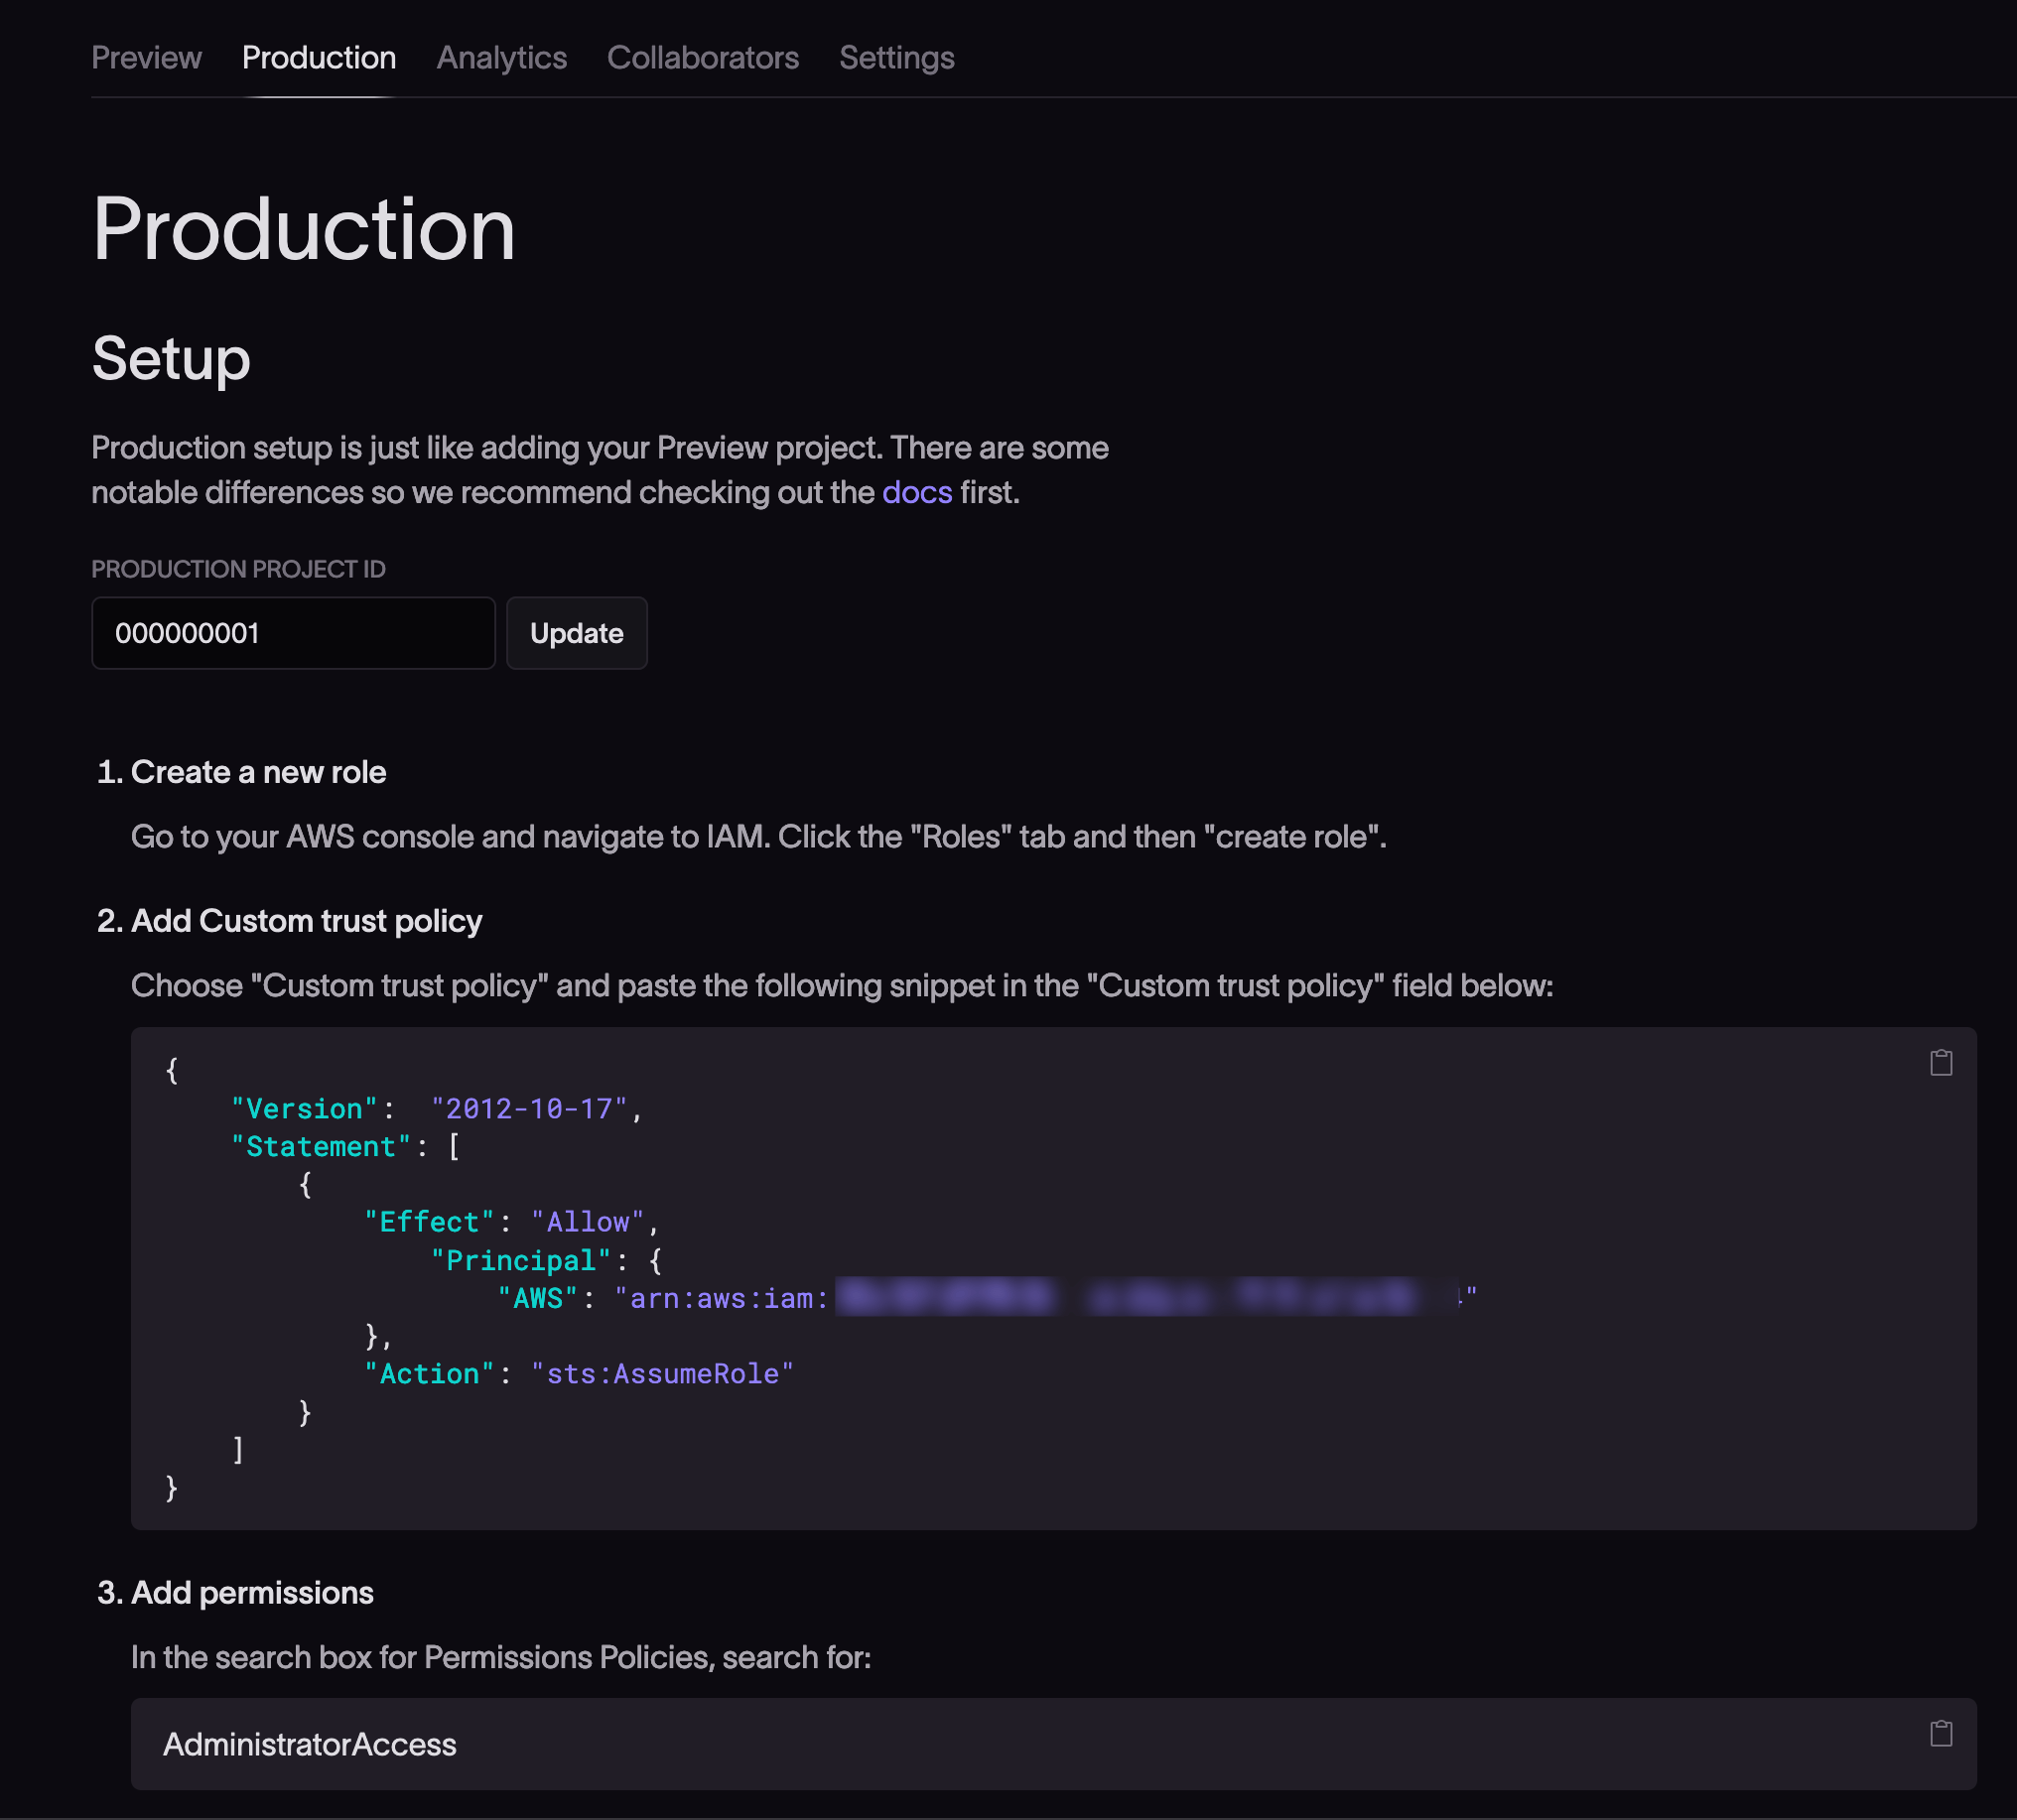
The production environment setup is similar to the Preview cloud setup, but you will need to connect to a production-dedicated AWS account.
Enter the production project ID for the project. In your production-dedicated AWS account, create a new IAM role for production by following the onscreen instructions or see our guide to connecting an app to AWS.
When you've added the custom trust policy and permissions, submit a build and deploy. Your application should now be available on the live link.