Create an application
This guide will help you create an application with Coherence.
Prerequisites
This guide assumes: - You have signed up for a Coherence account. If not, follow the guide. - You have a GitHub account with the required permissions.
Create an app on Coherence
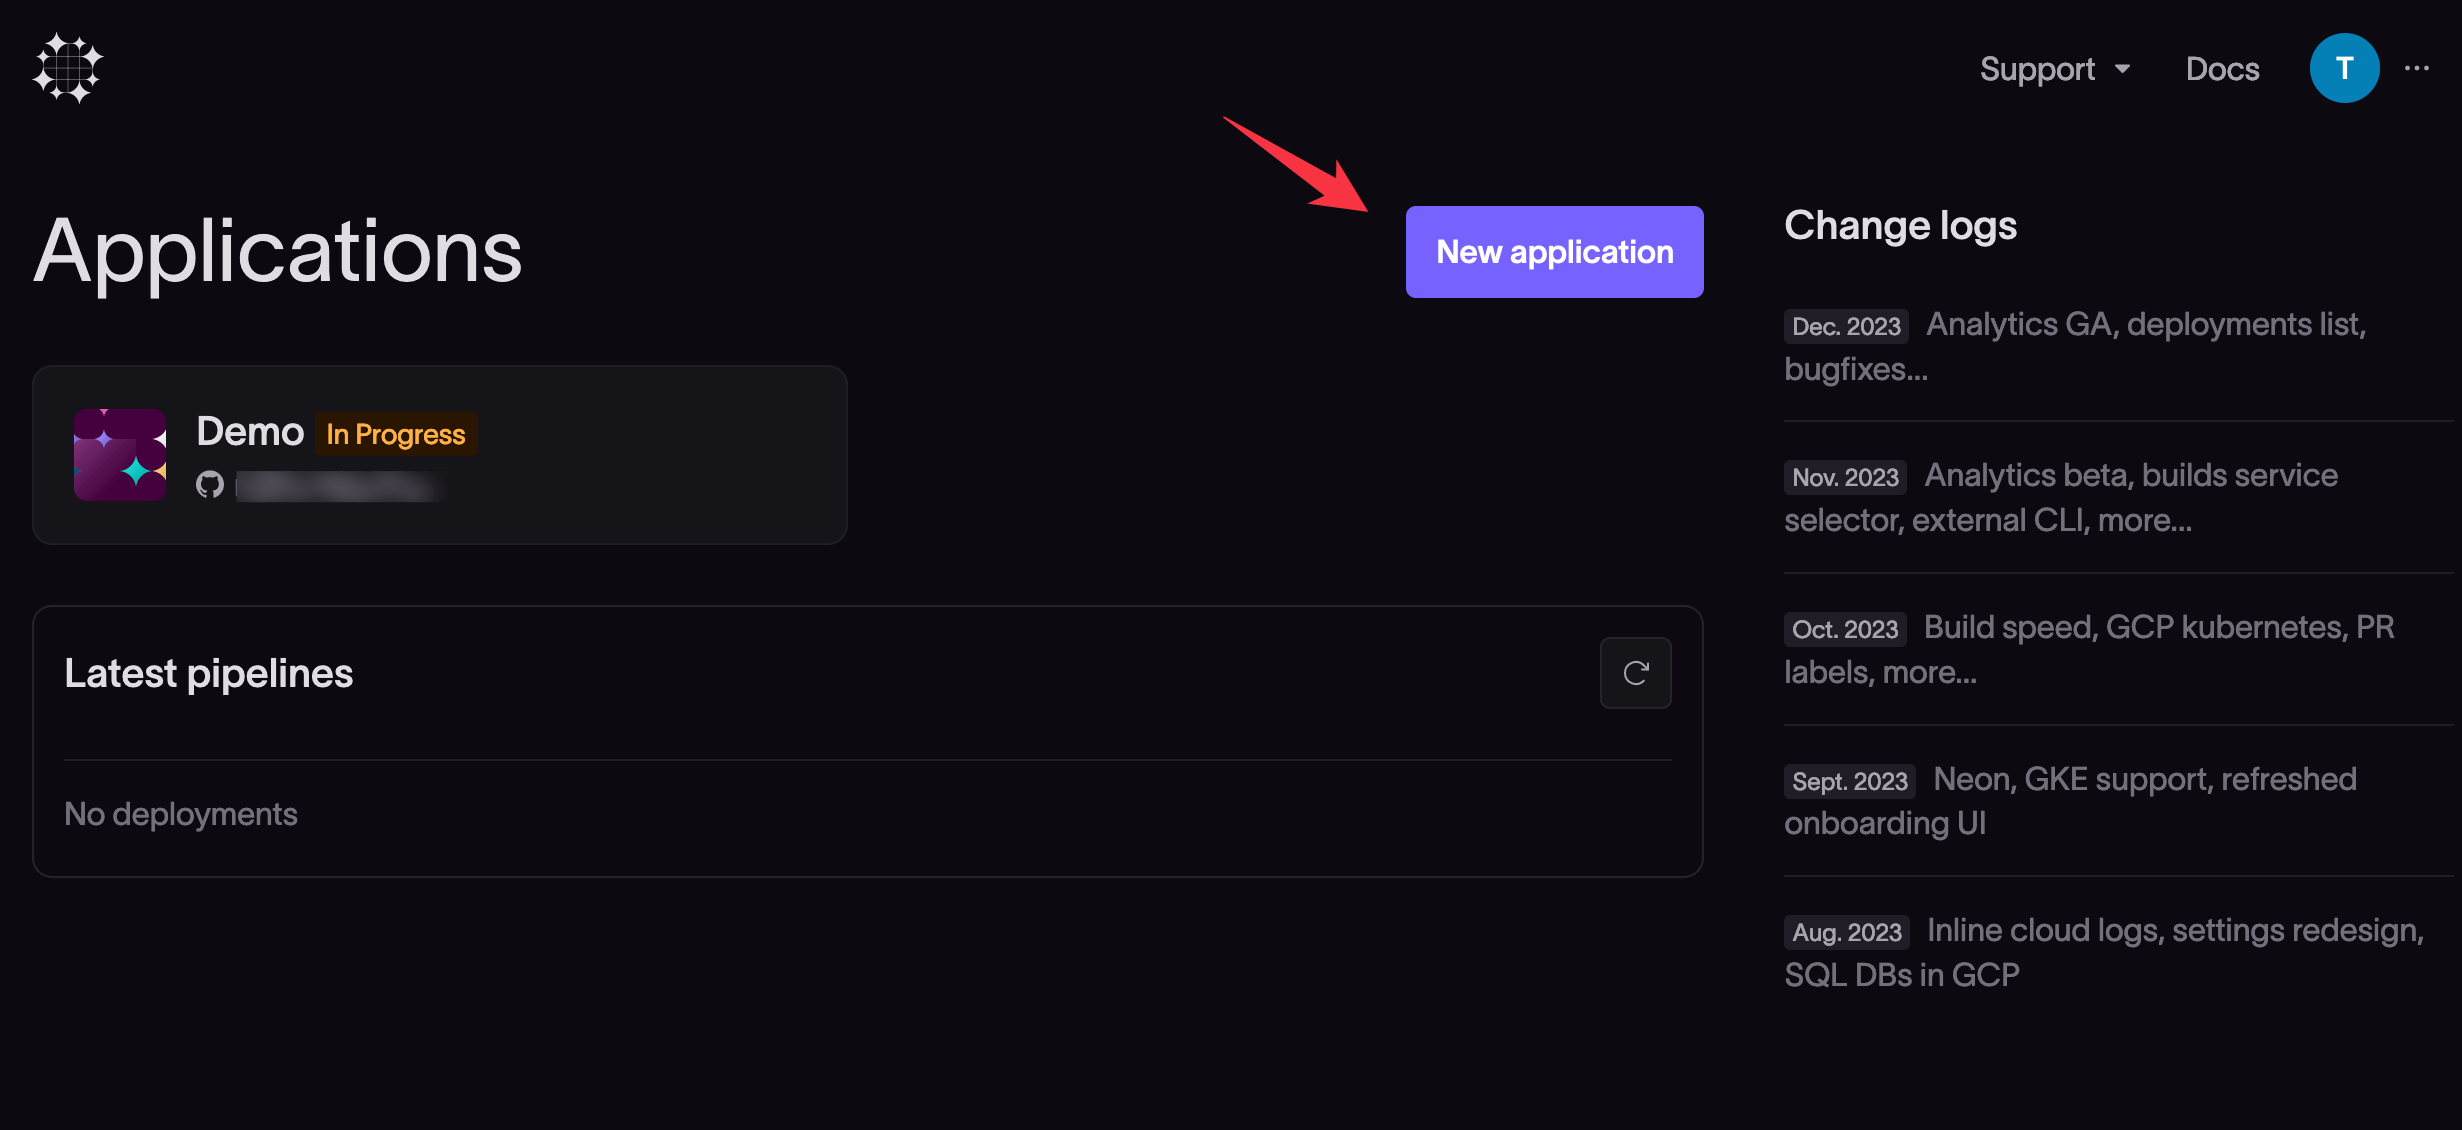
Log in to your Coherence account and select New application on the home screen.
-
- Give the application a name.
-
- Provide the URL of the GitHub repository for the app. When entering the GitHub repository URL, omit the trailing
.git.
- Provide the URL of the GitHub repository for the app. When entering the GitHub repository URL, omit the trailing
-
- Click Continue.
Install the Coherence GitHub app
The Coherence GitHub app gives Coherence repository-level privileges to trigger builds and infrastructure configuration jobs based on code pushes to your repo. You can find the app here.
When you have entered the initial details of your application, the next screen gives you options to install the Coherence GitHub app and authorize the app to perform builds on GitHub.

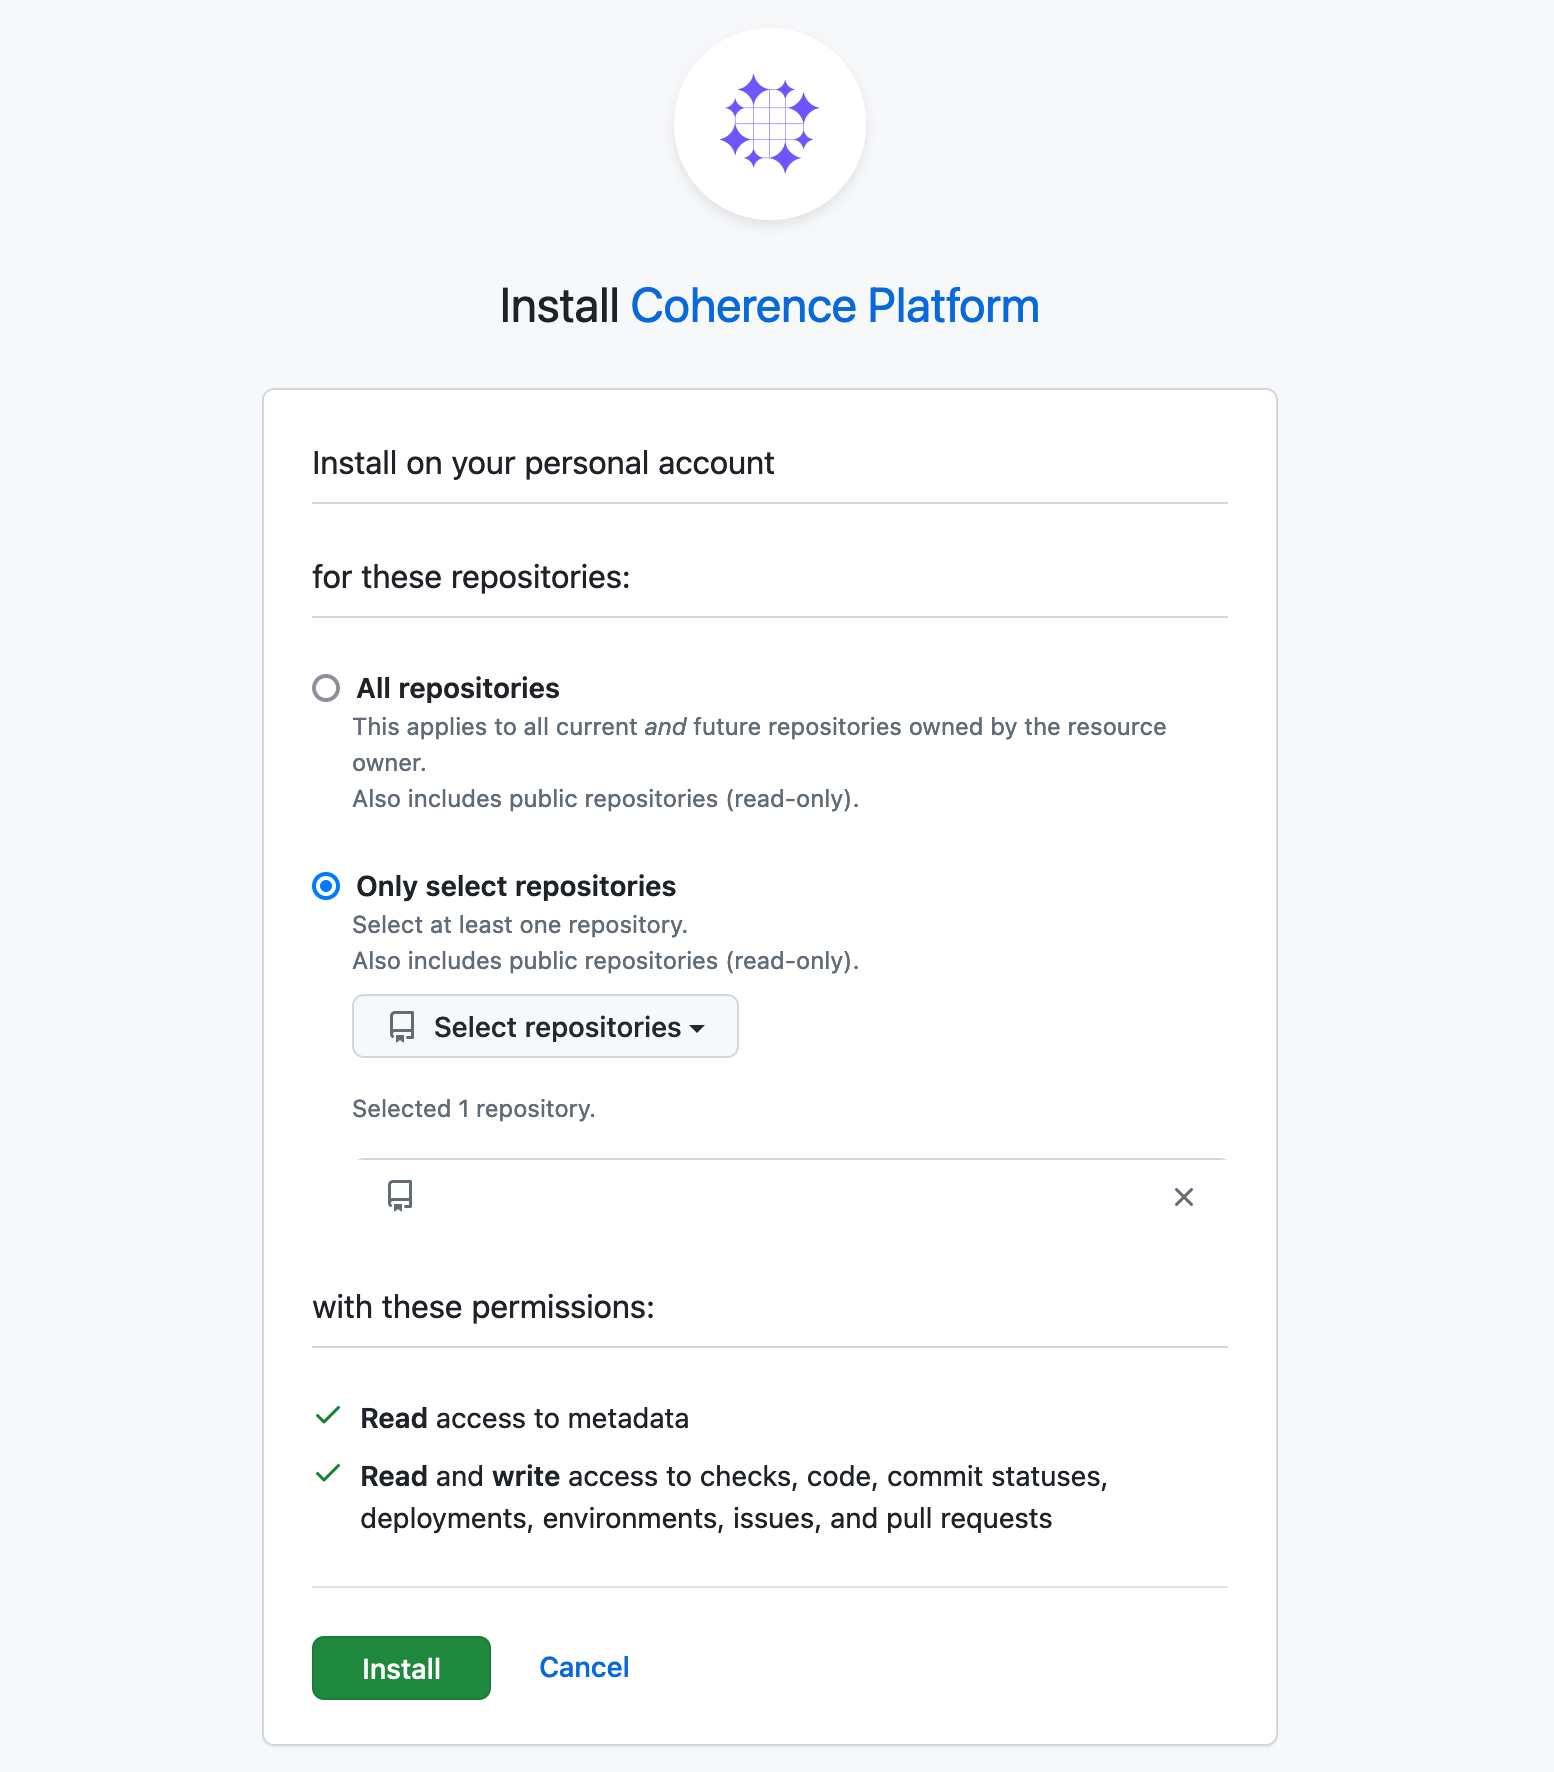
Click Install the app.
In the installation popup from GitHub, select whether to allow the installation for all repositories or only for selected repositories and click Install.
When you return to the Coherence platform, the Authorize GitHub dialog should show the Coherence GitHub app has been installed. You may need to refresh the browser for the changes to reflect. If the dialog does not show the app as installed, retry the installation steps.
Click Continue.
Configure your first environment
You'll create your first collection as the last step of account creation. The simplest way to think about a collection is that it represents a cloud account on AWS or a cloud project on GCP. A collection:
- can have many environments in it. depending on the
cncflavor you use, they can share resources like a VPC or load balancer - can share variables across environments, for example to make preview environments come up with necessary configuration or share API keys across many dev environments
- configure a collection's infrastructure on the
Provisioning Taskspage on each collection
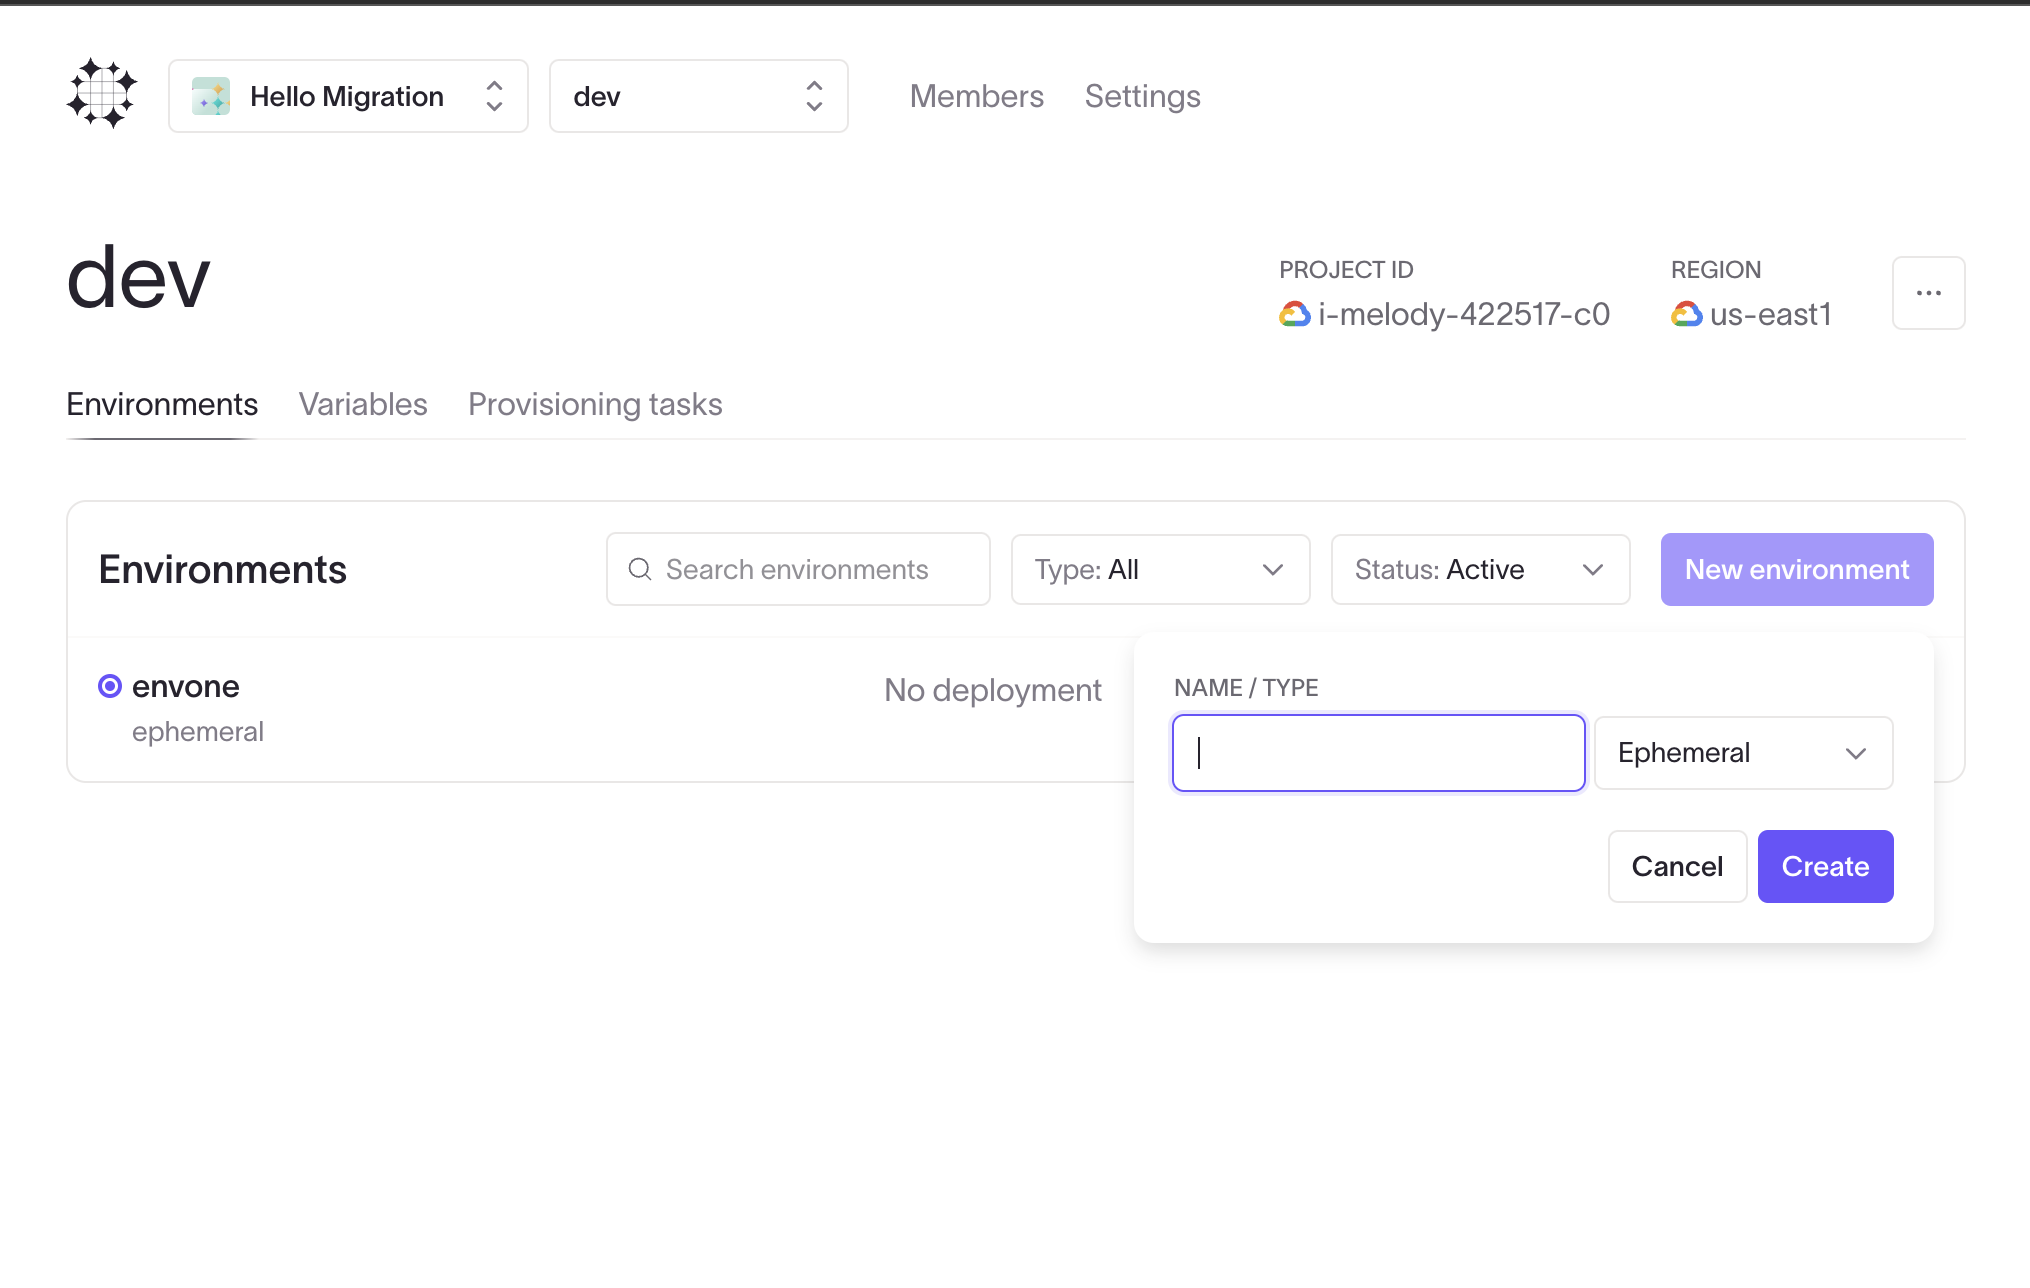
Create an environment
Add your first environment with the New Environment button on the collection homepage. Once you've got an environment set up, you can clone it's services and configuration to a new environment easily with the Clone from option here.
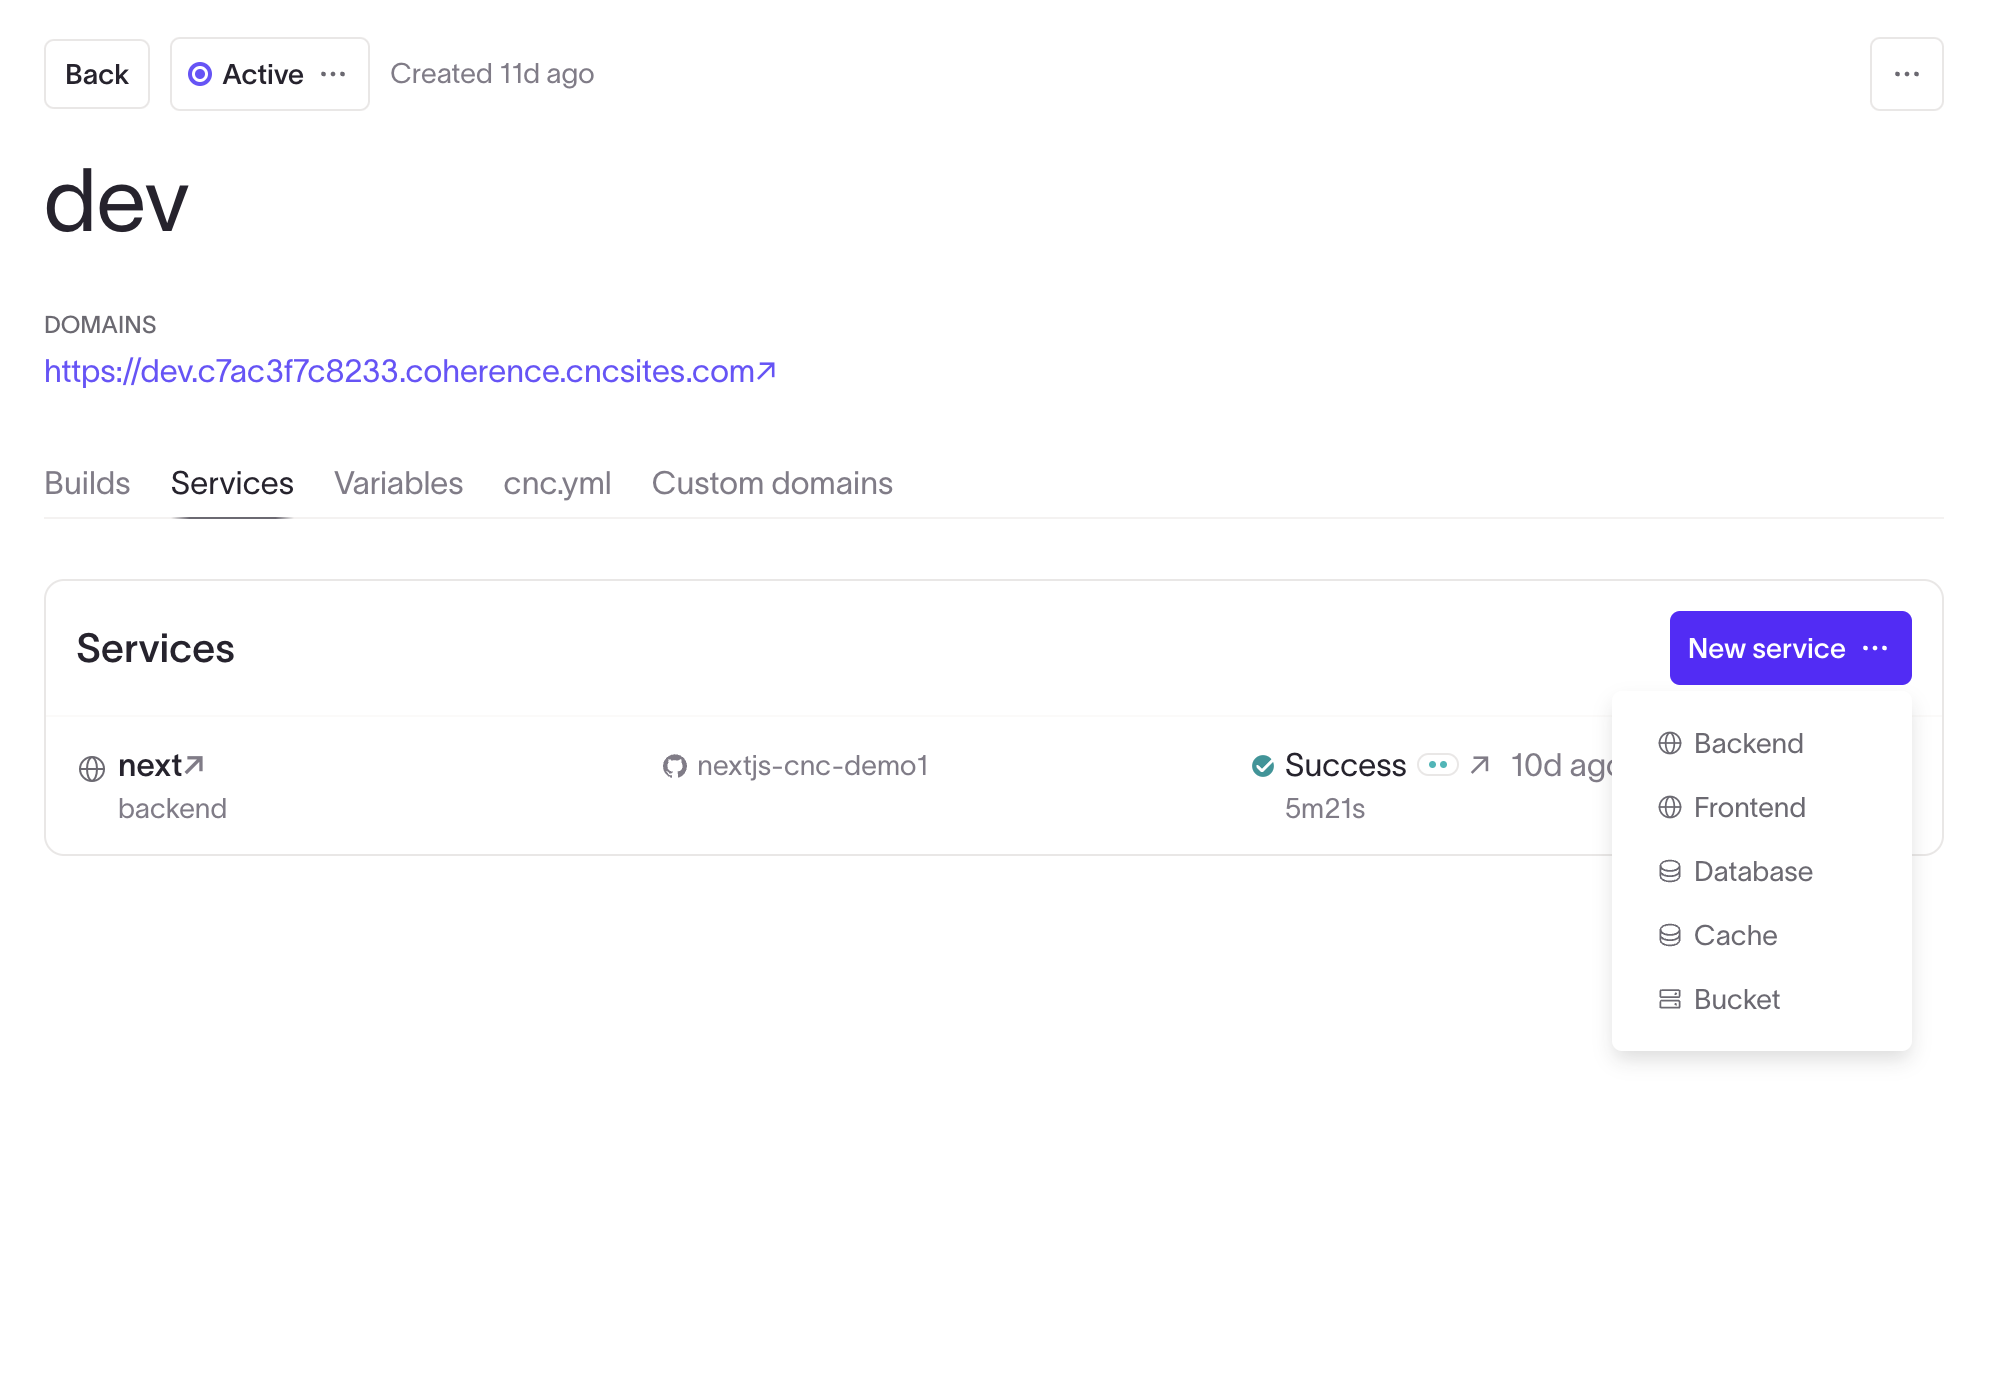
Add your services
Configure services as needed, the most common are the backend type for running a container and the frontend type for deploying a static site. "Track branch" lets you auto-deploy a pipleine when that branch is pushed. One environment can have services from many repos, and each service can track it's own branch. You can also use existing containers built outside Coherence instead of building a container as part of the pipeline. All of this can be customized with cnc. Read more here
Provision your infra
Use the Start task button on the Provisioning tasks page to run the infra configuration step. Any errors will be shown, along with info about the resources being created. You'll do this each time you add/remove an environment or service.

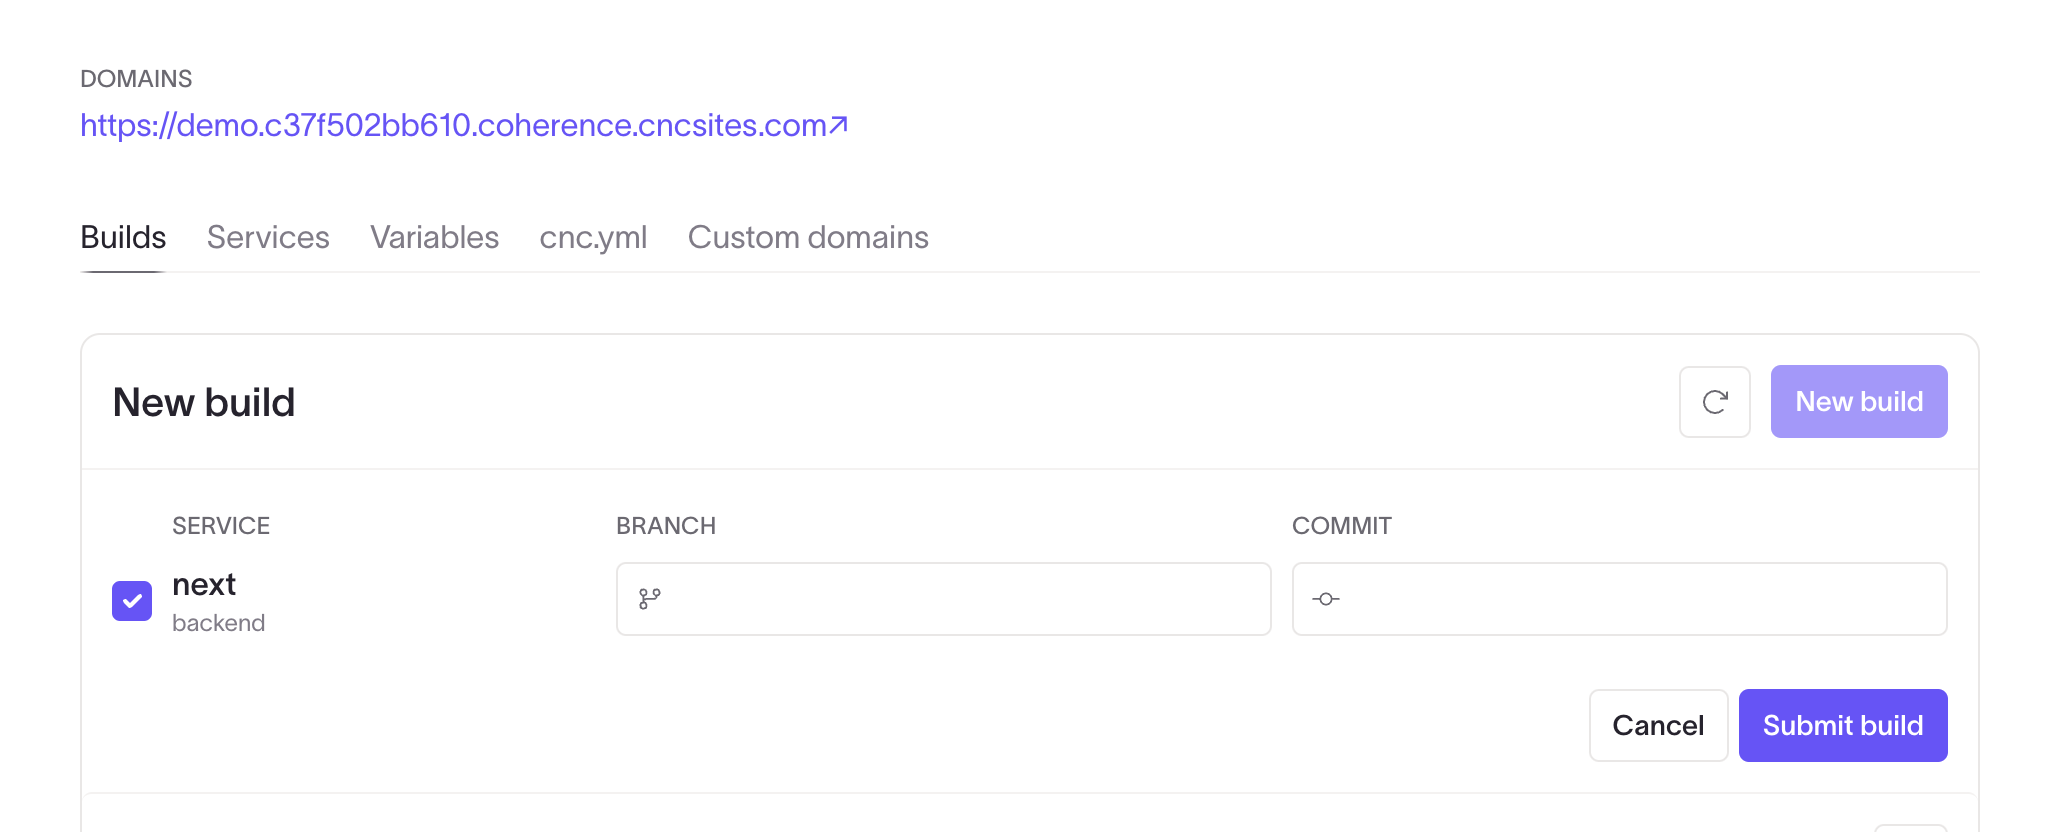
Run your first build pipeline
After the infra is provisioned, deploy your code with the New Build option on the environment Builds tab. If your service is tracking a branch, that will also trigger a pipeline. You can use the New Build option to deploy code from another branch, even if tracking a branch for automatic builds. This is also useful for a hotfix or to test code in an environment you don't auto-deploy to.