Use without GitHub
Introduction
Coherence is designed to seamlessly integrate with GitHub, offering native support through webhooks and automated environment creation and deployment processes. However, Coherence's versatility extends beyond GitHub, allowing users to leverage its powerful features with various Git hosting services or even without a Git repository altogether.
This guide will walk you through using Coherence with alternative Git providers such as Bitbucket and GitLab, as well as scenarios where you might not use Git at all. We'll cover setup, workflow, and provide specific examples for different CI/CD platforms.
Why Use Coherence with Non-GitHub Providers?
While Coherence works natively with GitHub, many organizations use alternative version control systems or have custom workflows. Coherence's flexibility allows you to:
- Maintain your existing version control setup
- Integrate Coherence into diverse CI/CD pipelines
- Utilize Coherence's powerful environment management and deployment features regardless of your source control, or without source control
- Leverage Coherence's managed container registry across various platforms or services
Setup
Before diving into specific workflows, ensure you have the following prerequisites in place:
- Docker Installation: Your Docker install must be authenticated to your managed registry. Most CI platforms provide images/steps that do this automatically.
-
Coherence CLI (cocli) Installation:
-
Install
cocliby following the instructions in the cocli GitHub repository. -
Set up authentication by creating an access token in your Coherence user profile and setting it as an environment variable:
export COHERENCE_ACCESS_TOKEN="your-access-token-here"- Coherence Service Configuration:
-
Set up your services using the "Other" container source mode in the Coherence UI.
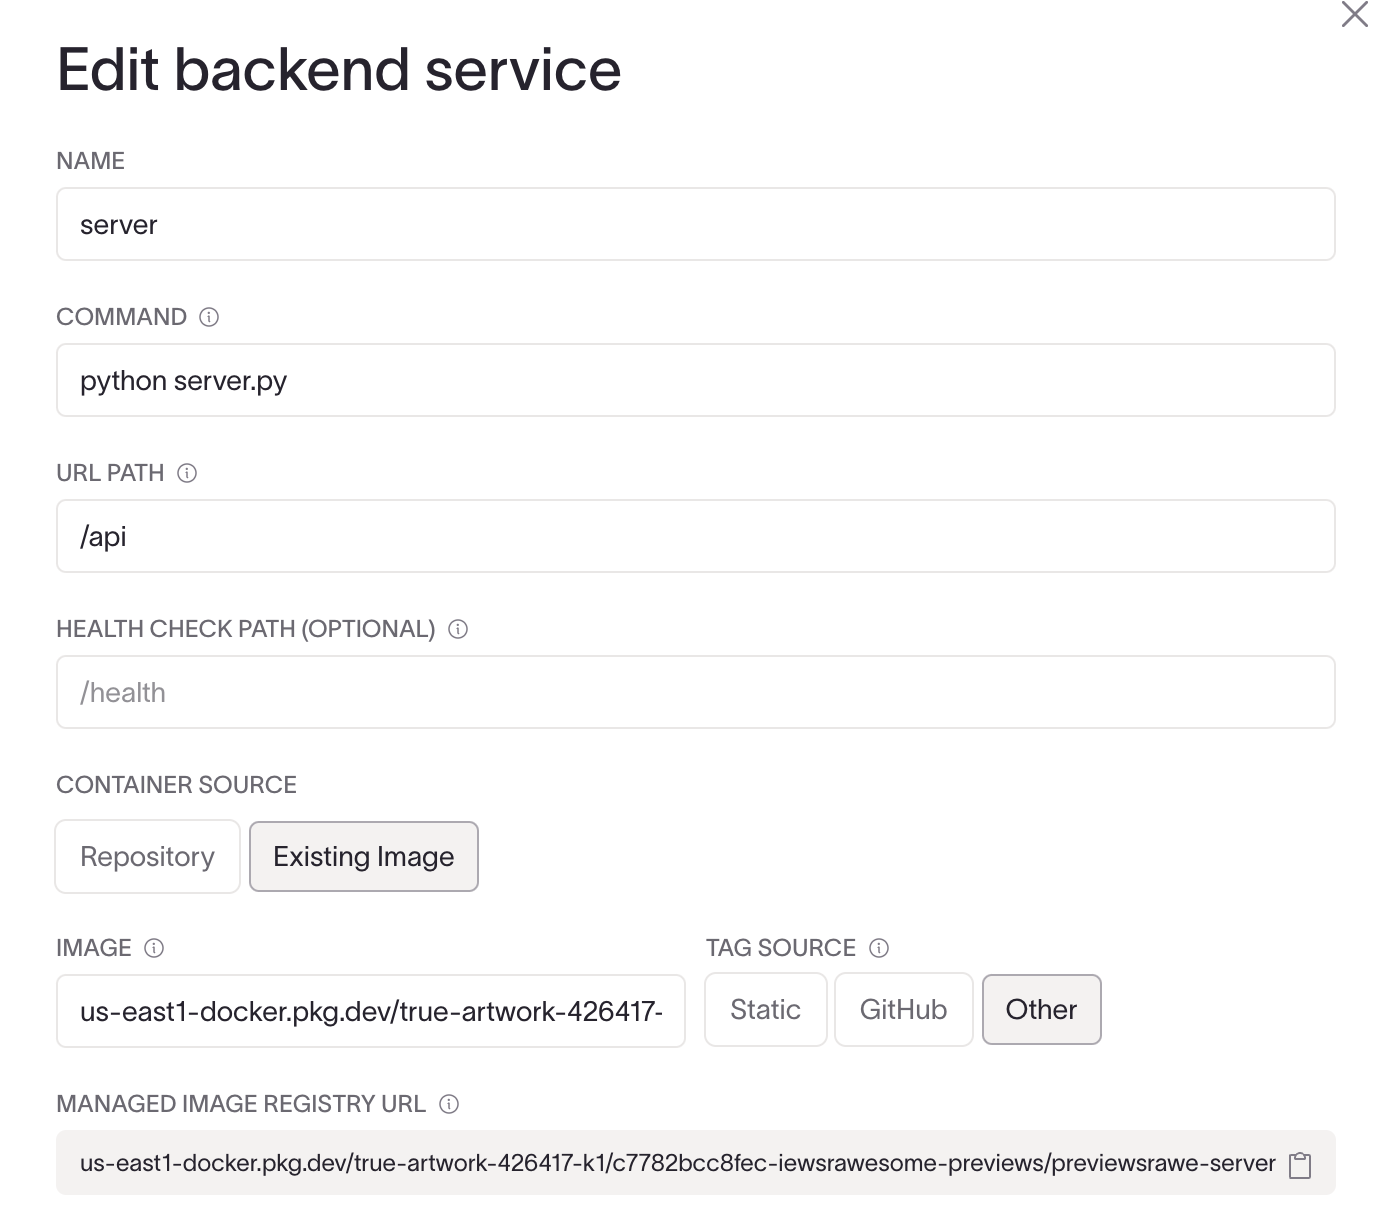
- Use the Coherence-managed image registry URL in the "Image" field for your service configuration.
General Workflow
The general workflow for using Coherence with non-GitHub providers involves these steps:
- Create an environment using
cocli - Build and push a Docker image using
cnc - Deploy the image tag to your infrastructure using
cocli - Archive the environment when it's no longer needed using
cocli
Let's break down each step below. For general cocli docs read more here: docs. Notable/useful commands for the below:
- Get your application ID:
cocli apps list | jq '.data[] | select(.name == "APP_NAME")' - Get your collection ID:
cocli collections list --app_id APPID | jq '.data[] | select(.name == "COLLECTION_NAME")' - Get your environment ID:
cocli collections list --app_id APPID | jq '.data[] | select(.name == "COLLECTION_NAME") | .latest_infra_config.valid_environments[] | select(.name == "ENVIRONMENT_NAME") | .id
1. Create an Environment
Use the following cocli command to create a new environment:
cocli environments create --name <environment_name> --collection_id <collection_id> [--type <deployment_type>] [--clone_environment_id <id>] [--clone_services_from_environment_id <id>] [--clone_service_infos name1=branch1,name2=branch2]
2. Build and Push Docker Image
Get your managed registry URL from the edit service form after you've run the provision task at least once.
Build and push the image to this registry for each environment. You can add additional docker tags to an existing build process.
export MANAGED_REPO_URL="YOUR_REGISTRY_HERE"
export IMAGE_TAG="YOUR_SHA_OR_TAG"
docker build -t $MANAGED_REPO_URL:$IMAGE_TAG .
docker push $MANAGED_REPO_URL:$IMAGE_TAG
To authenticate to the managed repo, see the docs for your cloud provider.
- AWS: ECR Authentication
- GCP: Artifact Registry Auth
3. Deploy to the Environment
Deploy your new image to the environment:
cocli environments deploy $ENV_ID '{
  "services": [
    {
      "name": "SERVICE_NAME",
      "commit_sha": "IMAGE_TAG"
    }
  ],
  "configure_infra": false
}'
4. Archive the Environment
When you're done with the environment, archive it:
cocli environments edit $ENV_ID --status archived
CI/CD Integration Examples
Now, let's look at how to integrate this workflow into popular CI/CD platforms.
GitLab CI/CD Example
For GitLab, you'll need to add the COHERENCE_ACCESS_TOKEN as a CI/CD variable in your project or group settings. Then, update the .gitlab-ci.yml file as follows:
stages:
  - build
  - deploy

variables:
  APP_NAME: "Your App Name"
  COLLECTION_NAME: "production"
  ENV_NAME: "main"
  SERVICE_NAME: "your-service-name"

build:
  stage: build
  image: docker:latest
  services:
    - docker:dind
  before_script:
    - apk add --no-cache curl jq
    - curl -L https://github.com/coherenceplatform/cocli/releases/latest/download/cocli-linux-amd64 -o /usr/local/bin/cocli
    - chmod +x /usr/local/bin/cocli
  script:
    - export COHERENCE_ACCESS_TOKEN=$COHERENCE_ACCESS_TOKEN  # Use the CI/CD variable
    - export MANAGED_REPO_URL="YOUR_REGISTRY_HERE"
    - export IMAGE_TAG="$CI_COMMIT_SHA"
    - docker build -t $MANAGED_REPO_URL:$IMAGE_TAG .
    - docker push $MANAGED_REPO_URL:$IMAGE_TAG

deploy:
  stage: deploy
  image: alpine:latest
  before_script:
    - apk add --no-cache curl jq
    - curl -L https://github.com/coherenceplatform/cocli/releases/latest/download/cocli-linux-amd64 -o /usr/local/bin/cocli
    - chmod +x /usr/local/bin/cocli
  script:
    - export COHERENCE_ACCESS_TOKEN=$COHERENCE_ACCESS_TOKEN  # Use the CI/CD variable
    - APP_ID=$(cocli apps list | jq -r '.[] | select(.title=="$APP_NAME") | .id')
    - COLLECTION_ID=$(cocli collections list -a $APP_ID | jq -r '.data[] | select(.name=="$COLLECTION_NAME") | .id')
    - ENV_ID=$(cocli environments list -c $COLLECTION_ID | jq -r '.data[] | select(.name=="$ENV_NAME") | .id')
    - cocli environments deploy $ENV_ID '{
        "services": [
          {
            "name": "$SERVICE_NAME",
            "commit_sha": "$CI_COMMIT_SHA"
          }
        ],
        "configure_infra": false
      }'
To add the COHERENCE_ACCESS_TOKEN as a CI/CD variable in GitLab:
1. Go to your project's Settings > CI/CD > Variables
2. Add a new variable with the key COHERENCE_ACCESS_TOKEN and the value being your Coherence access token
3. Make sure to mask this variable and only allow it in protected branches if necessary
Bitbucket Pipelines Example
For Bitbucket, you'll need to add the COHERENCE_ACCESS_TOKEN as a repository variable. Then, update the bitbucket-pipelines.yml file as follows:
image: atlassian/default-image:3

pipelines:
  default:
    - variables:
      APP_NAME: "Your App Name"
      COLLECTION_NAME: "production"
      ENV_NAME: "main"
      SERVICE_NAME: "your-service-name"
    - step:
        name: Build and Push
        services:
          - docker
        script:
          - curl -L https://github.com/coherenceplatform/cocli/releases/latest/download/cocli-linux-amd64 -o /usr/local/bin/cocli
          - chmod +x /usr/local/bin/cocli
          - export COHERENCE_ACCESS_TOKEN=$COHERENCE_ACCESS_TOKEN  # Use the repository variable
          - export MANAGED_REPO_URL="YOUR_REGISTRY_HERE"
          - export IMAGE_TAG="$BITBUCKET_COMMIT"
          - docker build -t $MANAGED_REPO_URL:$IMAGE_TAG .
          - docker push $MANAGED_REPO_URL:$IMAGE_TAG
    - step:
        name: Deploy
        script:
          - curl -L https://github.com/coherenceplatform/cocli/releases/latest/download/cocli-linux-amd64 -o /usr/local/bin/cocli
          - chmod +x /usr/local/bin/cocli
          - export COHERENCE_ACCESS_TOKEN=$COHERENCE_ACCESS_TOKEN  # Use the repository variable
          - APP_ID=$(cocli apps list | jq -r '.[] | select(.title=="$APP_NAME") | .id')
          - COLLECTION_ID=$(cocli collections list -a $APP_ID | jq -r '.data[] | select(.name=="$COLLECTION_NAME") | .id')
          - ENV_ID=$(cocli environments list -c $COLLECTION_ID | jq -r '.data[] | select(.name=="$ENV_NAME") | .id')
          - cocli environments deploy $ENV_ID '{
              "services": [
                {
                  "name": "$SERVICE_NAME",
                  "commit_sha": "$BITBUCKET_COMMIT"
                }
              ],
              "configure_infra": false
            }'
To add the COHERENCE_ACCESS_TOKEN as a repository variable in Bitbucket:
1. Go to your repository's Settings > Repository variables
2. Add a new variable with the name COHERENCE_ACCESS_TOKEN and the value being your Coherence access token
3. Make sure to mark this variable as secured to keep it hidden in logs
By adding these details, we ensure that the Coherence access token is securely handled in both GitLab and Bitbucket CI/CD configurations. This approach keeps the token out of the repository itself and allows for secure usage in the pipelines.
Conclusion
By leveraging Coherence's CLI and flexible deployment options, you can integrate Coherence into your existing workflows regardless of your Git provider or CI/CD platform. This approach allows you to benefit from Coherence's powerful environment management and deployment features while maintaining your preferred development tools and processes.
Remember to secure your Coherence access token and other sensitive information by using your CI/CD platform's secrets management features. Always refer to the latest Coherence documentation and cocli help commands for the most up-to-date information on available options and best practices.