AWS Connection
This guide demonstrates how to connect a Coherence app to Amazon Web Services (AWS).
Prerequisites
This guide assumes:
- You have a Coherence account. Sign up here to get started if you don't have an account yet and want to follow along.
- You have an app on the Coherence platform, the Coherence GitHub app is installed in the app repository, and the Coherence GitHub app is authorized to access the repository. Follow our guide to creating an app on Coherence if you still need to complete these steps.
Set up your cloud provider
In the Coherence console, click on the application you wish to connect to your cloud provider.

Click the Add Preview cloud button and complete the pop-up form. Note that all the fields are required.
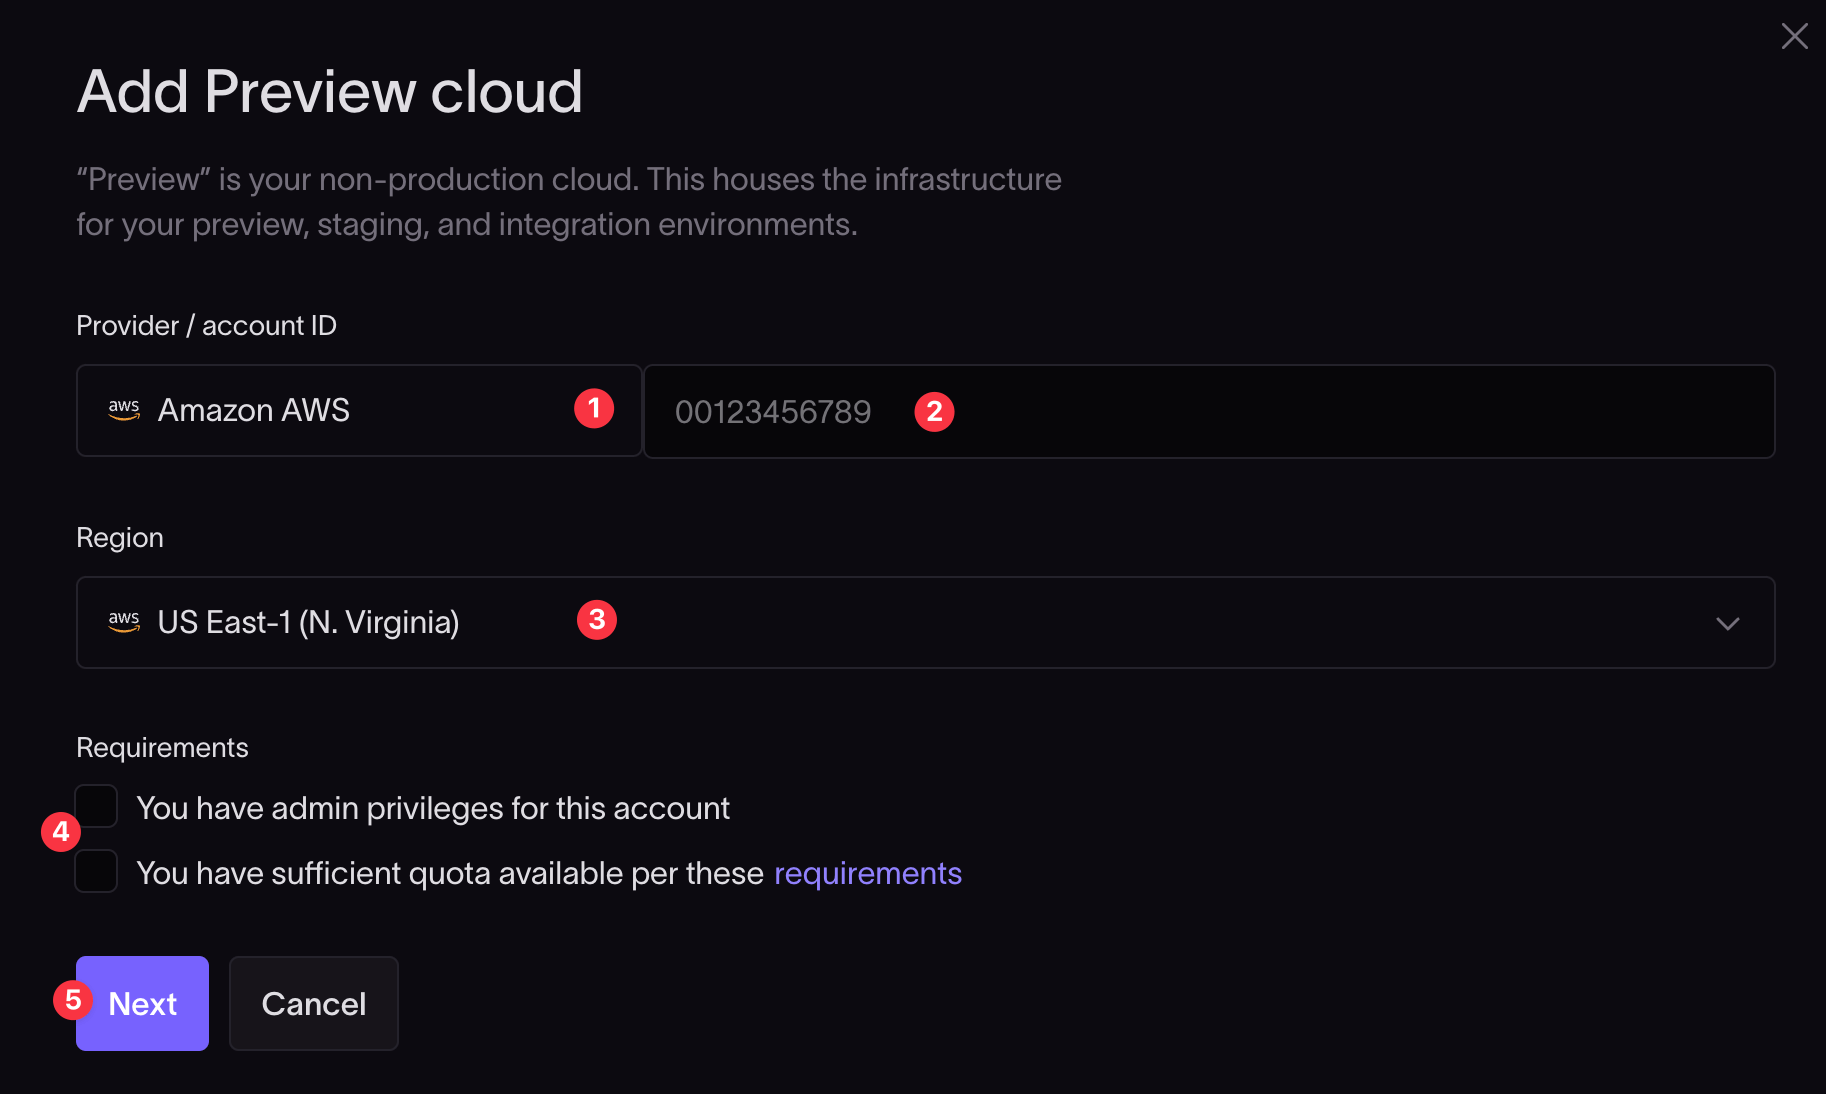
- Select Amazon AWS from the dropdown list of providers.
- Enter your AWS account ID. You can find this on your AWS console by clicking on the dropdown menu behind your username, on the top right-hand side of the AWS console.

- Select the AWS region where you want to host your infrastructure.
Please take note of the requirements and check the checkboxes:
- You must have admin privileges on the AWS account.
- Sufficient quotas must be available. If unsure, follow the on-screen requirements link to find out more.
Click the Next button to continue.
The Add Preview cloud IAM role dialog will open.

Create a new role in AWS
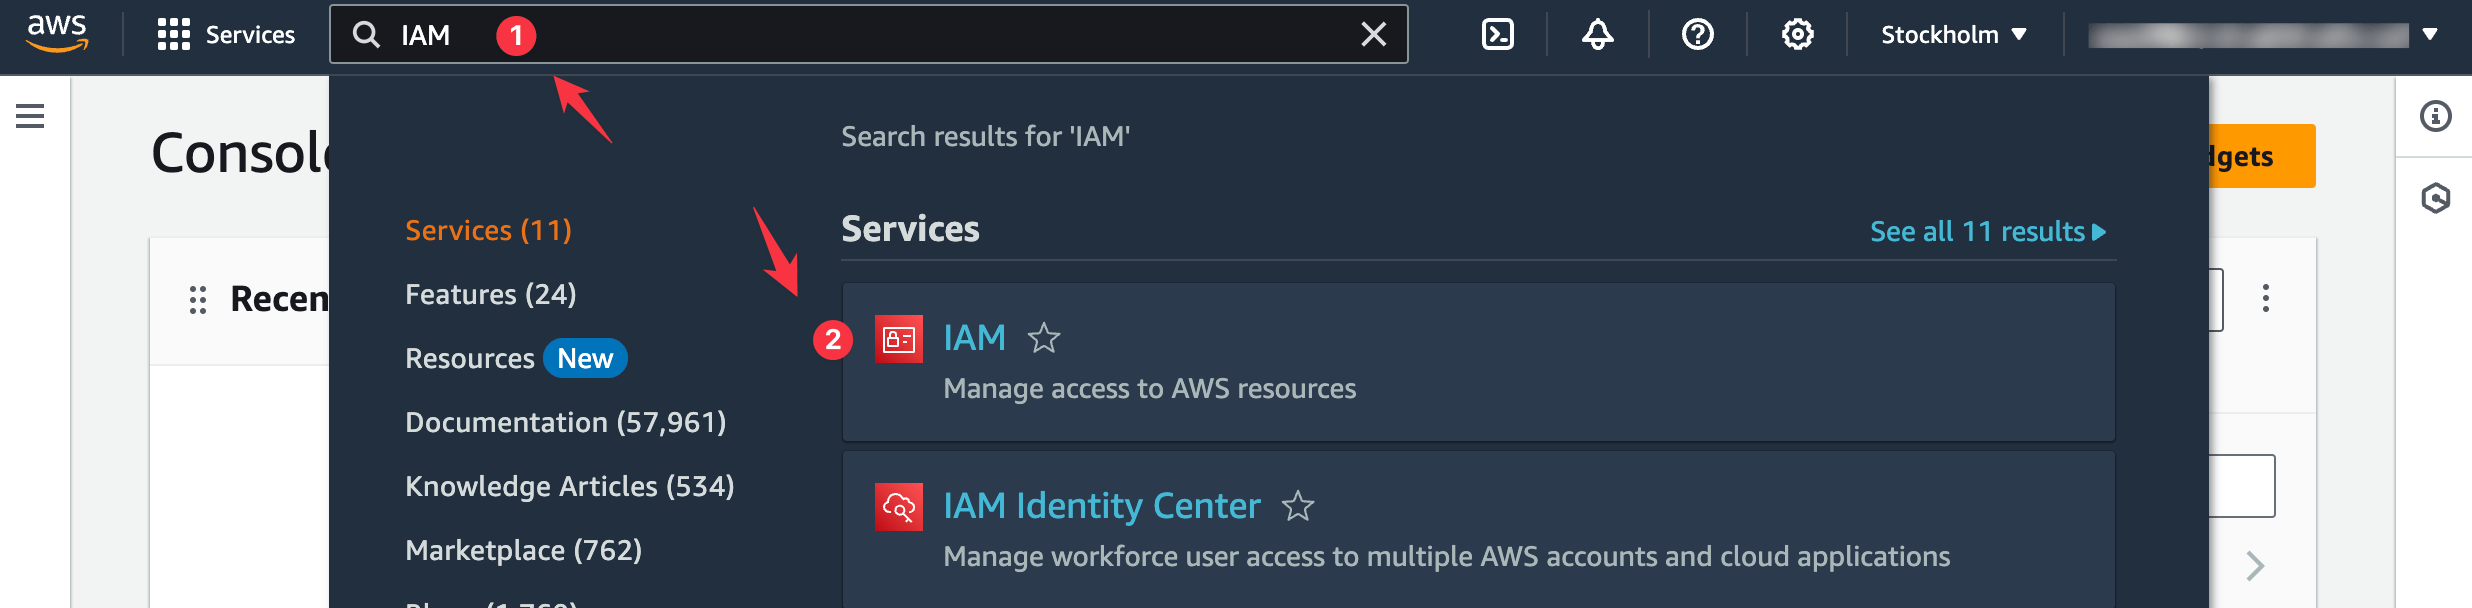
Sign in to your AWS console.
Search "IAM" in the Service search bar at the top and select the IAM option from the search results.
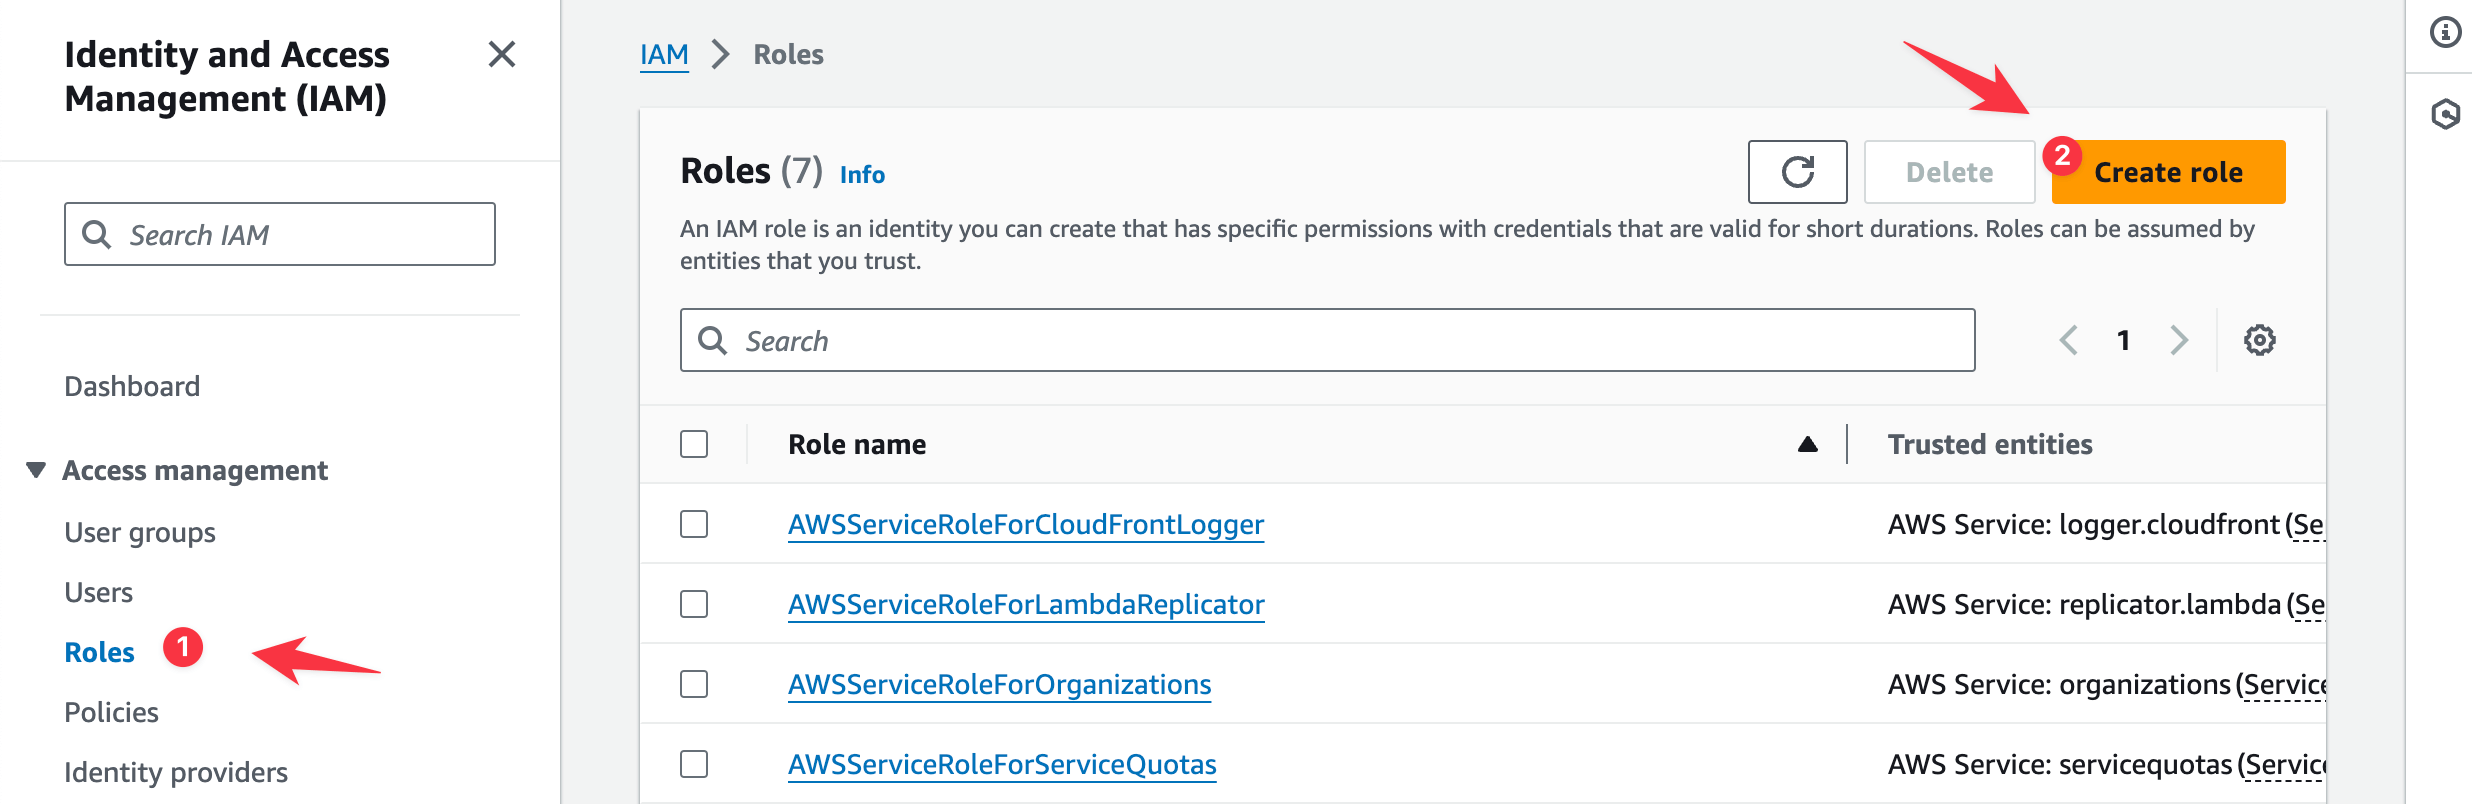
On the IAM configuration page, click the Roles tab in the left sidebar and click the Create role button.
Select the Custom trust policy.
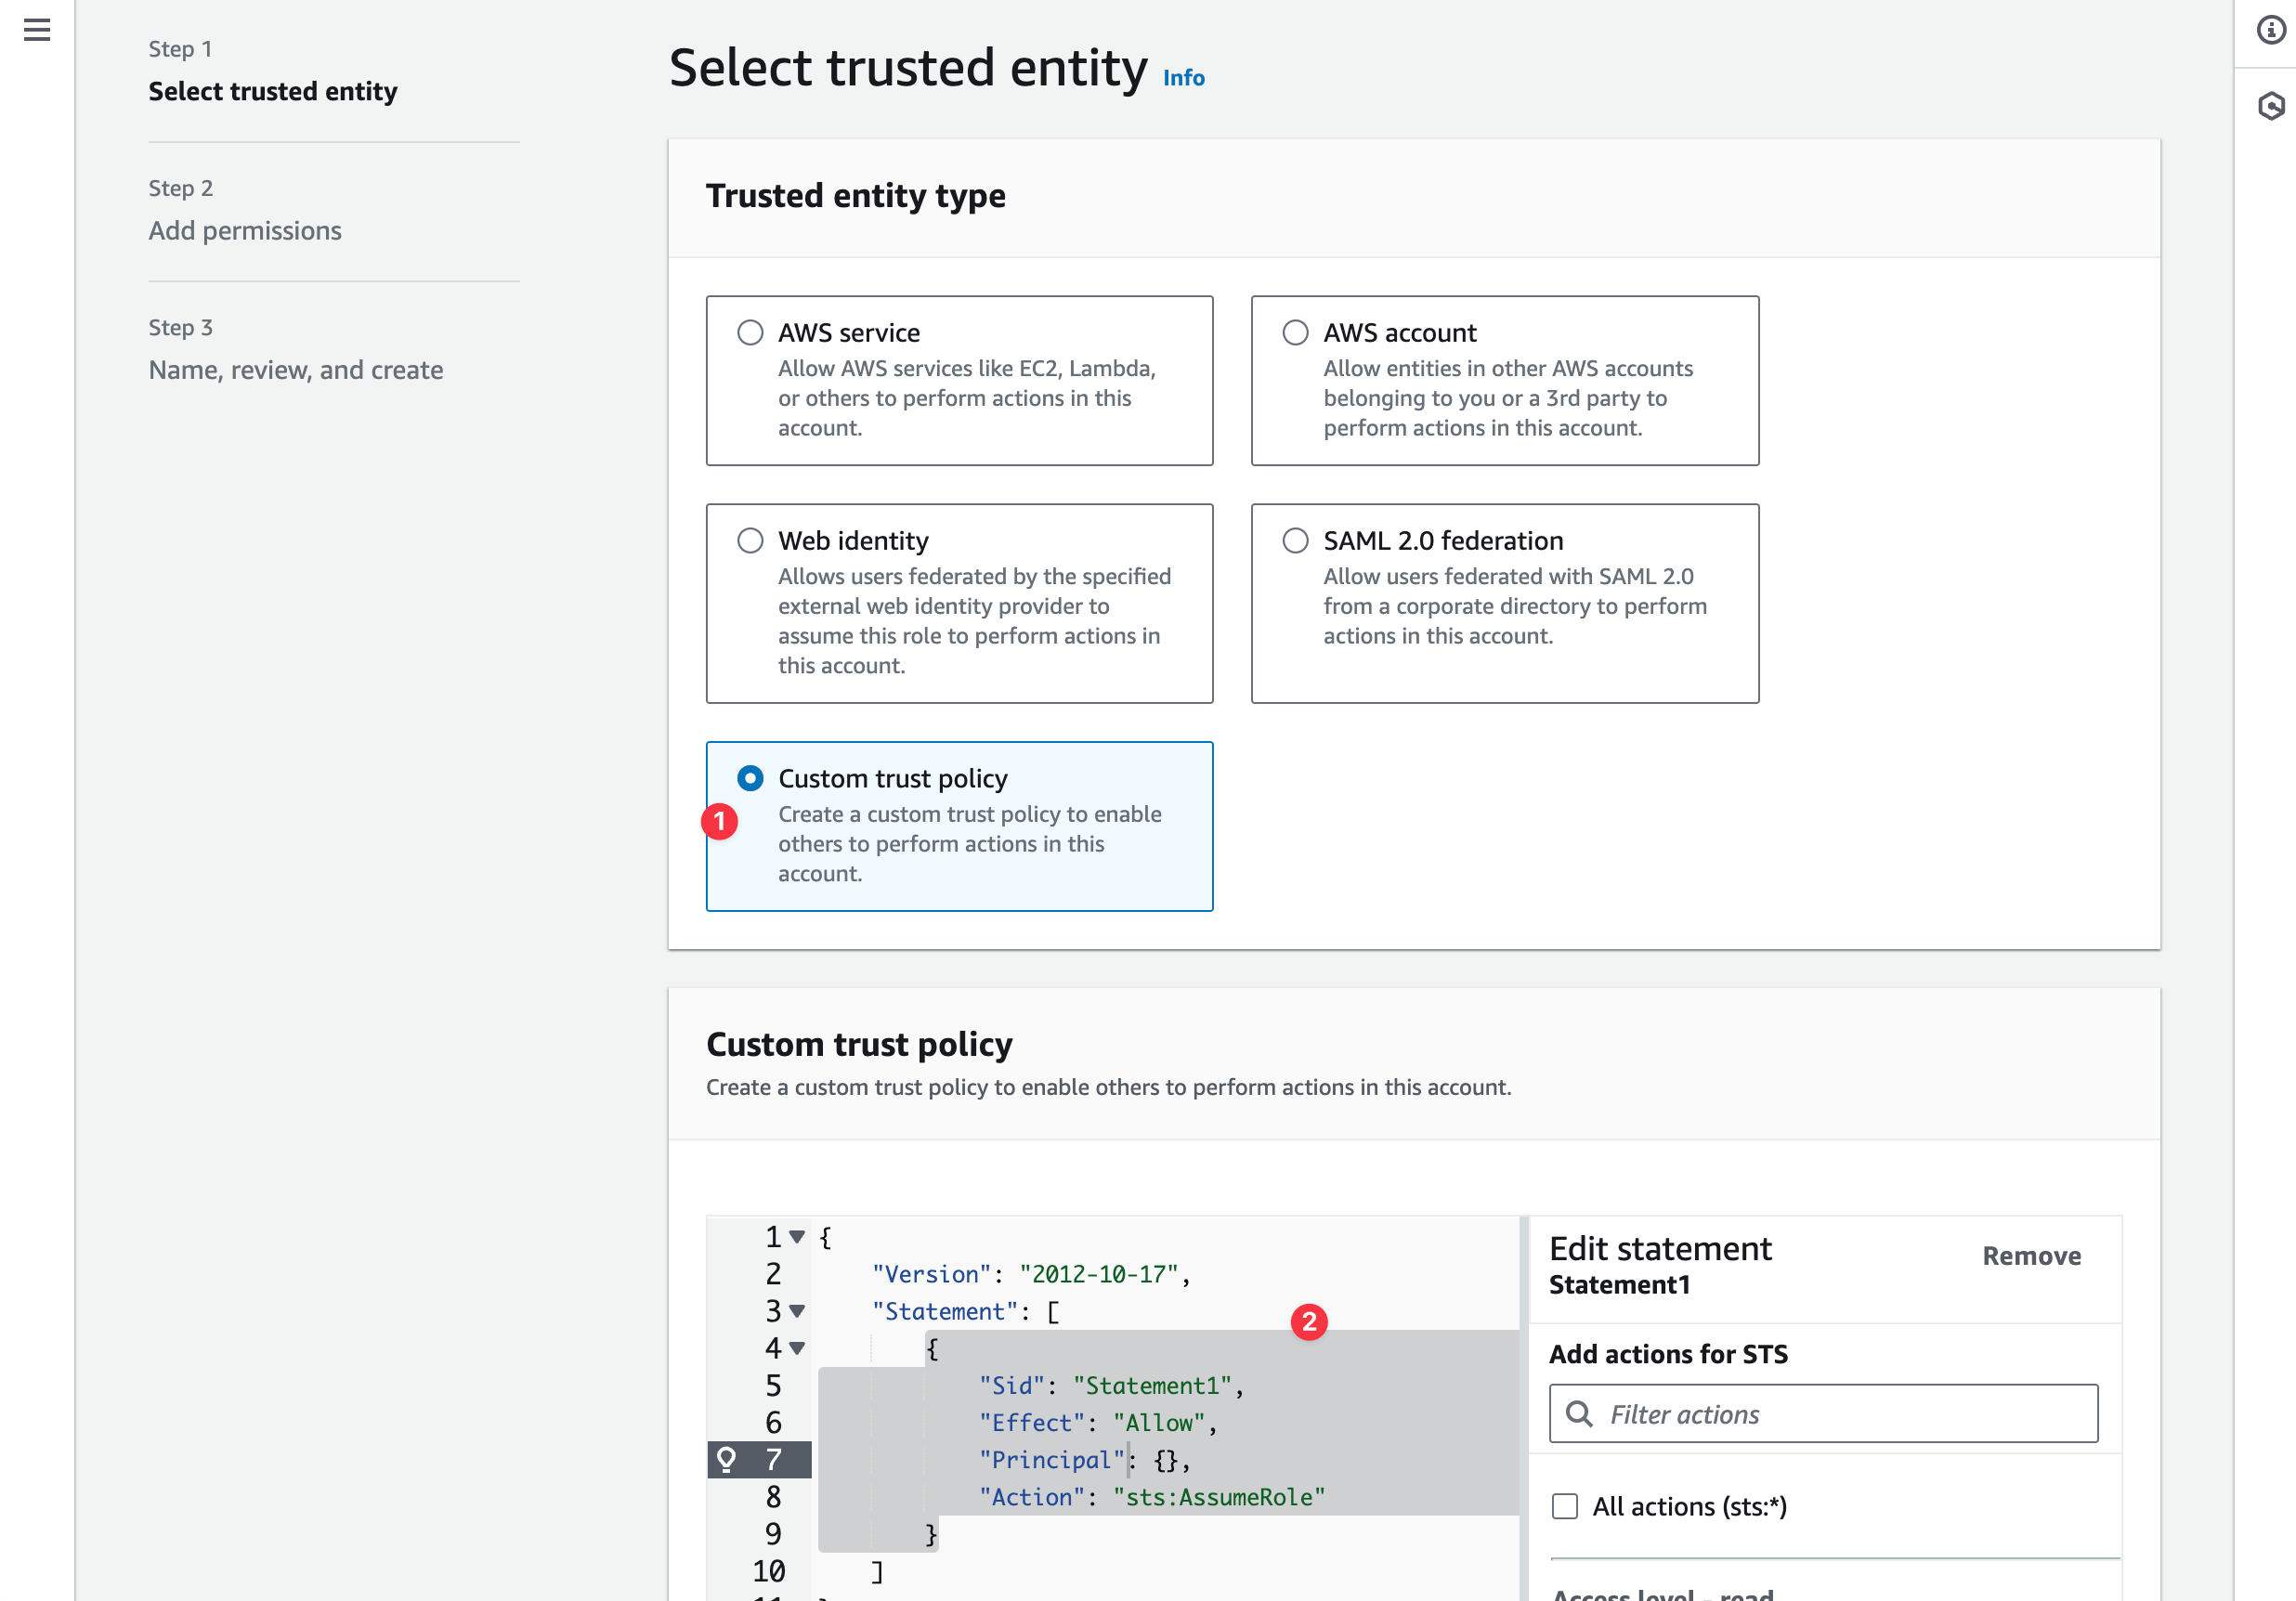
In the Add Preview cloud IAM role dialog box in Coherence, copy the custom trust policy JSON snippet and paste it into the AWS custom trust policy configuration field.
Click Next.
In the search box for permissions policies, search for "AdministratorAccess".
In the search results, check the box for the AdministratorAccess policy with the type "AWS managed - job function".
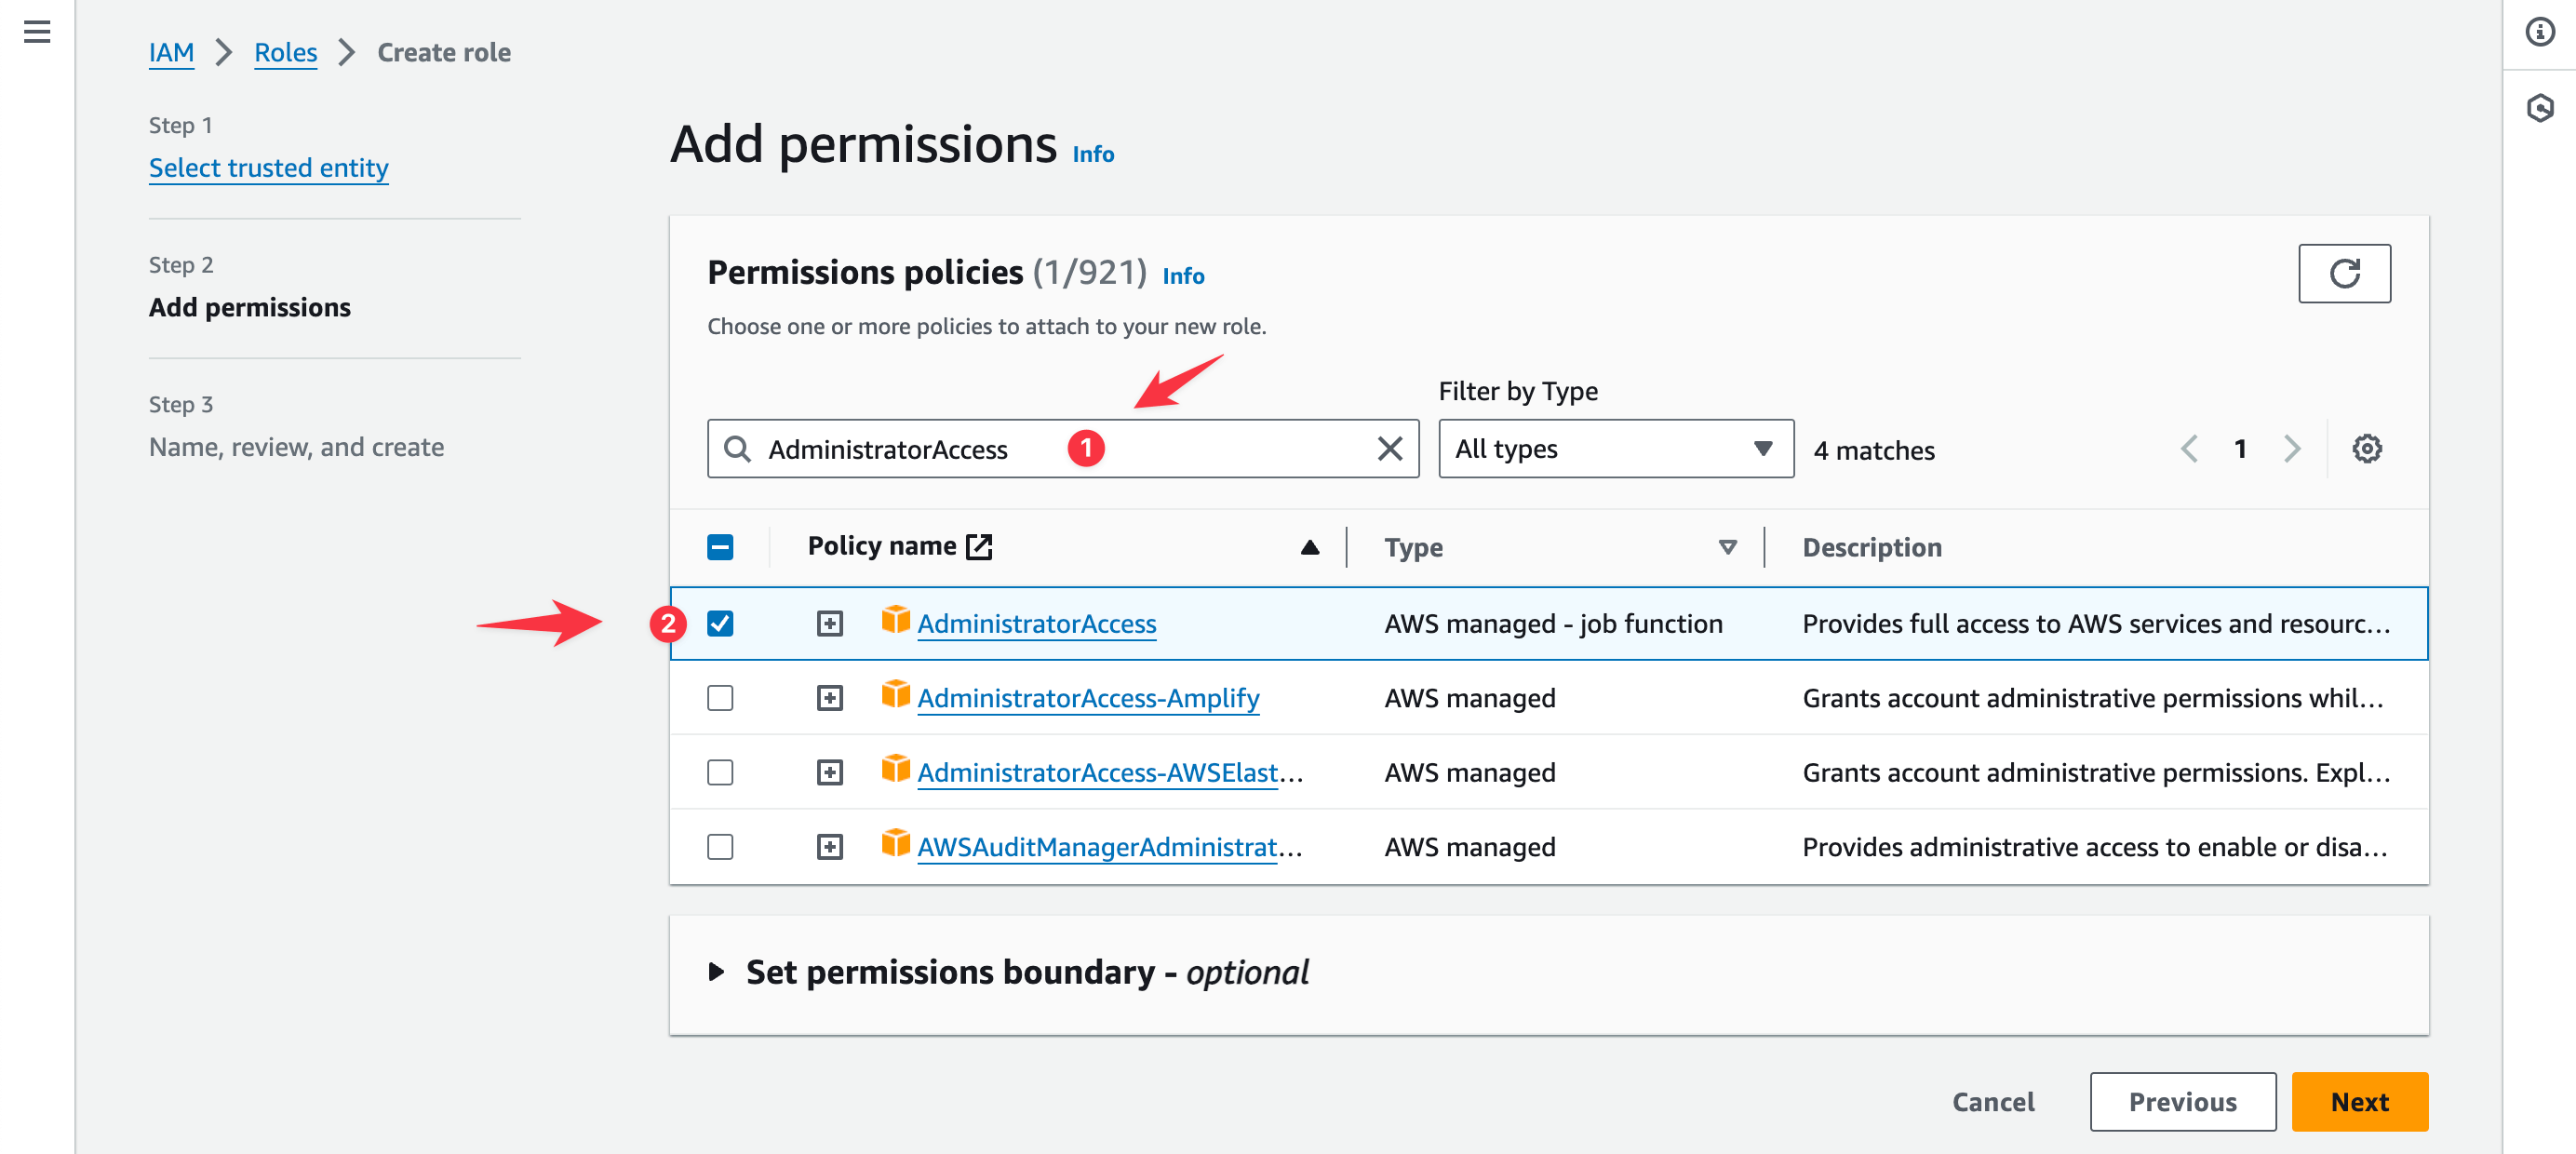
Click Next.
Return to the Add Preview cloud IAM role dialog in Coherence and copy the role name from the role name field. Paste the copied role name into the role name field in the AWS Create role dialog.
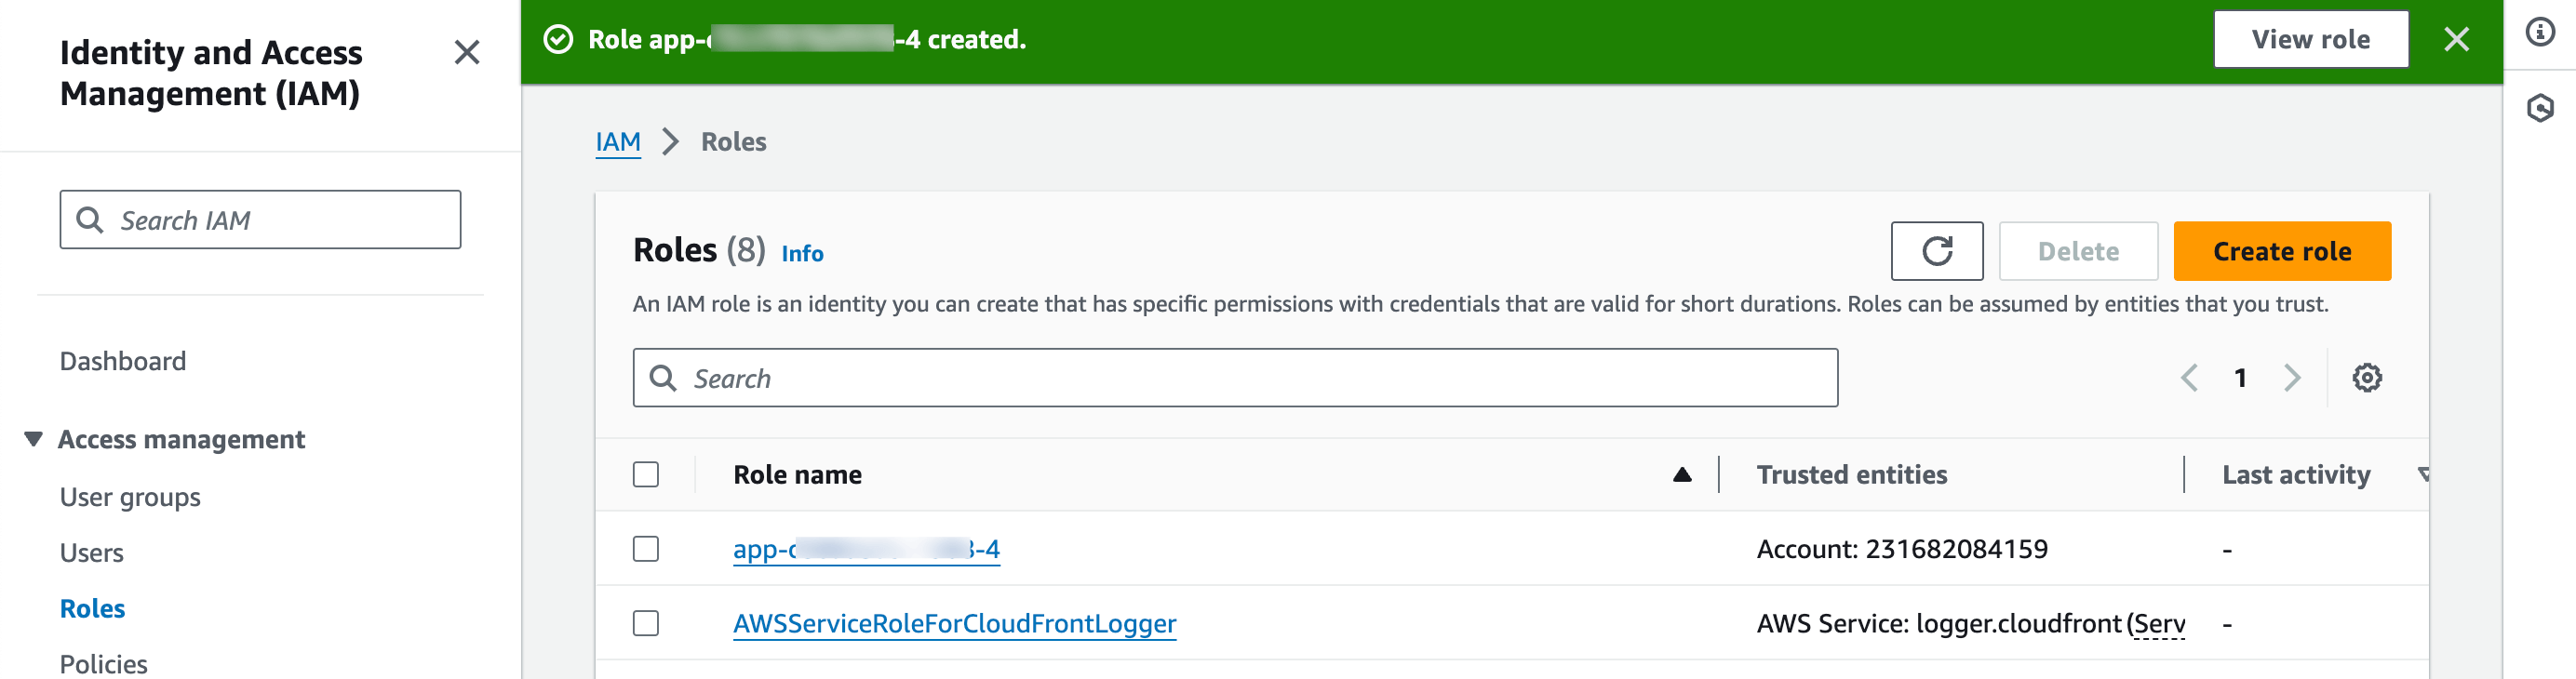
Verify the role details and click Create role.
If there are any validation errors, they will be noted on the screen. If the role was successfully created, a confirmation notification will display at the top of the AWS roles list view.
Return to the Coherence Add Preview cloud IAM role dialog and click Continue.
Coherence will check whether it can access the newly created role. If the role isn't detected, you'll receive the notification, "We didn't detect an IAM role. Please wait a minute and try again."
Import variables
Next, you can optionally enter or configure variables to be used with your cloud provider.
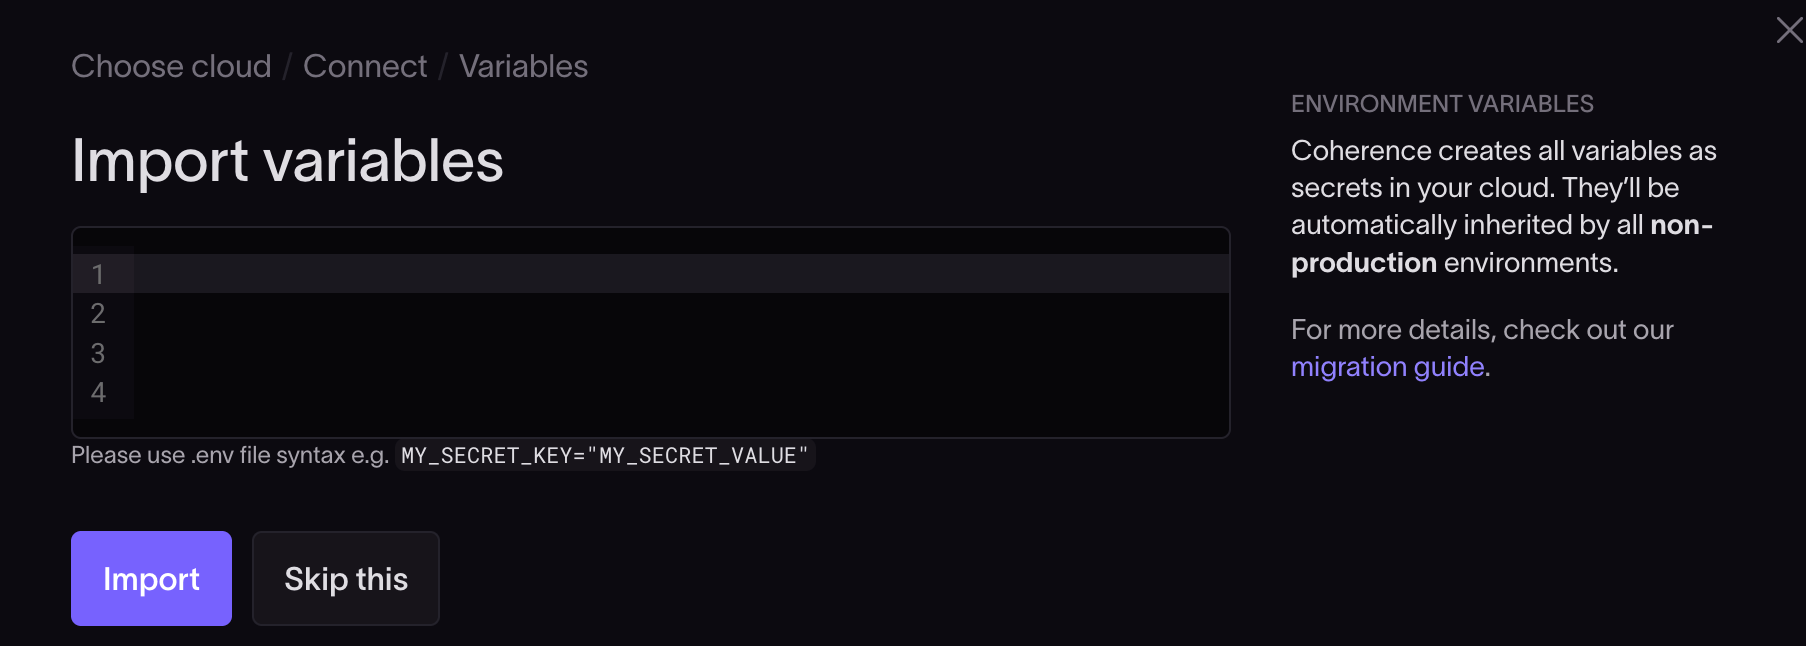
These variables are stored in your AWS Secrets Manager.
Coherence securely integrates with cloud build pipelines and container runtimes, and automatically injects variables for managed resources like databases, eliminating the need to manually copy items such as DATABASE_URL or REDIS_URL. Read more about this in the environment variables documentation.
If you don't need environment variables, you can click Skip this.
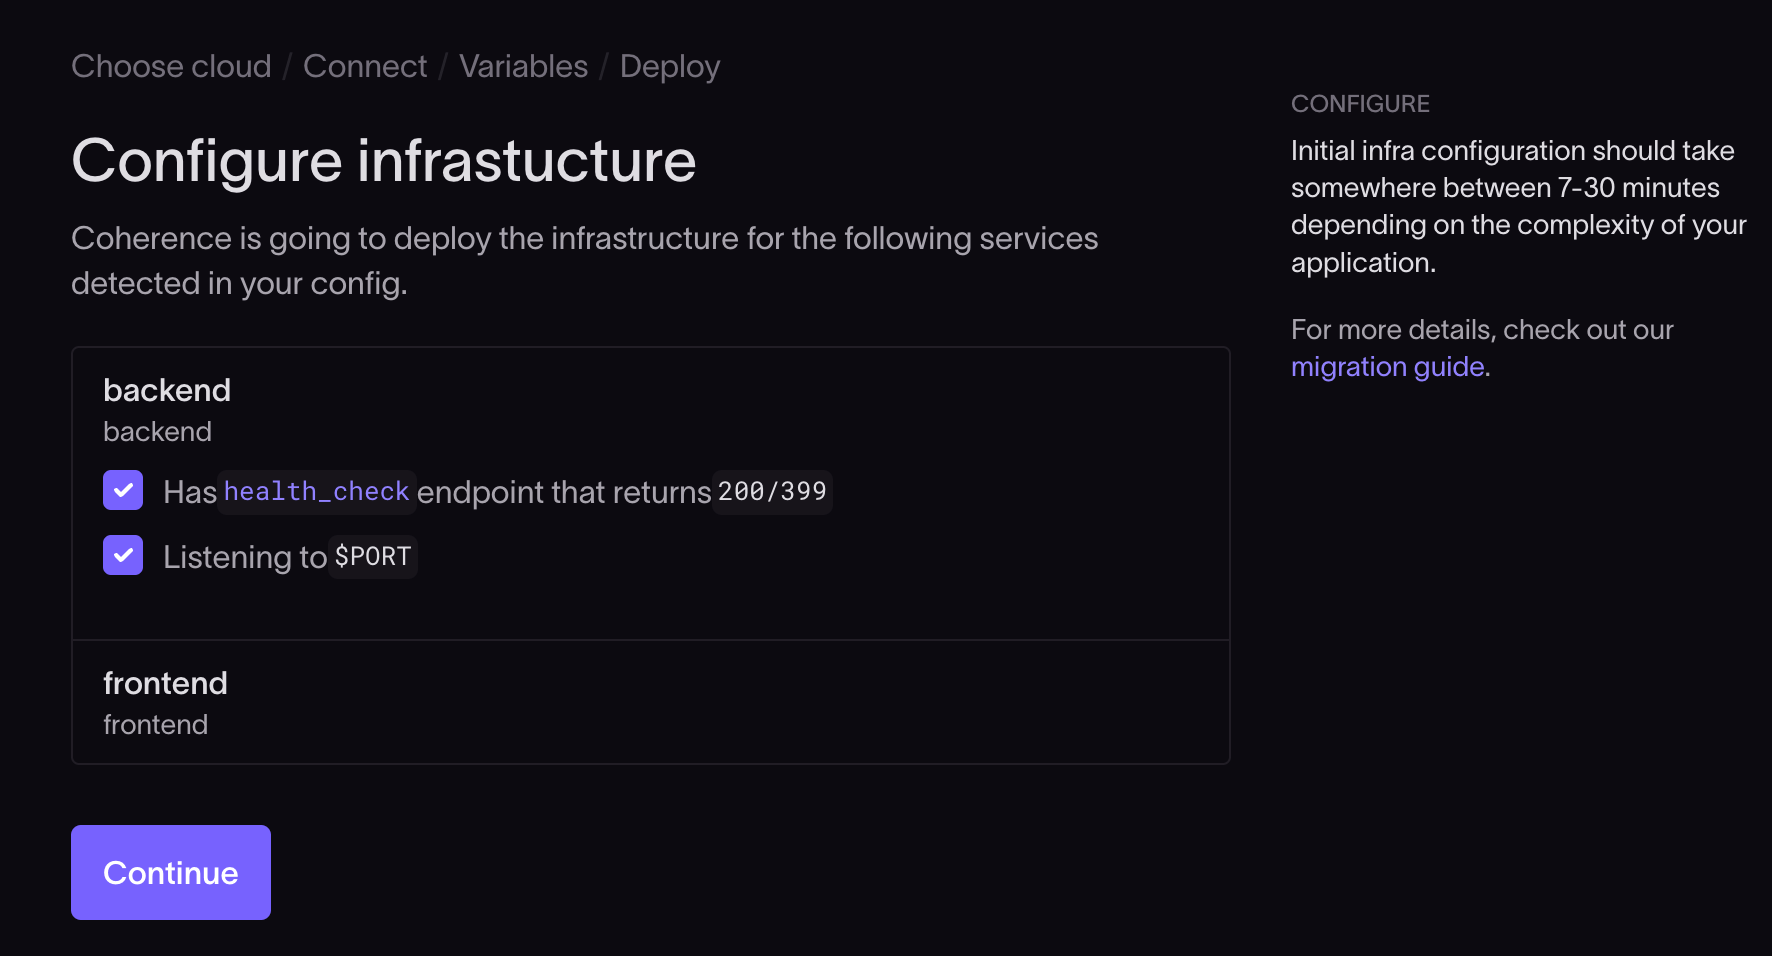
Configure infrastructure
Coherence uses the coherence.yml file to set up the infrastructure your app needs.
In the configure infrastructure step, you'll be presented with a list of the resources, defined in the coherence.yml file, that Coherence has detected.
Select the resources that apply to your project and click Continue.
Coherence will now create the resources defined in the coherence.yml file and provision the preview cloud. Note that provisioning the preview cloud will make changes to your AWS environment and may lead to cost implications if left unattended.
Next, you'll be redirected to the Infrastructure Logs tab.
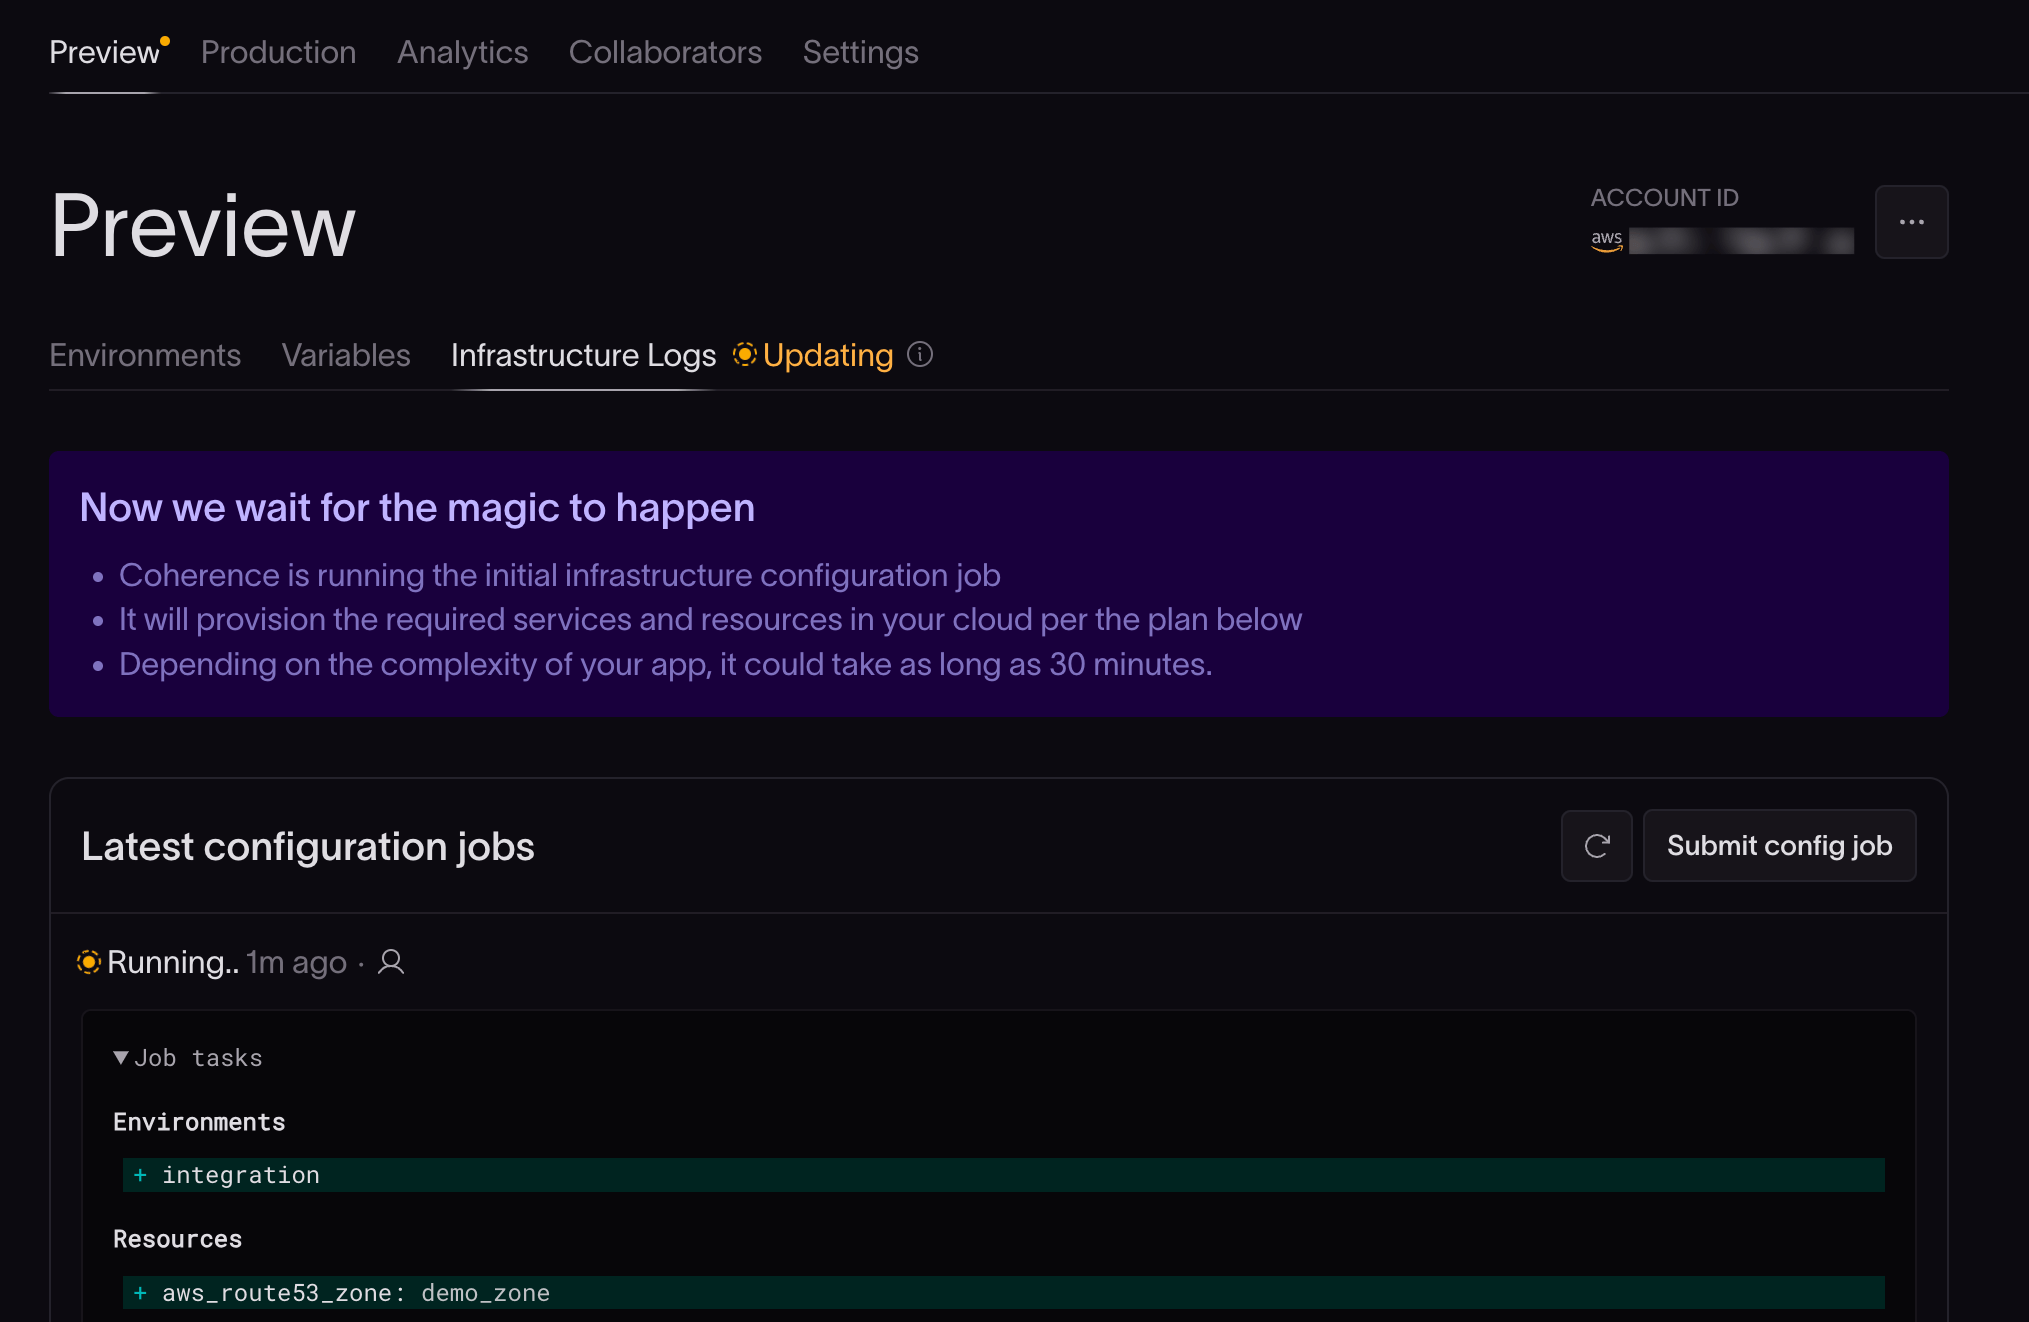
Provisioning the preview cloud can take 5-30 minutes, depending on the complexity of the configuration. Once Coherence successfully submits a build to your integration branch, you’re up and running.
If Coherence doesn't successfully provision the preview cloud, look at the infrastructure logs to help you address the issue, make any necessary changes, and retry.
Troubleshooting initial configuration errors
If you're using Coherence with your AWS environment for the first time, you might run into an error like this:
Error: creating CloudFront Distribution: AccessDenied: Your account must be verified before you can add new CloudFront
resources. To verify your account, please contact AWS Support (https://console.aws.amazon.com/support/home#/) and
include this error message. status code: 403, request id: 0089832f-a155-470a-91cb-e7a988b94db Error:
aws_cloudfront_distribution.main_coherencedemoapp1_ZnJvbnRIbnQ_cdn: Creation errored after 8s For more help, please
contact support at support@withcoherence.com
To solve this error, do the following:
If your AWS account is newly created, double-check that it is verified.
If it is, ensure the correct quotas are available on your AWS account.
If the issue still isn't resolved, open a case with the AWS support center:
- Navigate to the Support Center in your AWS console.
 - Click the Create Case button.
- Create a case under the Account and Billing section.
- Under Service, select Account.
- Under Category, select Other Account Issues.
- Paste the error text from Coherence into the description and submit the case.
- Click the Create Case button.
- Create a case under the Account and Billing section.
- Under Service, select Account.
- Under Category, select Other Account Issues.
- Paste the error text from Coherence into the description and submit the case.
When the issue is resolved, repeat the setup steps.
Using the Preview cloud
In the Coherence console, navigate to the Preview tab on your application page.
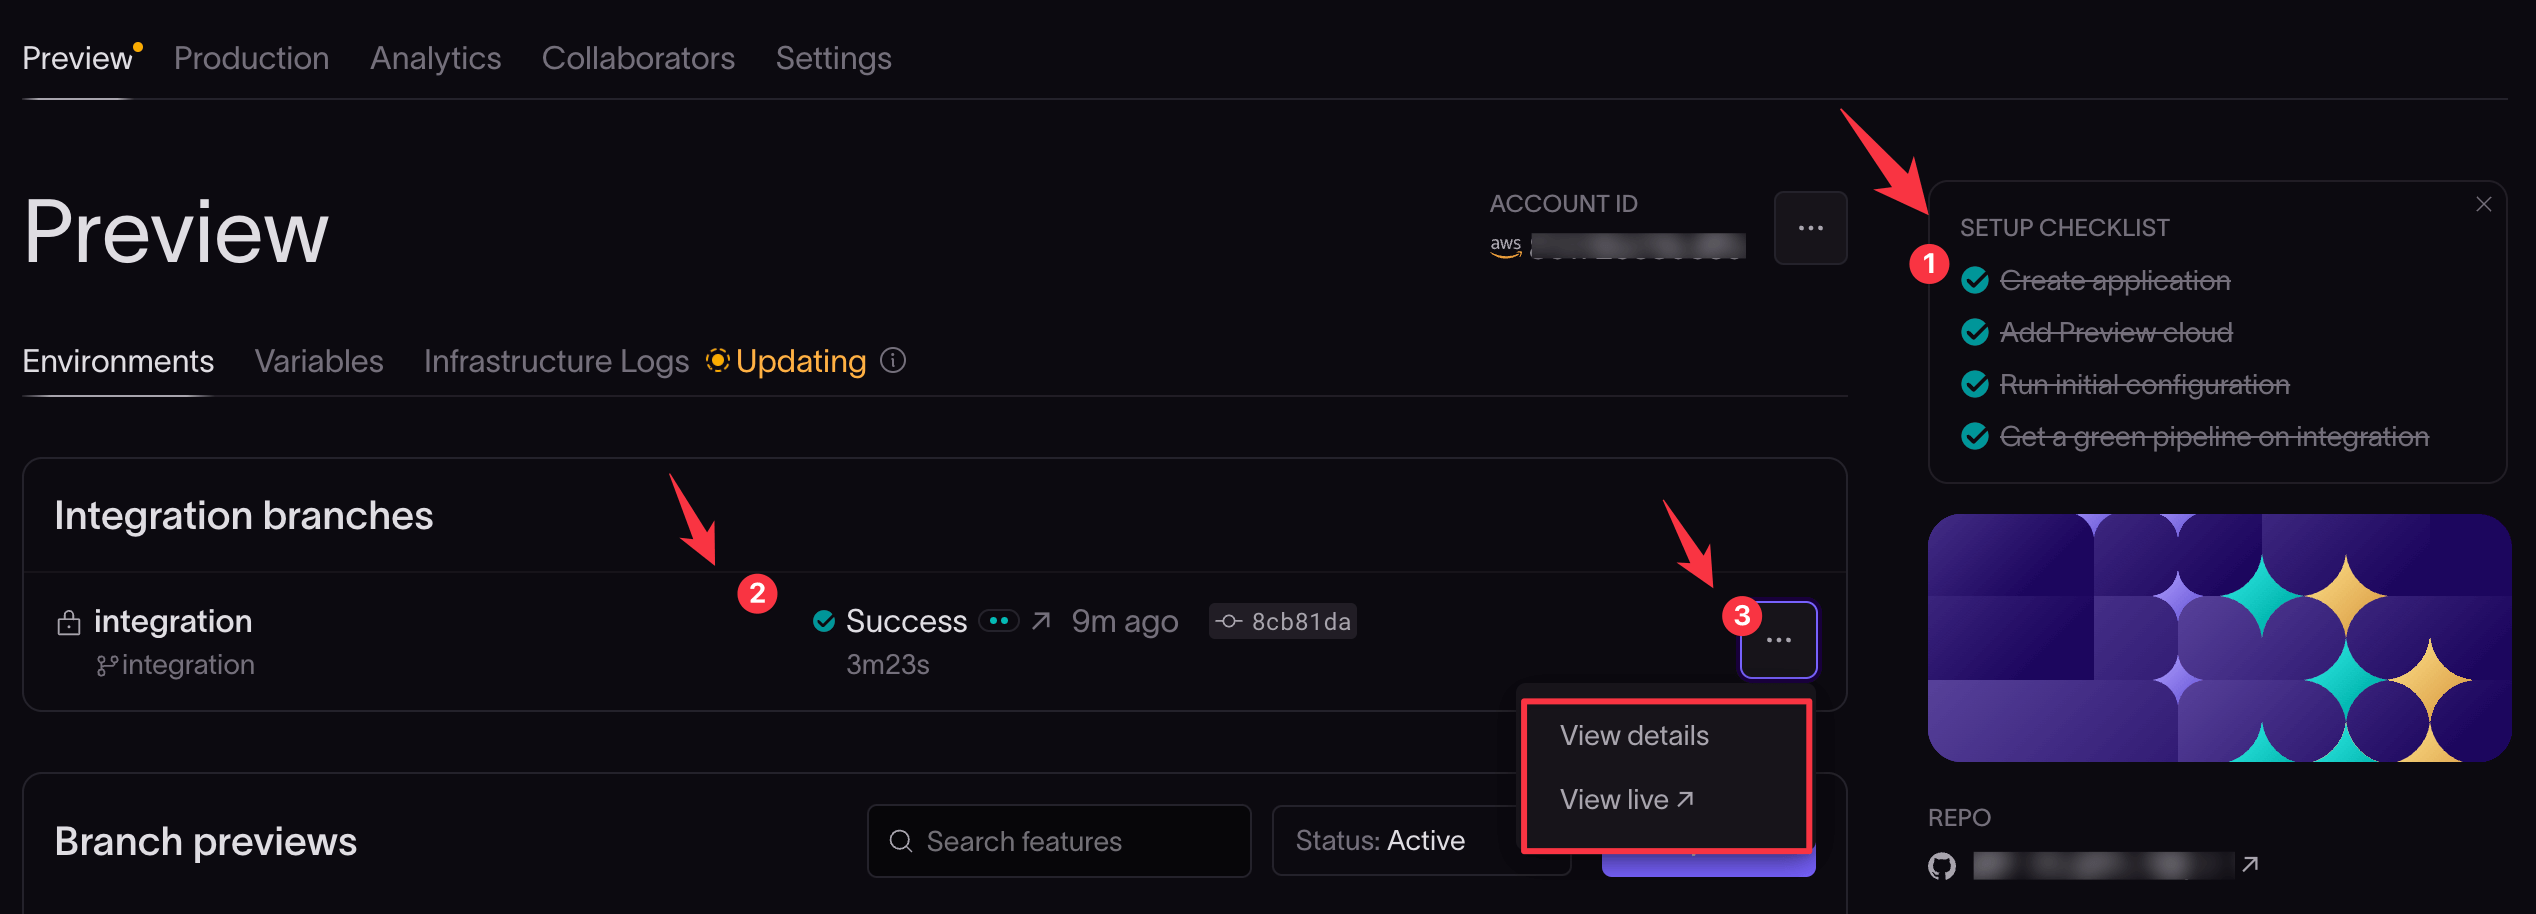
The checklist on the top right should show all items checked. If all items aren't checked, consult the Infrastructure Logs to troubleshoot, correct any issues, and repeat the steps in the guide to complete setup.
The app integration branch name and status are displayed under Integration branches.
The menu button next to the integration branch contains links to:
- View details: Here, you can view more details about the build.
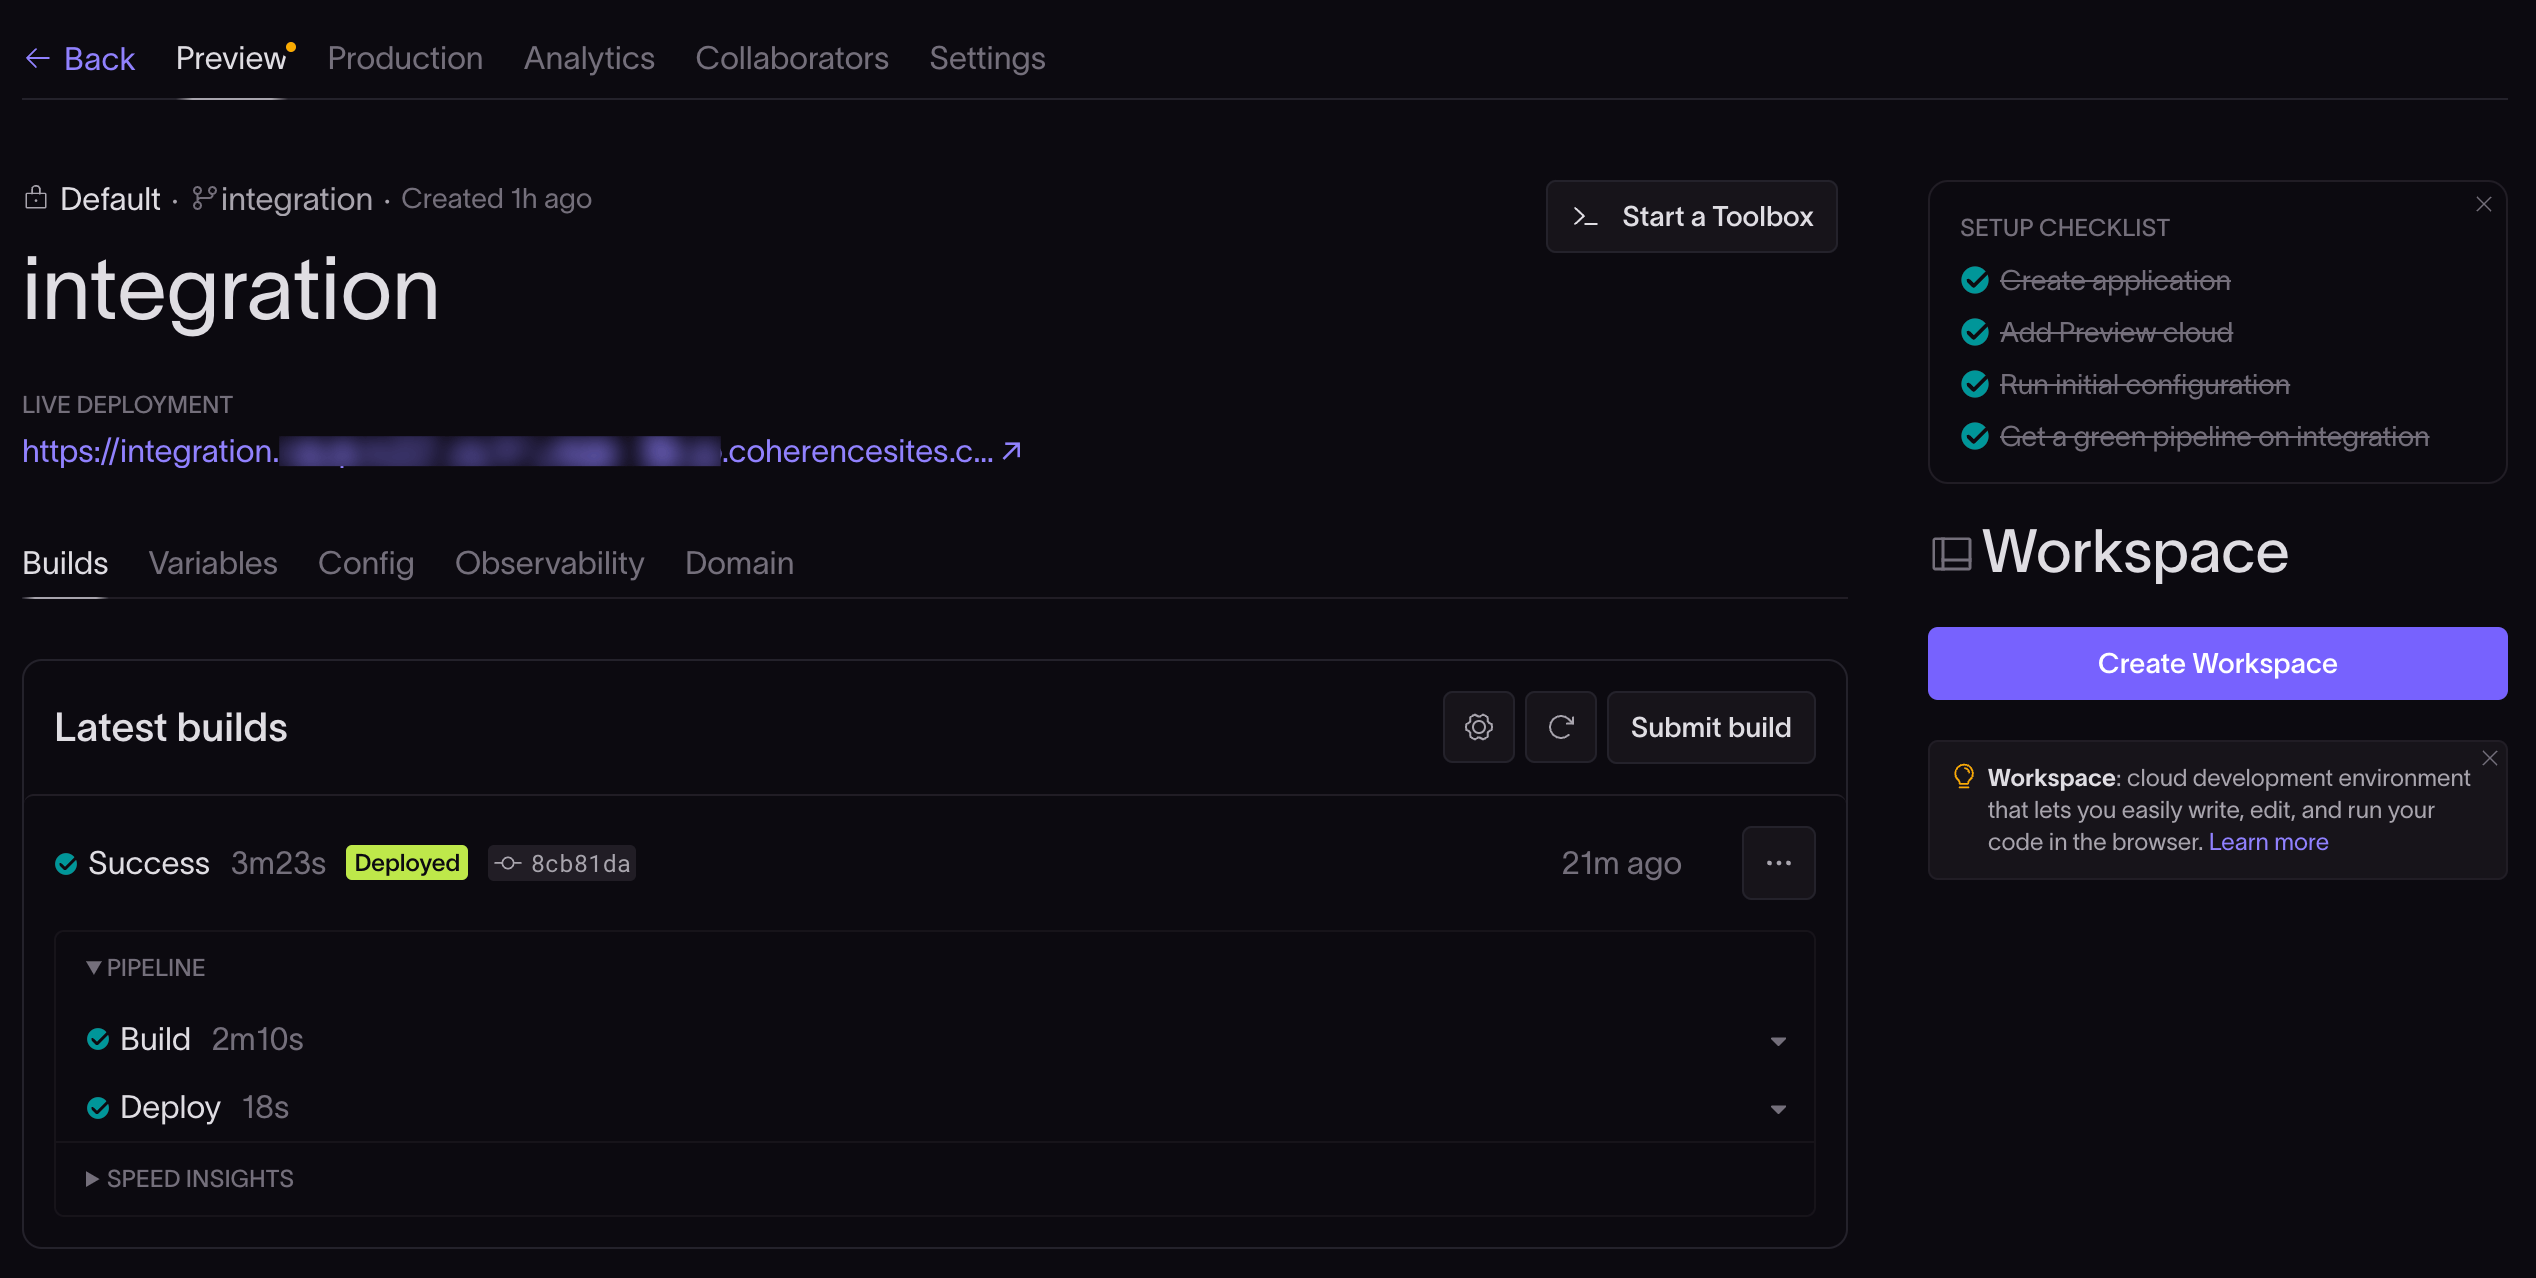
You can also click Submit build to start a new automated build and deployment process. Coherence will pull the latest source from the configured GitHub account, push it to AWS code build pipelines, and deploy it to the AWS cloud.
- View live: Here, you can view the live preview of the deployed application. It will take you to the deployed application that links to the static Route 53-hosted zone URL configured in the AWS cloud environment, configured by Coherence.
A change to the integration branch in GitHub will trigger a build and deploy to the Preview cloud environment with the latest changes.
AWS resources reference
The resources and environments created by Coherence on your AWS cloud will differ, depending on your specific use case and configuration.
Here's a short outline of a few important resources that may be created on your AWS cloud. You should monitor your AWS environment, as some configurations may have cost implications.
View services in the AWS console.
Route 53
Amazon Route 53 is a highly available and scalable domain name system (DNS) web service. Read more about it in the Route 53 AWS documentation.
- Coherence sets up a hosted zone in Route 53 for the live view of your deployed app.
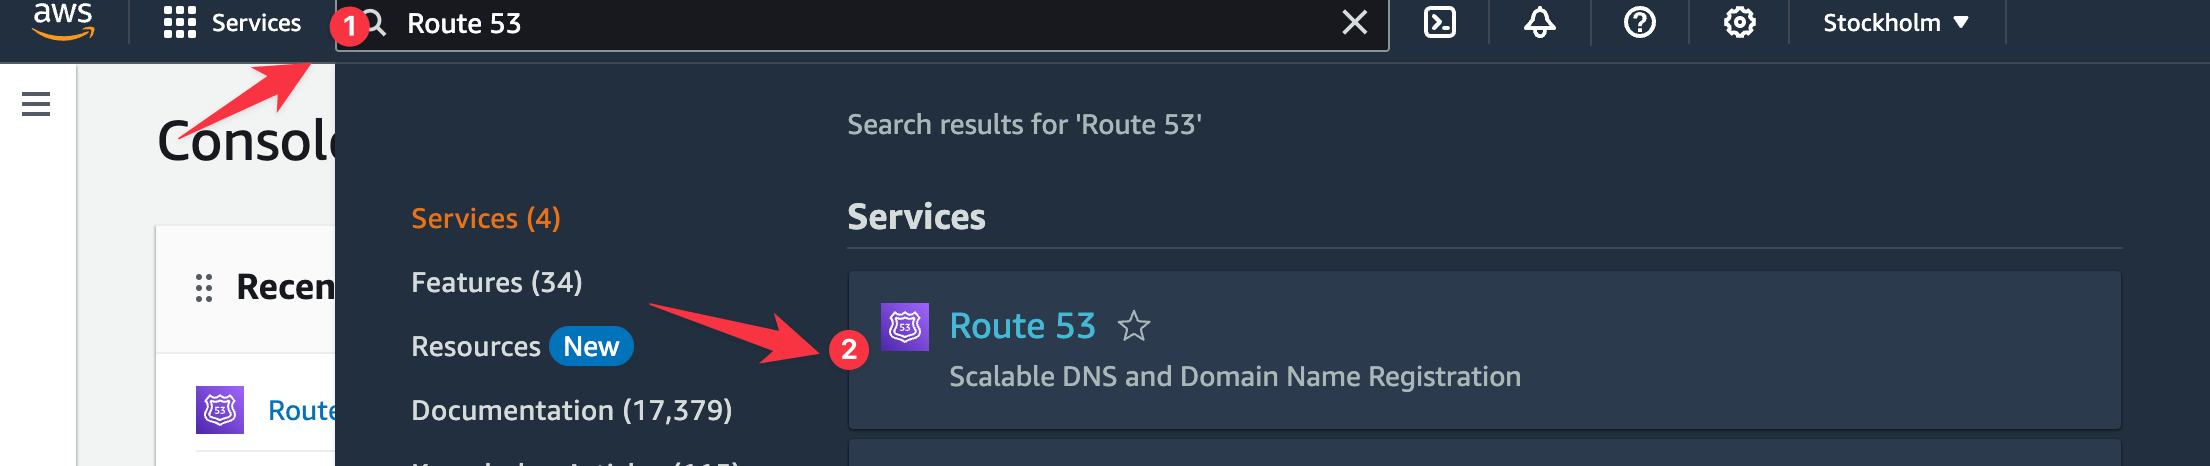
- Access the hosted zone by searching for "Route 53" in the console search bar and clicking Route 53 in the results.
- On the Route 53 page, click Hosted zones in the sidebar.
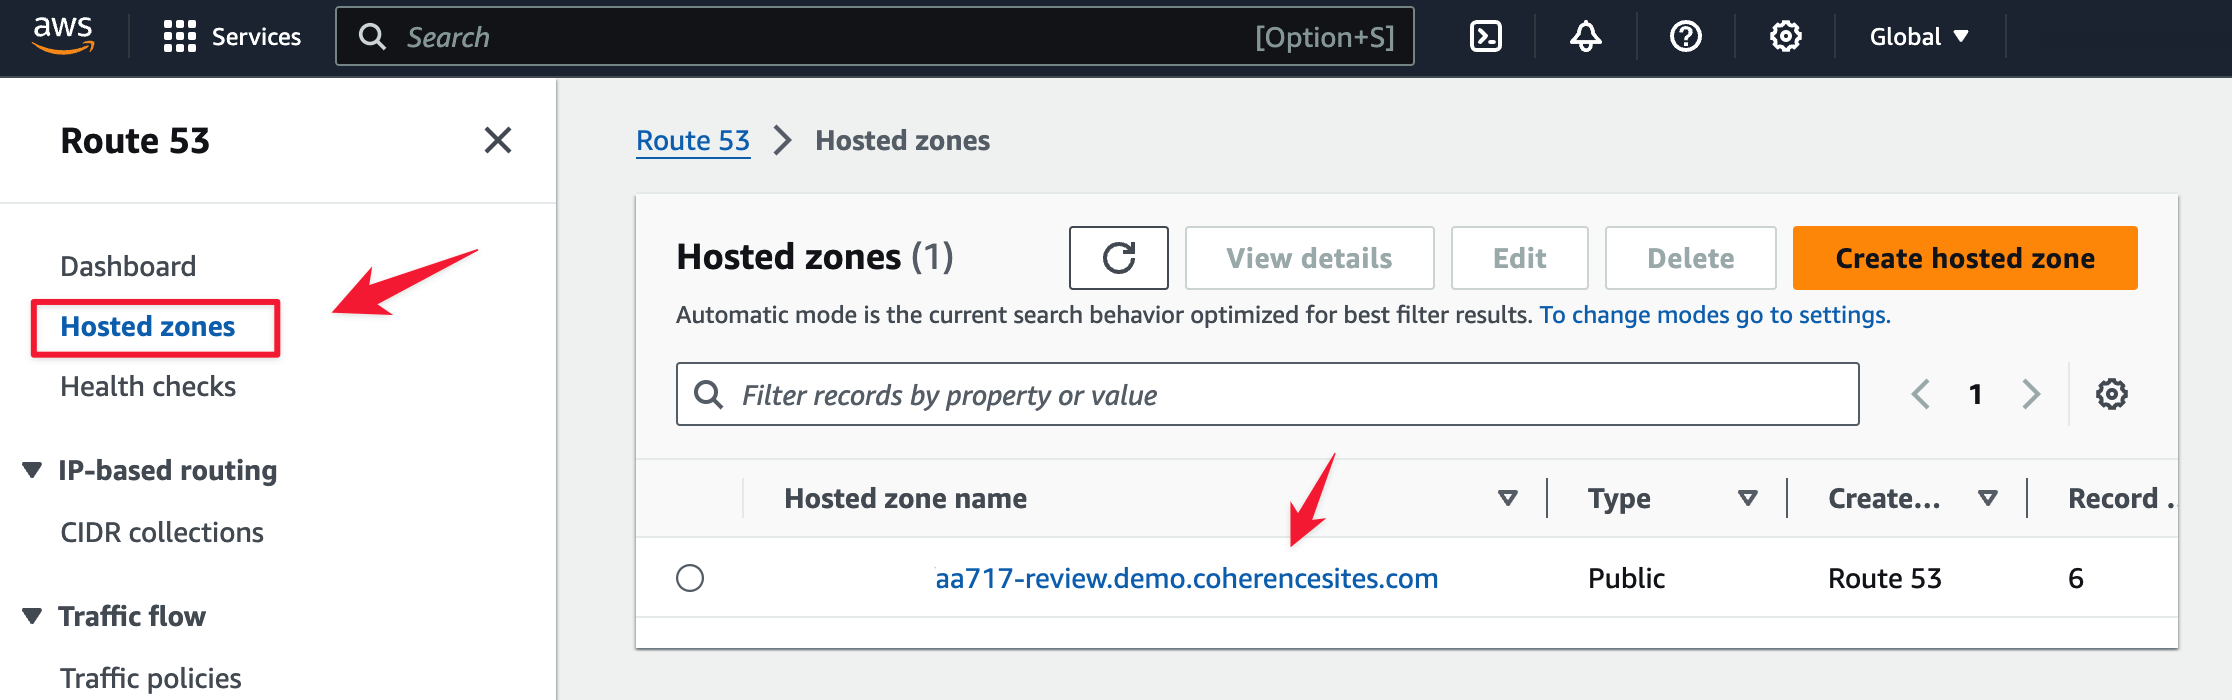
- The Hosted zones page lists the hosted zones in the region.
- Hosted zones created by Coherence will have
coherencesites.comor similar in their name.
S3
Amazon Simple Storage Service (Amazon S3) is an object storage service offering industry-leading scalability, data availability, security, and performance. Read about it in the Amazon S3 documentation.
- Coherence sets up buckets in your S3 storage to store your application's build files.
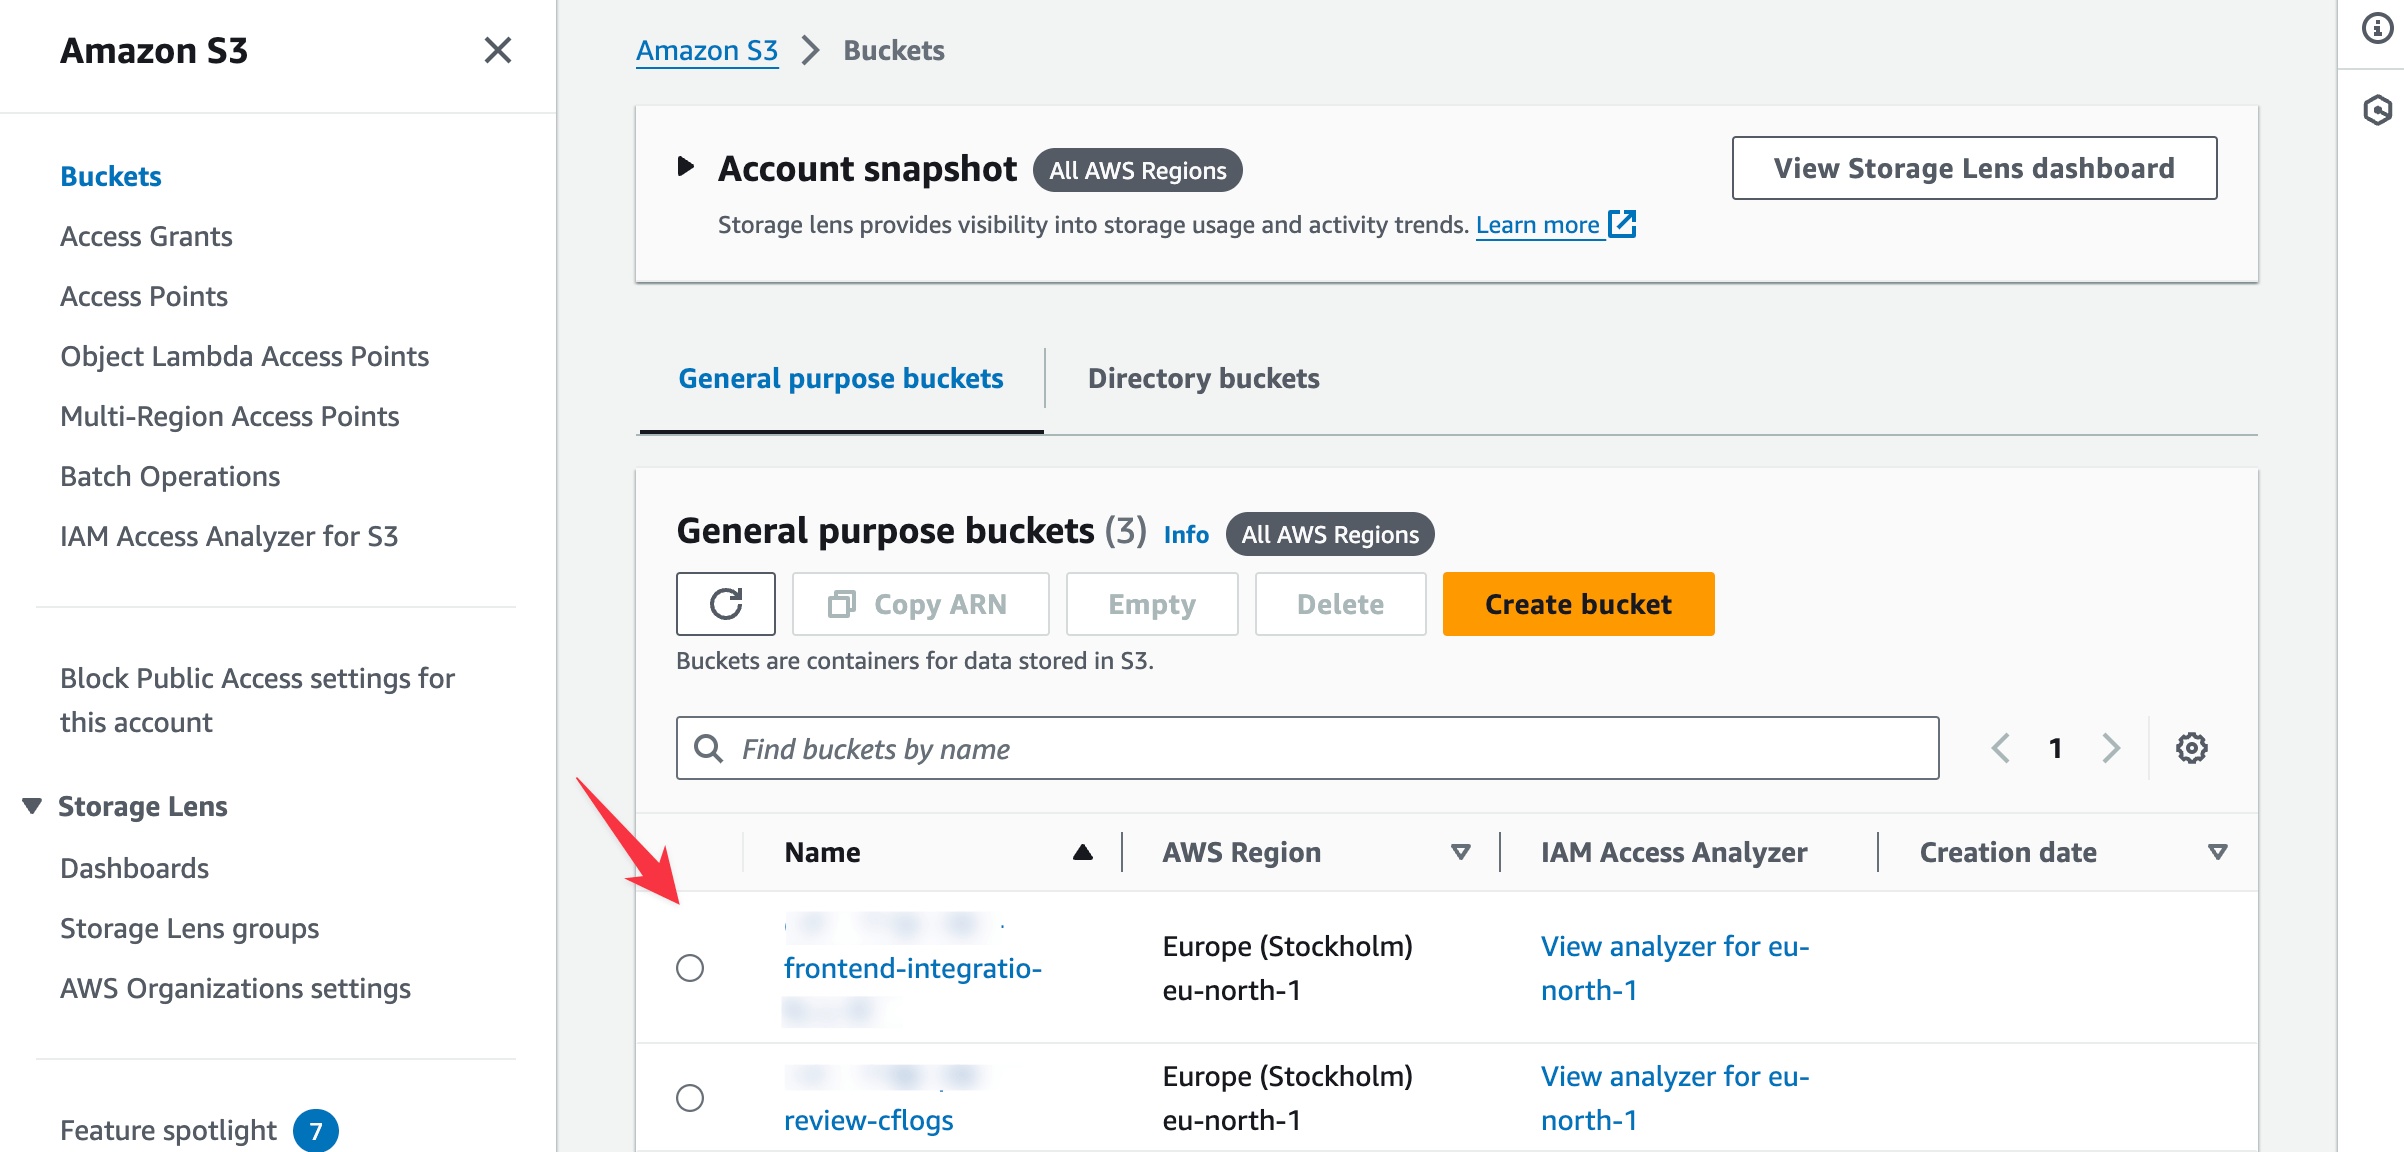
- Access the S3 service by searching for "S3" in the console search bar and selecting S3 from the results.
- The Amazon S3 page lists the buckets created while configuring your app.
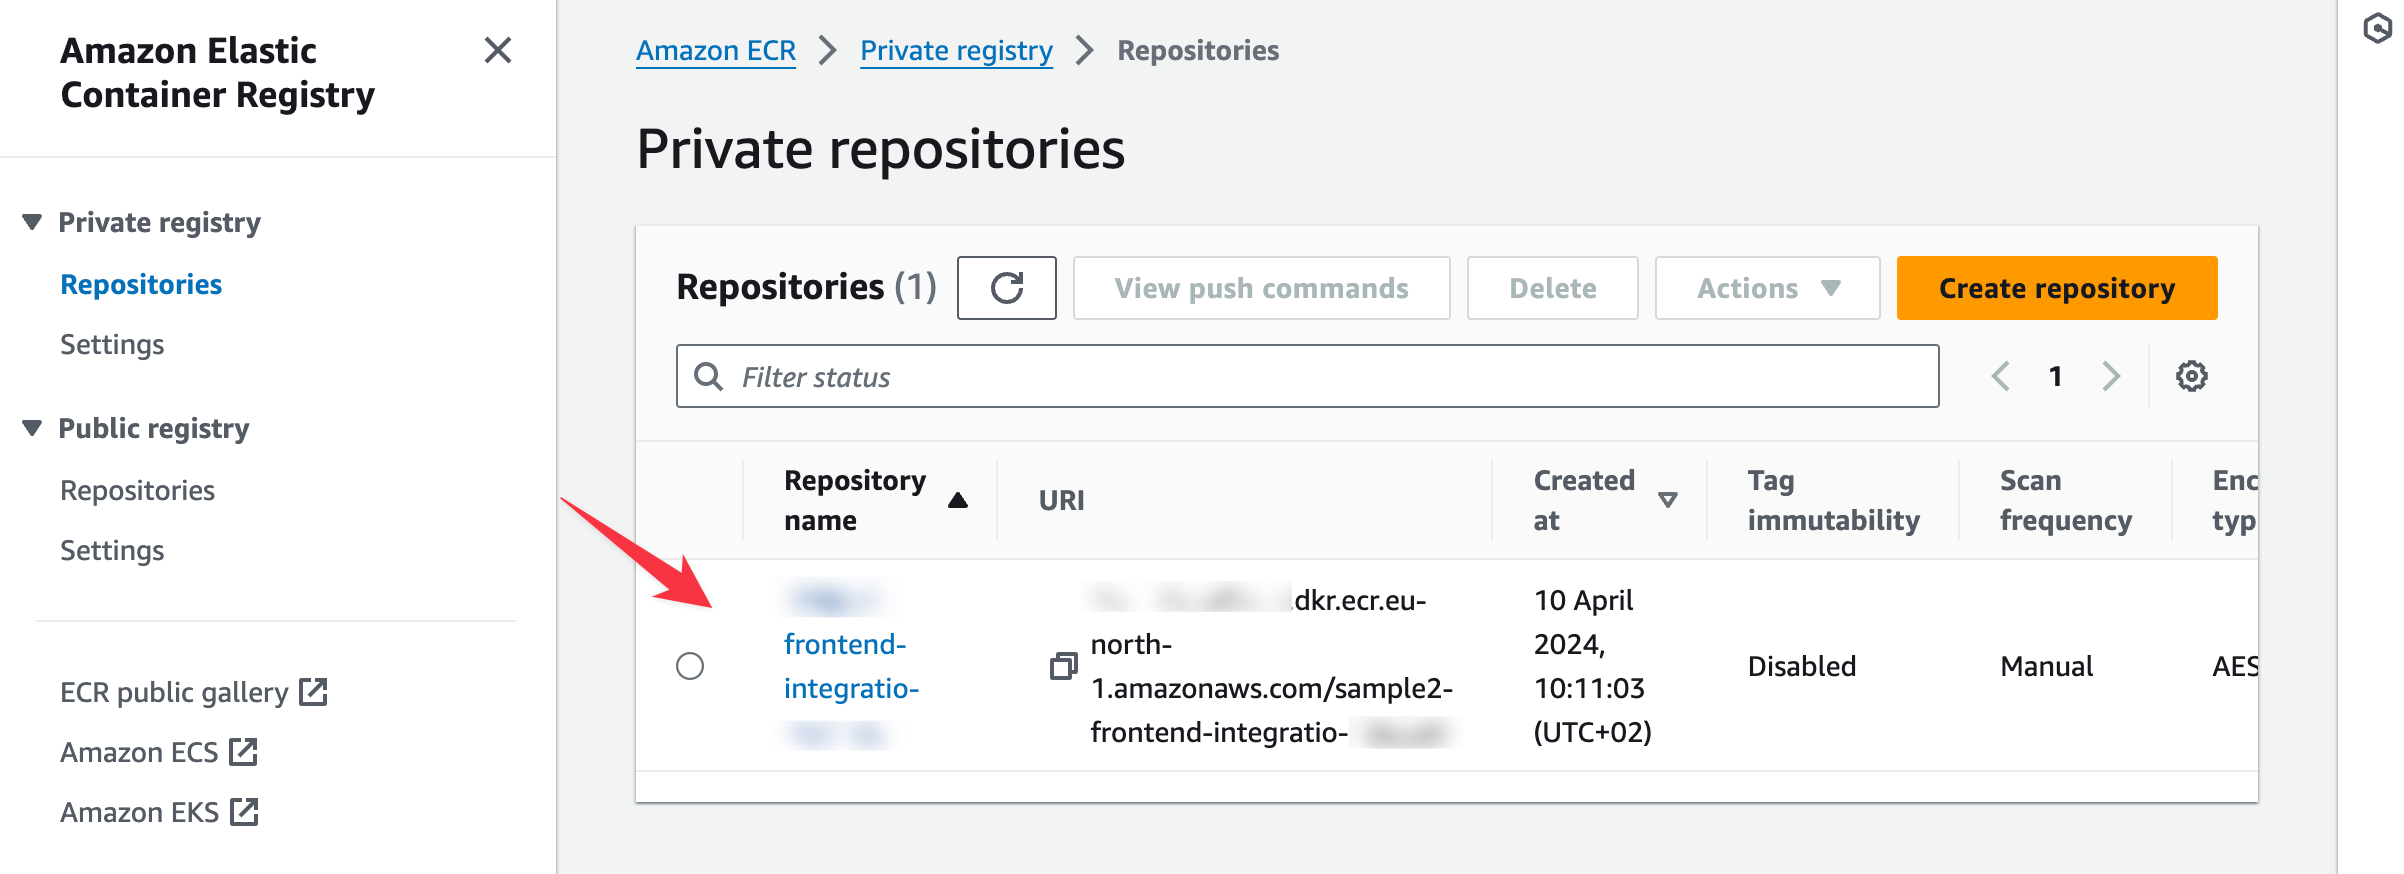
ECR
Amazon Elastic Container Registry (Amazon ECR) is a fully managed container registry offering high-performance hosting, so you can reliably deploy application images and artifacts anywhere. For more information, read the Amazon ECR documentation.
- Coherence sets up private repositories in your Amazon ECR service to host your applications.
- Access the ECR service by searching for "ECR" in the console search bar and selecting Elastic Container Registry from the results.
- Select Repositories under Private registry in the sidebar to see a list of the repositories created while configuring your app.
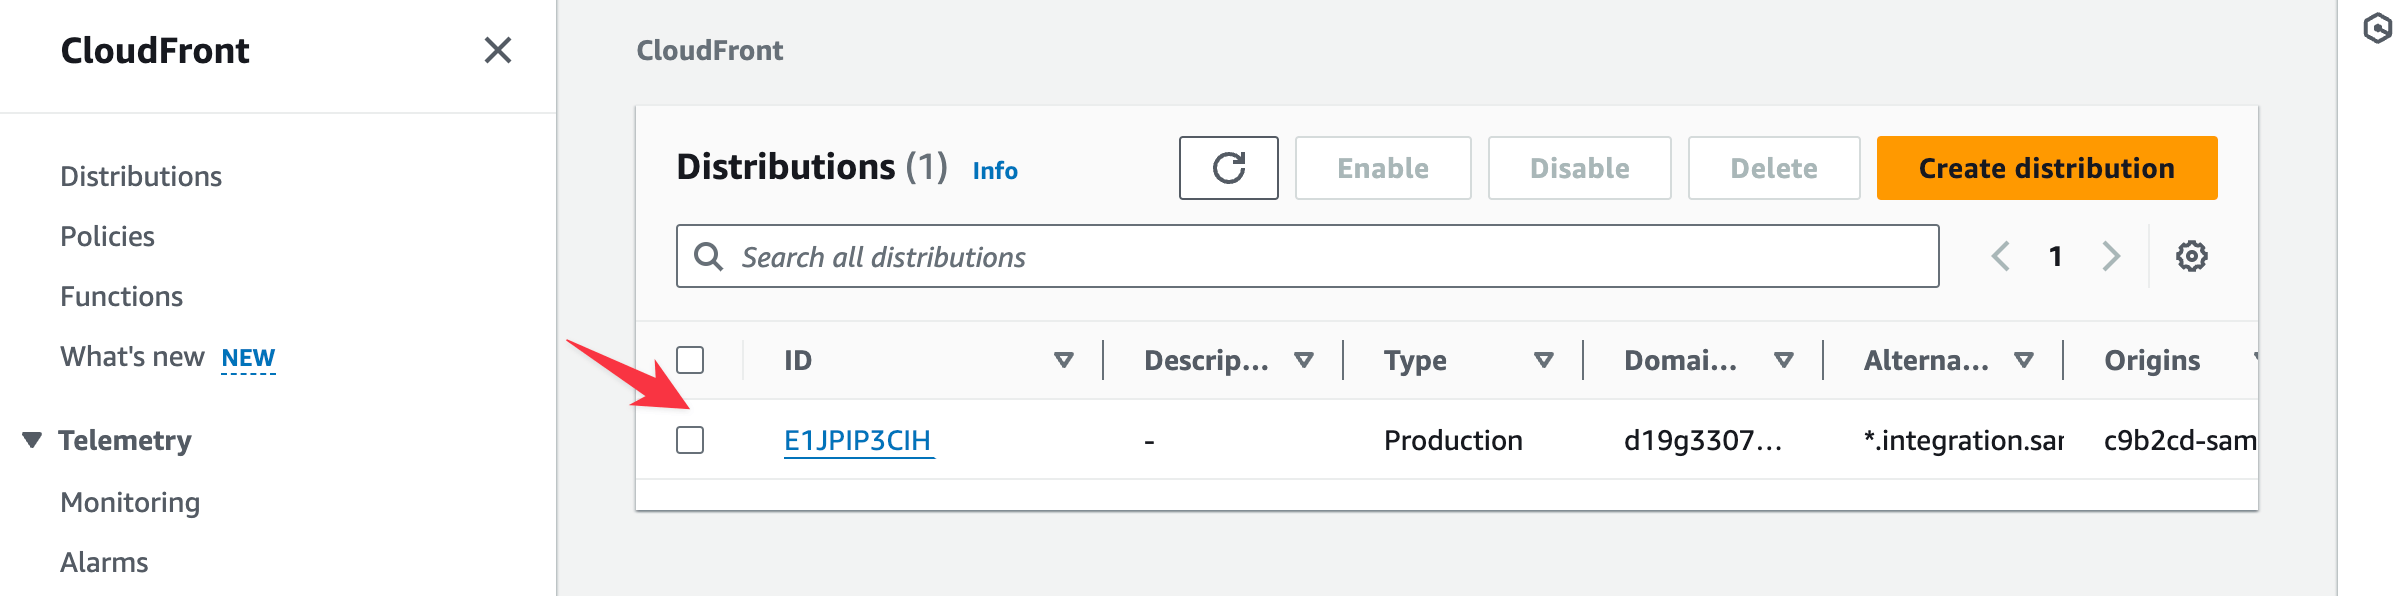
CloudFront
Amazon CloudFront is a web service that speeds up the distribution of your static and dynamic web content (such as .html, .css, .js, and image files) to your users. Read more about it in the Amazon CloudFront documentation.
- Access the Amazon CloudFront service by searching for "CloudFront" in the console search bar and selecting CloudFront from the results.
- The CloudFront page lists the CloudFront distributions created while configuring your app.
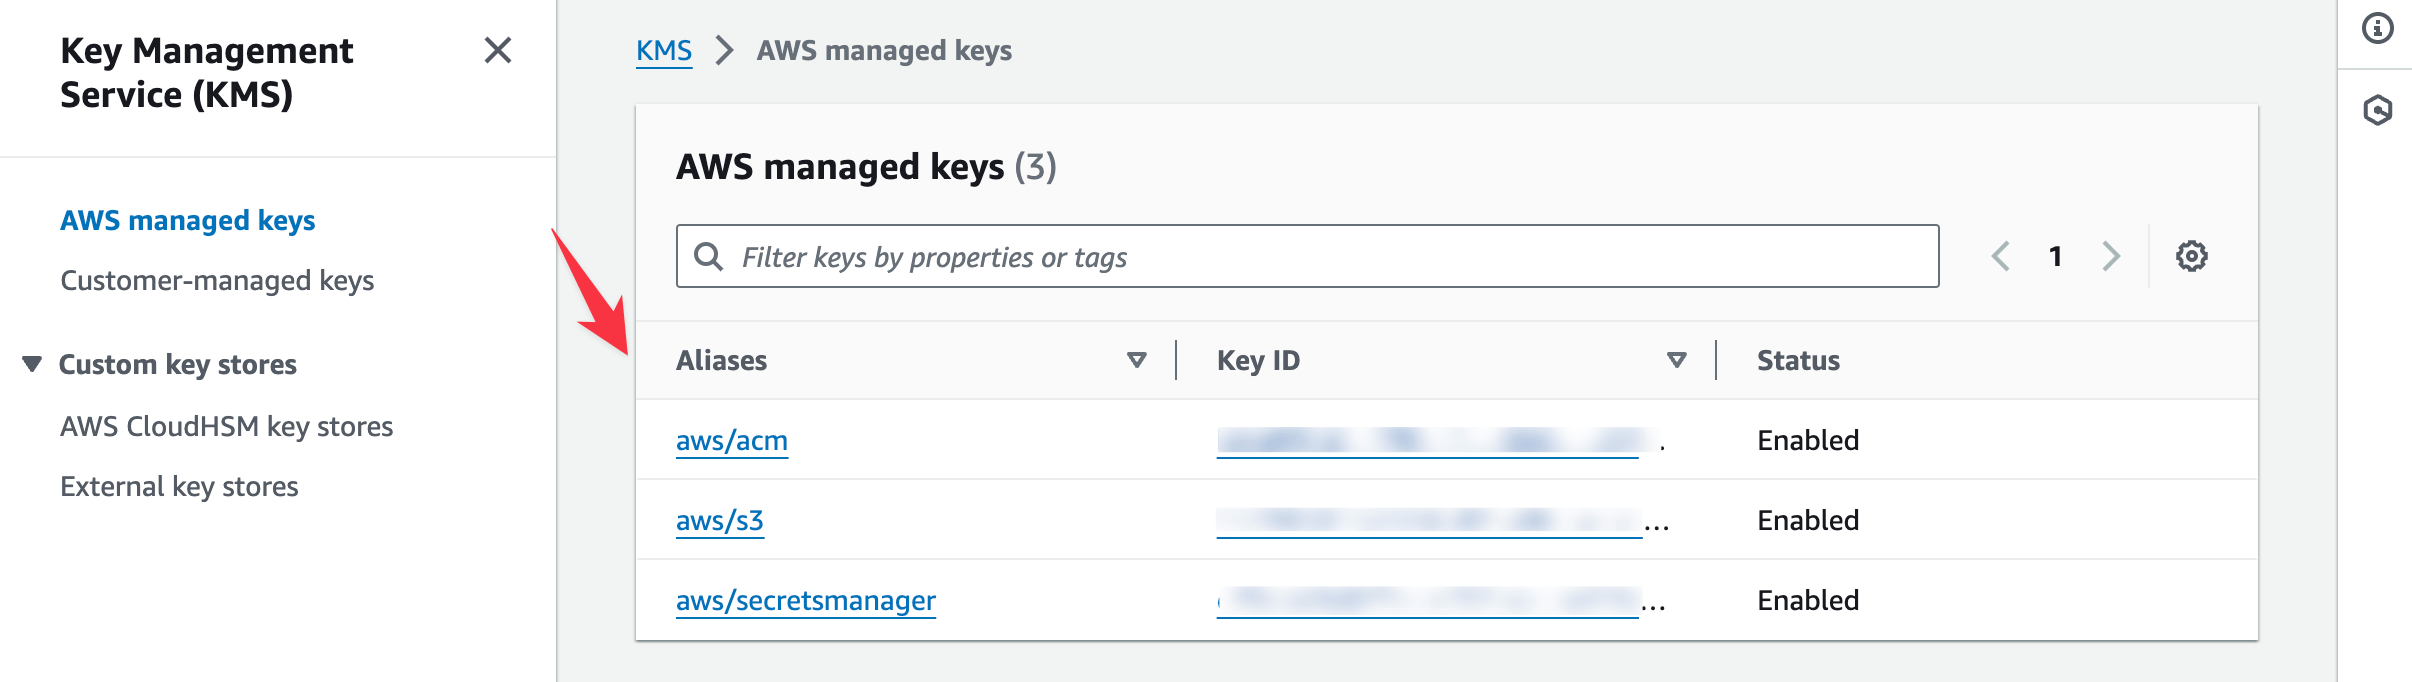
KMS
AWS Key Management Service (AWS KMS) lets you create, manage, and control cryptographic keys across your applications and AWS services. For more information, read the Amazon KMS documentation.
- Access AWS KMS by searching for "KMS" in the console search bar and selecting Key Management Service from the results.
- The Amazon KMS page lists the keys created while configuring your app.