Customizing the CNC template
Some things can’t be customized directly in the cnc.yml file. In the background, Coherence uses the CNC Framework to create Terraform scripts, ECS task definition files, and Cloud Run YAML files.
You can override these scripts and files using a specific structure containing customization files in your repository. You don’t need to install CNC locally; Coherence will run the CNC customizations for you.
Adding custom CNC templates
To customize the CNC templates, create a coherence directory in the root of your repository. In this directory, you can specify templates for Coherence to use during the provisioning, build, and deployment steps.
The coherence directory should have the following structure:
coherence
├── provision
│   └── main.tf.j2
├── build
│   └── main.sh.j2
└── deploy
    └── ecs_web_task.json.j2
You can create custom provisioning and build templates by extending the base templates. However, to create a custom deployment template, you need to copy the full ECS task definition from the Coherence CNC repository into your ecs_web_task.json.j2 file and modify it as needed.
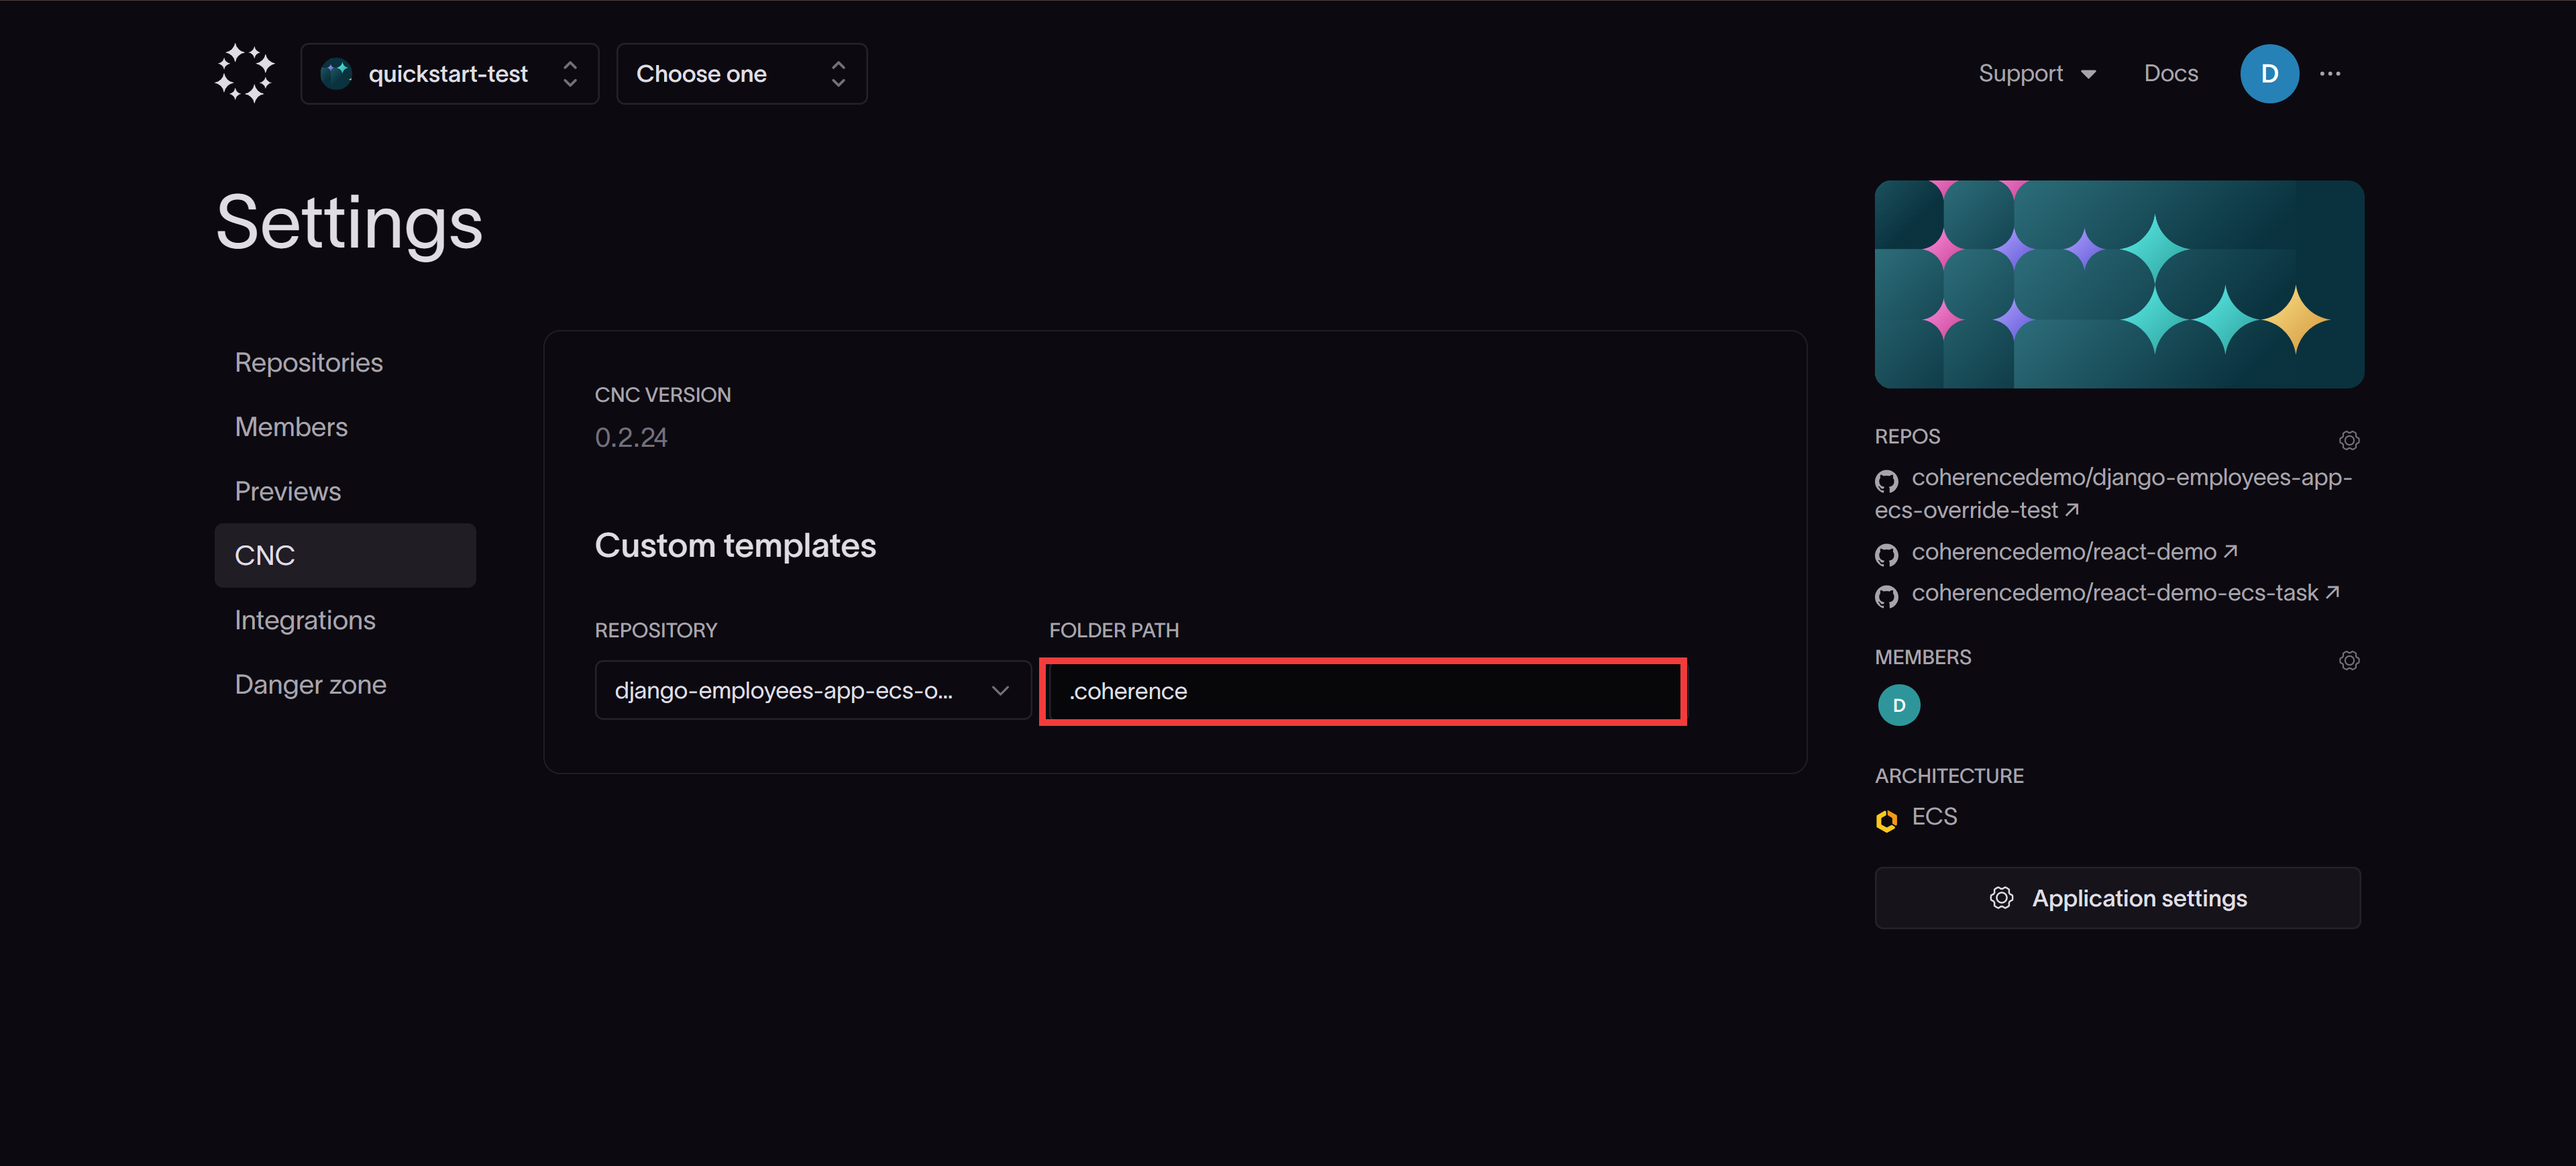
Once you've created your templates, you need to specify the path to the coherence directory in the CNC tab of your Application settings.

Template customization examples
1. Provisioning template
In the coherence/provision directory, create a main.tf.j2 file that extends the base template as follows:
{% extends "base.tf.j2" %}
{% block custom scoped %}
{{ super() }}
# Your Terraform resources here
{% endblock custom %}
2. Build script template
In the coherence/build directory, create a main.sh.j2 file that extends the base template as follows:
{% extends "base.sh.j2" %}
{% block build_commands %}
{{ super() }}
# Your commands here
{% endblock %}
3. ECS task template
To add your custom configurations to the ECS task definition, copy the complete ECS task template from the Coherence CNC repository into the ecs_web_task.json.j2 file in your coherence/deploy project directory and modify it as follows:
{
    "family": "{{ service.task_family }}",
    "containerDefinitions": [
        {
            "name": "web",
            "image": "{{ service.image }}",
            // Your custom container configuration
        },
        {
            "name": "custom-sidecar",
            "image": "custom-image:latest",
            // Your additional container configuration
        }
    ]
}
Note: ECS task definitions are only created for container-based applications on the Coherence platform.
Customizing ECS task definitions
Coherence uses Jinja2 templating to render ECS task definitions. You can customize the task definitions with your own configurations by adding to the ecs_web_task.json.j2 file that Coherence uses when deploying your application.
In this example, we'll customize the ECS task definition to implement AWS FireLens for advanced log routing.
Modifying the ECS task template
- Create an
ecs_web_task.json.j2file in thecoherence/deploydirectory of your repository. -
Copy the complete contents of the ECS task template to this file and modify it to include your FireLens configuration:
{
    "family": "{{ task_name }}",
    // ... other task configurations ...
    "containerDefinitions": [
        {
            // ... other container configurations ...
            "logConfiguration": {
                // Modified from base template: changed "awslogs" to "awsfirelens"
                "logDriver": "awsfirelens",
                // Options configured for Firelens
                "options": {
                    "Name": "cloudwatch",
                    "region": "{{ environment.collection.region }}",
                    "log_group_name": "{{ service.instance_name }}",
                    "log_stream_prefix": "{{ service.log_stream_prefix('web') }}"
                }
            },
        },
        // log-router added
        {
            "name": "log-router",
            "image": "public.ecr.aws/aws-observability/aws-for-fluent-bit:stable",
            "essential": true,
            "firelensConfiguration": {
                "type": "fluentbit"
            },
            "logConfiguration": {
                "logDriver": "awslogs",
                "options": {
                    "awslogs-group": "{{ service.instance_name }}",
                    "awslogs-region": "{{ environment.collection.region }}",
                    "awslogs-stream-prefix": "{{ service.log_stream_prefix('firelens') }}"
                }
            },
            "memoryReservation": 50
        }
    ]
}
The key modifications in this example include:
- Adding a new
log-routercontainer for FireLens - Modifying the web container's
logConfigurationto useawsfirelensand Firelens-specificoptionslikeName, which indicates the log-forwarding mechanism (e.g.cloudwatch),region, and other log group customizations. - Configuring the FireLens log router to forward logs to CloudWatch
- Adding a new
-
Next, you'll need to specify the path to your
coherencedirectory in the CNC tab of your Application settings.
Verifying the changes
After deploying your application with a customized task definition, verify your changes by checking the task definition in the AWS ECS console or by running the following command in the AWS CLI:
aws ecs describe-task-definition --task-definition <your-task-definition-name> --region <your-region>
In the output, you should see the following:
- A
logConfigurationusing theawsfirelenslog driver for your main container - A second container, named
log-router, with the FireLens configuration - A
firelensConfigurationsection specifying the use of Fluent Bit in thelog-routercontainer
Customizing provisioning
In this example, we'll customize the provision step by adding a custom S3 bucket to the infrastructure.
Extending the base provisioning template
Create a file named main.tf.j2 in your coherence/provision directory with the following content:
{% extends "base.tf.j2" %}
{% block custom scoped %}
{{ super() }}
resource "aws_s3_bucket" "test_bucket" {
  bucket = "my-basic-test-bucket"
}
{% endblock custom %}
This Terraform template extends the base provisioning template and adds a new S3 bucket resource. The {{ super() }} call ensures that all default provisioning resources are created alongside your custom bucket.
Verifying the provisioning changes
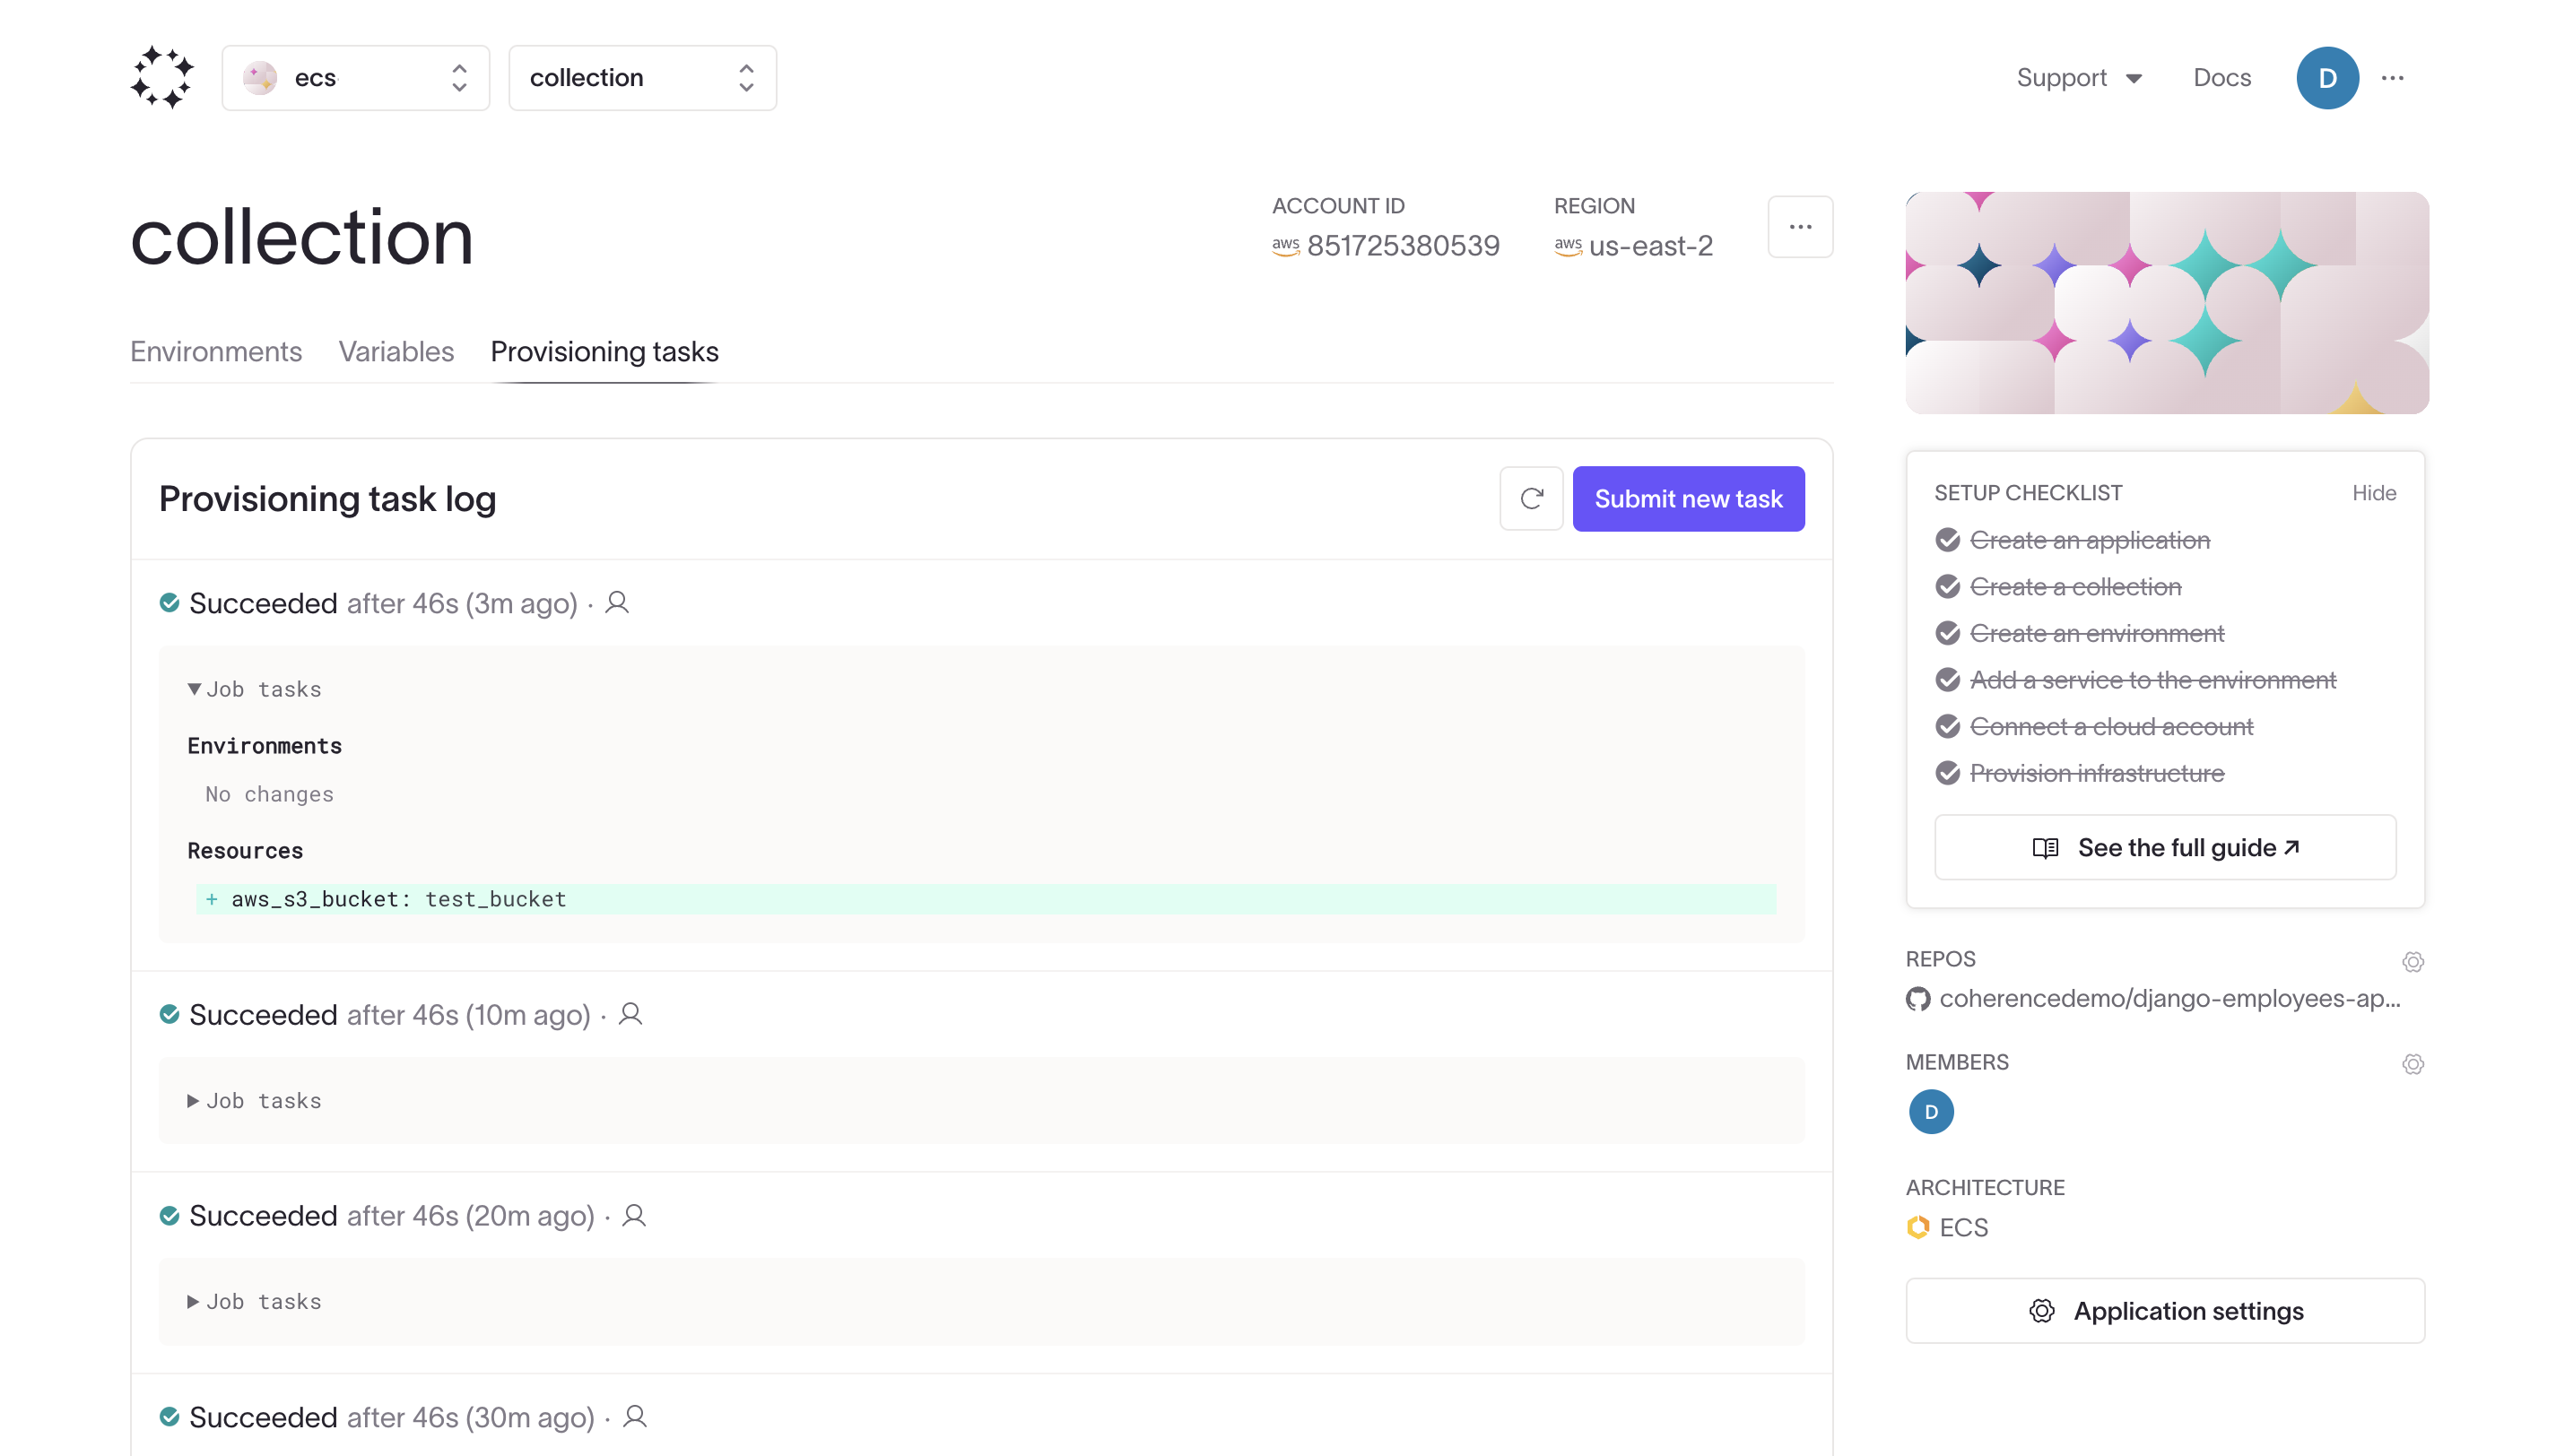
Trigger a provisioning task in the Coherence UI to verify that your custom S3 bucket has been created successfully.
You should see the custom bucket listed among the created Resources:

Customizing deployment
In this example, we'll customize the deployment process by overriding the deployment script template.
Extending the base deployment script
Create a file named main.sh.j2 in your coherence/deploy directory:
{% extends "base.sh.j2" %}
{% block build_commands %}
{{ super() }}
enable_execute_command() {
    aws ecs update-service \
        --region {{ environment.collection.region }} \
        --cluster {{ environment.collection.instance_name }} \
        --service {{ service.instance_name }} \
        --enable-execute-command
}
enable_execute_command
{% endblock %}
This script extends the base deployment script and introduces a custom function, enable_execute_command, which enables the ECS Execute Command feature for your service after the standard deployment steps are completed. The {{ super() }} call ensures that all original deployment commands are executed before the custom function.
Verifying the deployment changes
After deploying your application with this customization, verify that the ECS Execute Command feature has been enabled by running the following AWS CLI command:
aws ecs describe-services --cluster <your-cluster-name> --services <your-service-name> --region <your-region>
In the output, look for the enableExecuteCommand field. It should be set to true, indicating that the ECS Execute Command feature has been successfully enabled for your service.