Quick start
This guide will take you through deploying your first application on Coherence. Specifically, it will show you how to:
- Create a new application
- Create a collection
- Create an environment
- Add a service
- Connect your cloud account
- Provision infrastructure
- Build and deploy your application
After following this guide, you'll have a basic React application deployed to your cloud (AWS or GCP), hosted on a Coherence URL. It will look like this.
Prerequisites
To follow along, you'll need:
- A Coherence account. Sign up at withcoherence.com.
- A GitHub account. Sign up at github.com.
- Administrator access to a Google Cloud or AWS account.
- An application to deploy. If you don't have an application to deploy, you can fork our example React application to your GitHub account to use in this guide.
Create an application
In Coherence, an app is an abstract space that defines your application. A Coherence app links to your GitHub repository, but also defines one or more collections (loosely equivalent to cloud accounts) and one or more environments (for example, staging and production), and contains CNC configuration to define how parts of your application fit together (for example, backend, frontend, and database).
On your Coherence dashboard, click New app in the top-left dropdown to open the New app dialog.
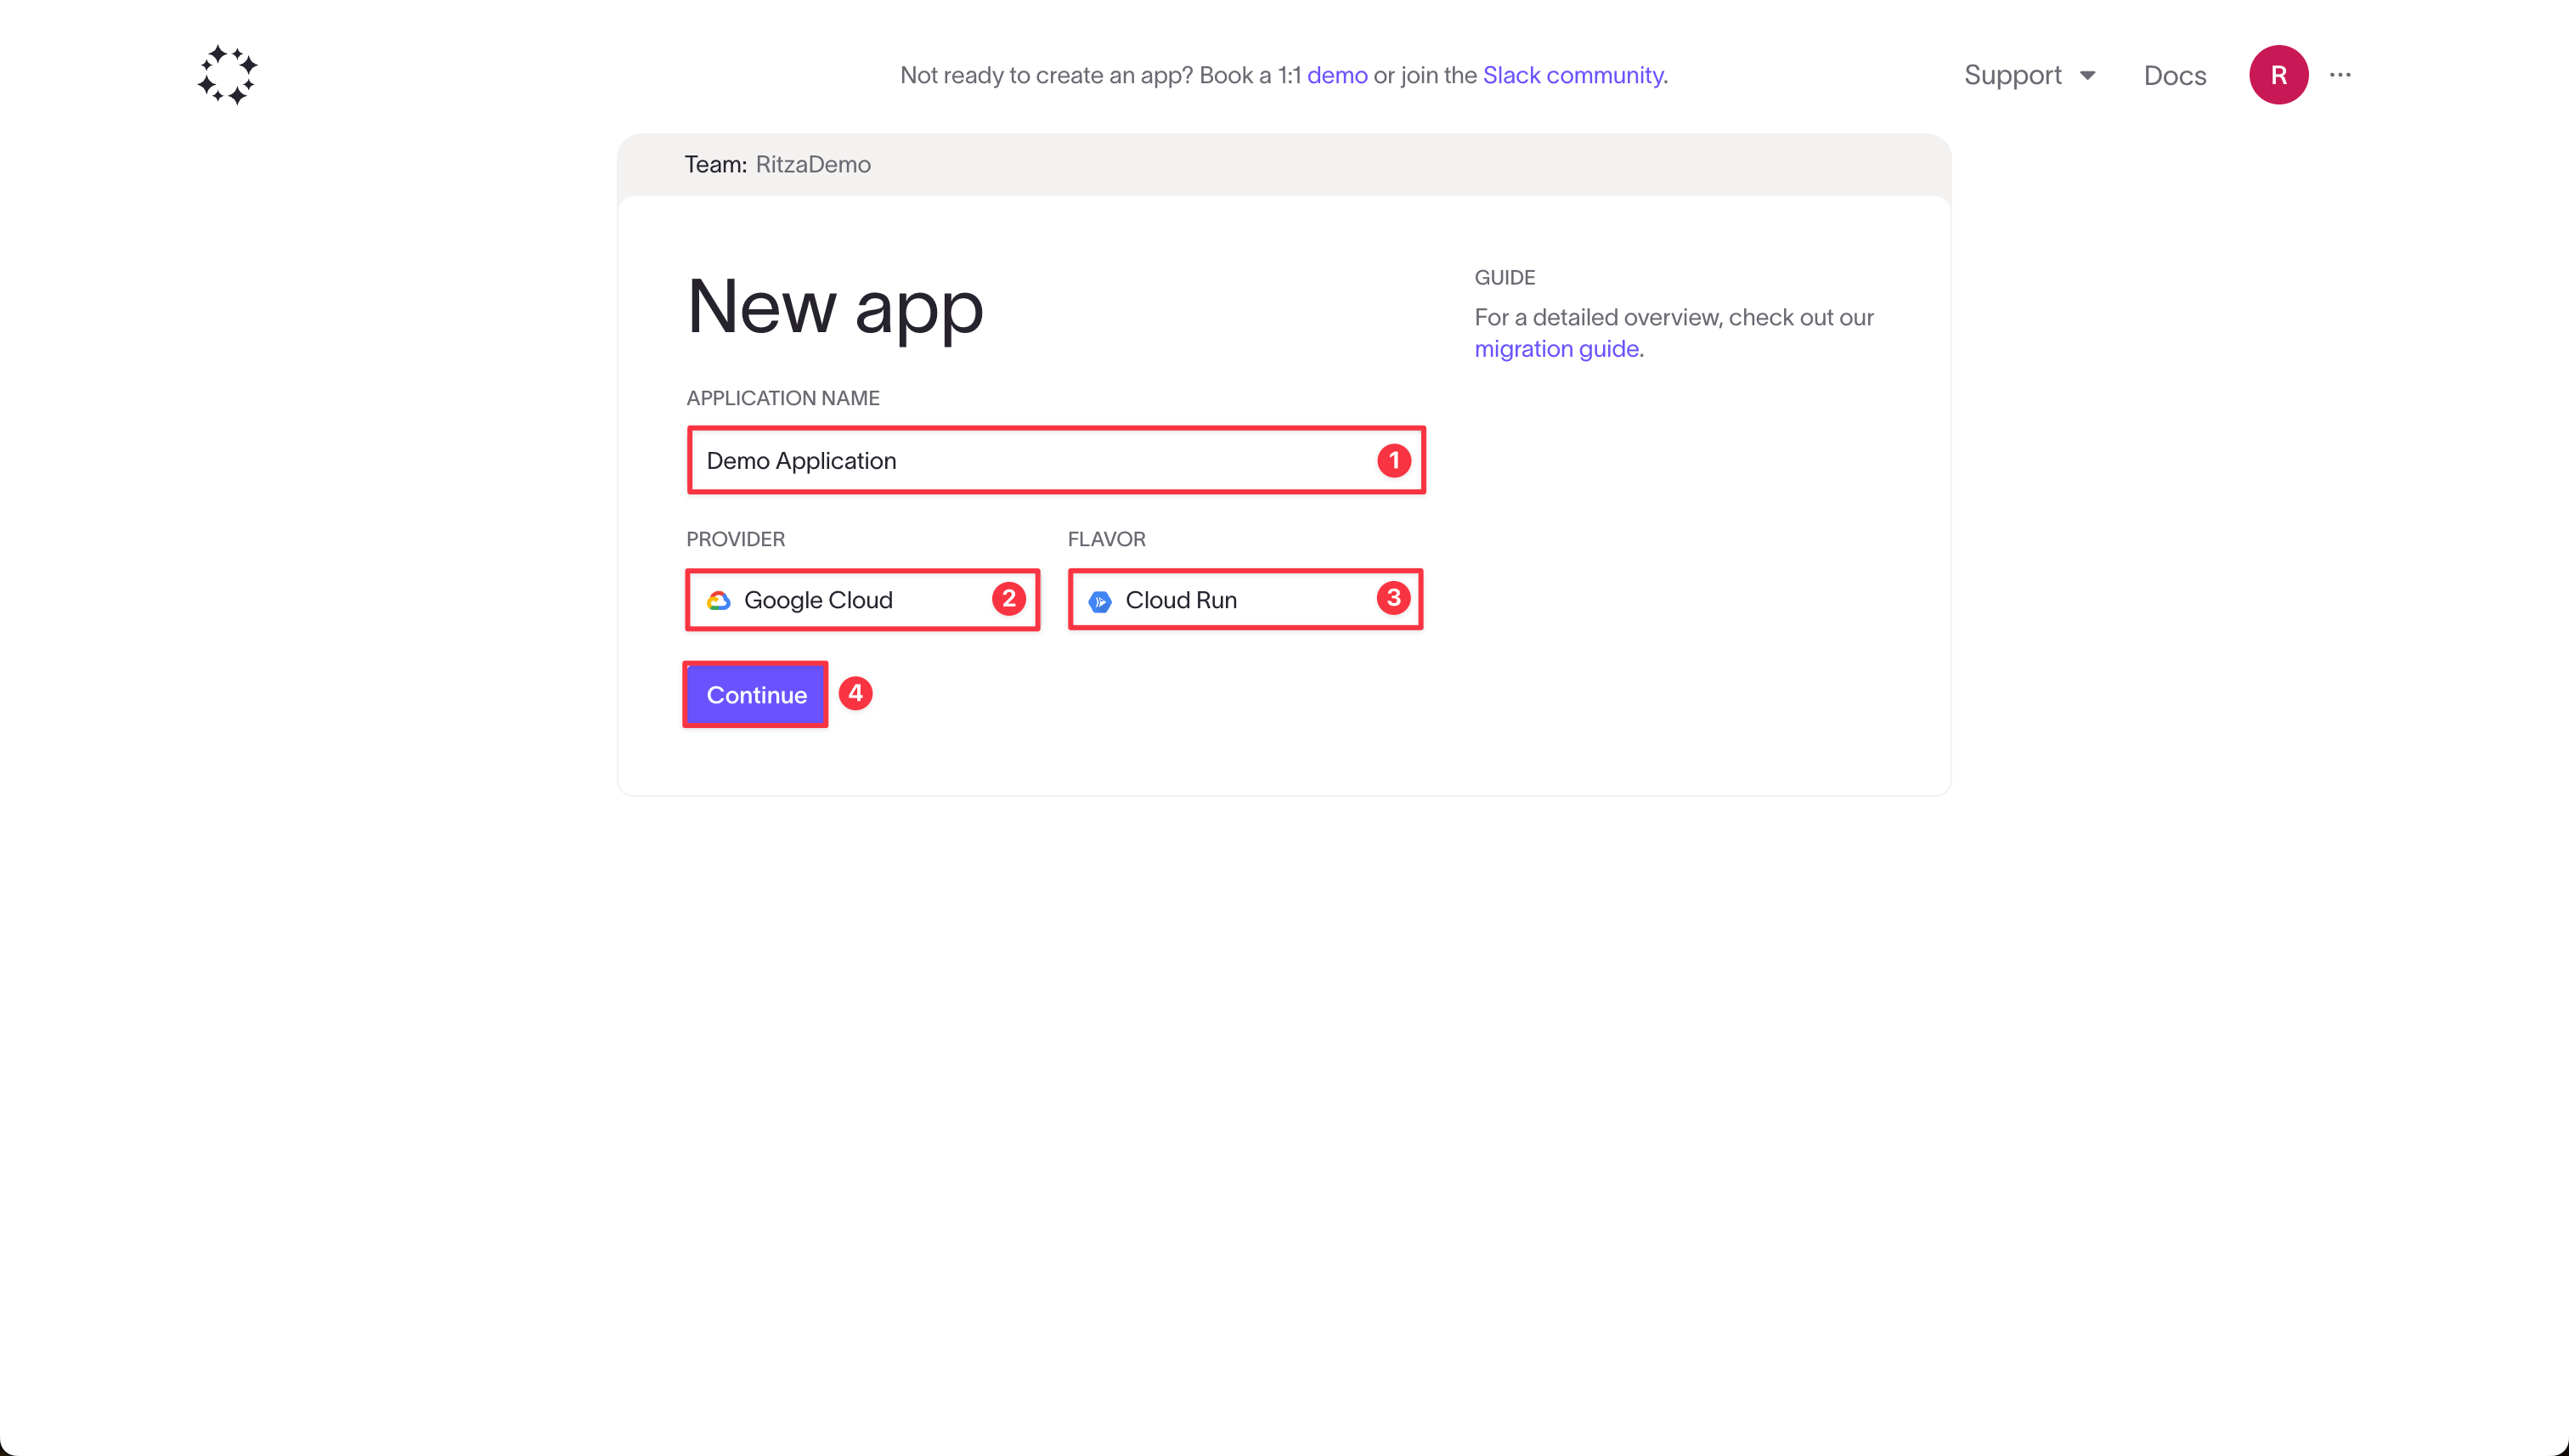
- Give the app a name.
- Choose Amazon AWS or Google Cloud for the provider, depending on where you want your application to be deployed.
- Choose a deployment flavor for your application. If you're unsure which to pick, choose Cloud Run for Google Cloud or ECS for AWS.
- Click Continue.
Create a collection
A collection is loosely equivalent to a cloud account. For example, you might have separate clouds for staging and production, or for different customers.
Click Create collection.
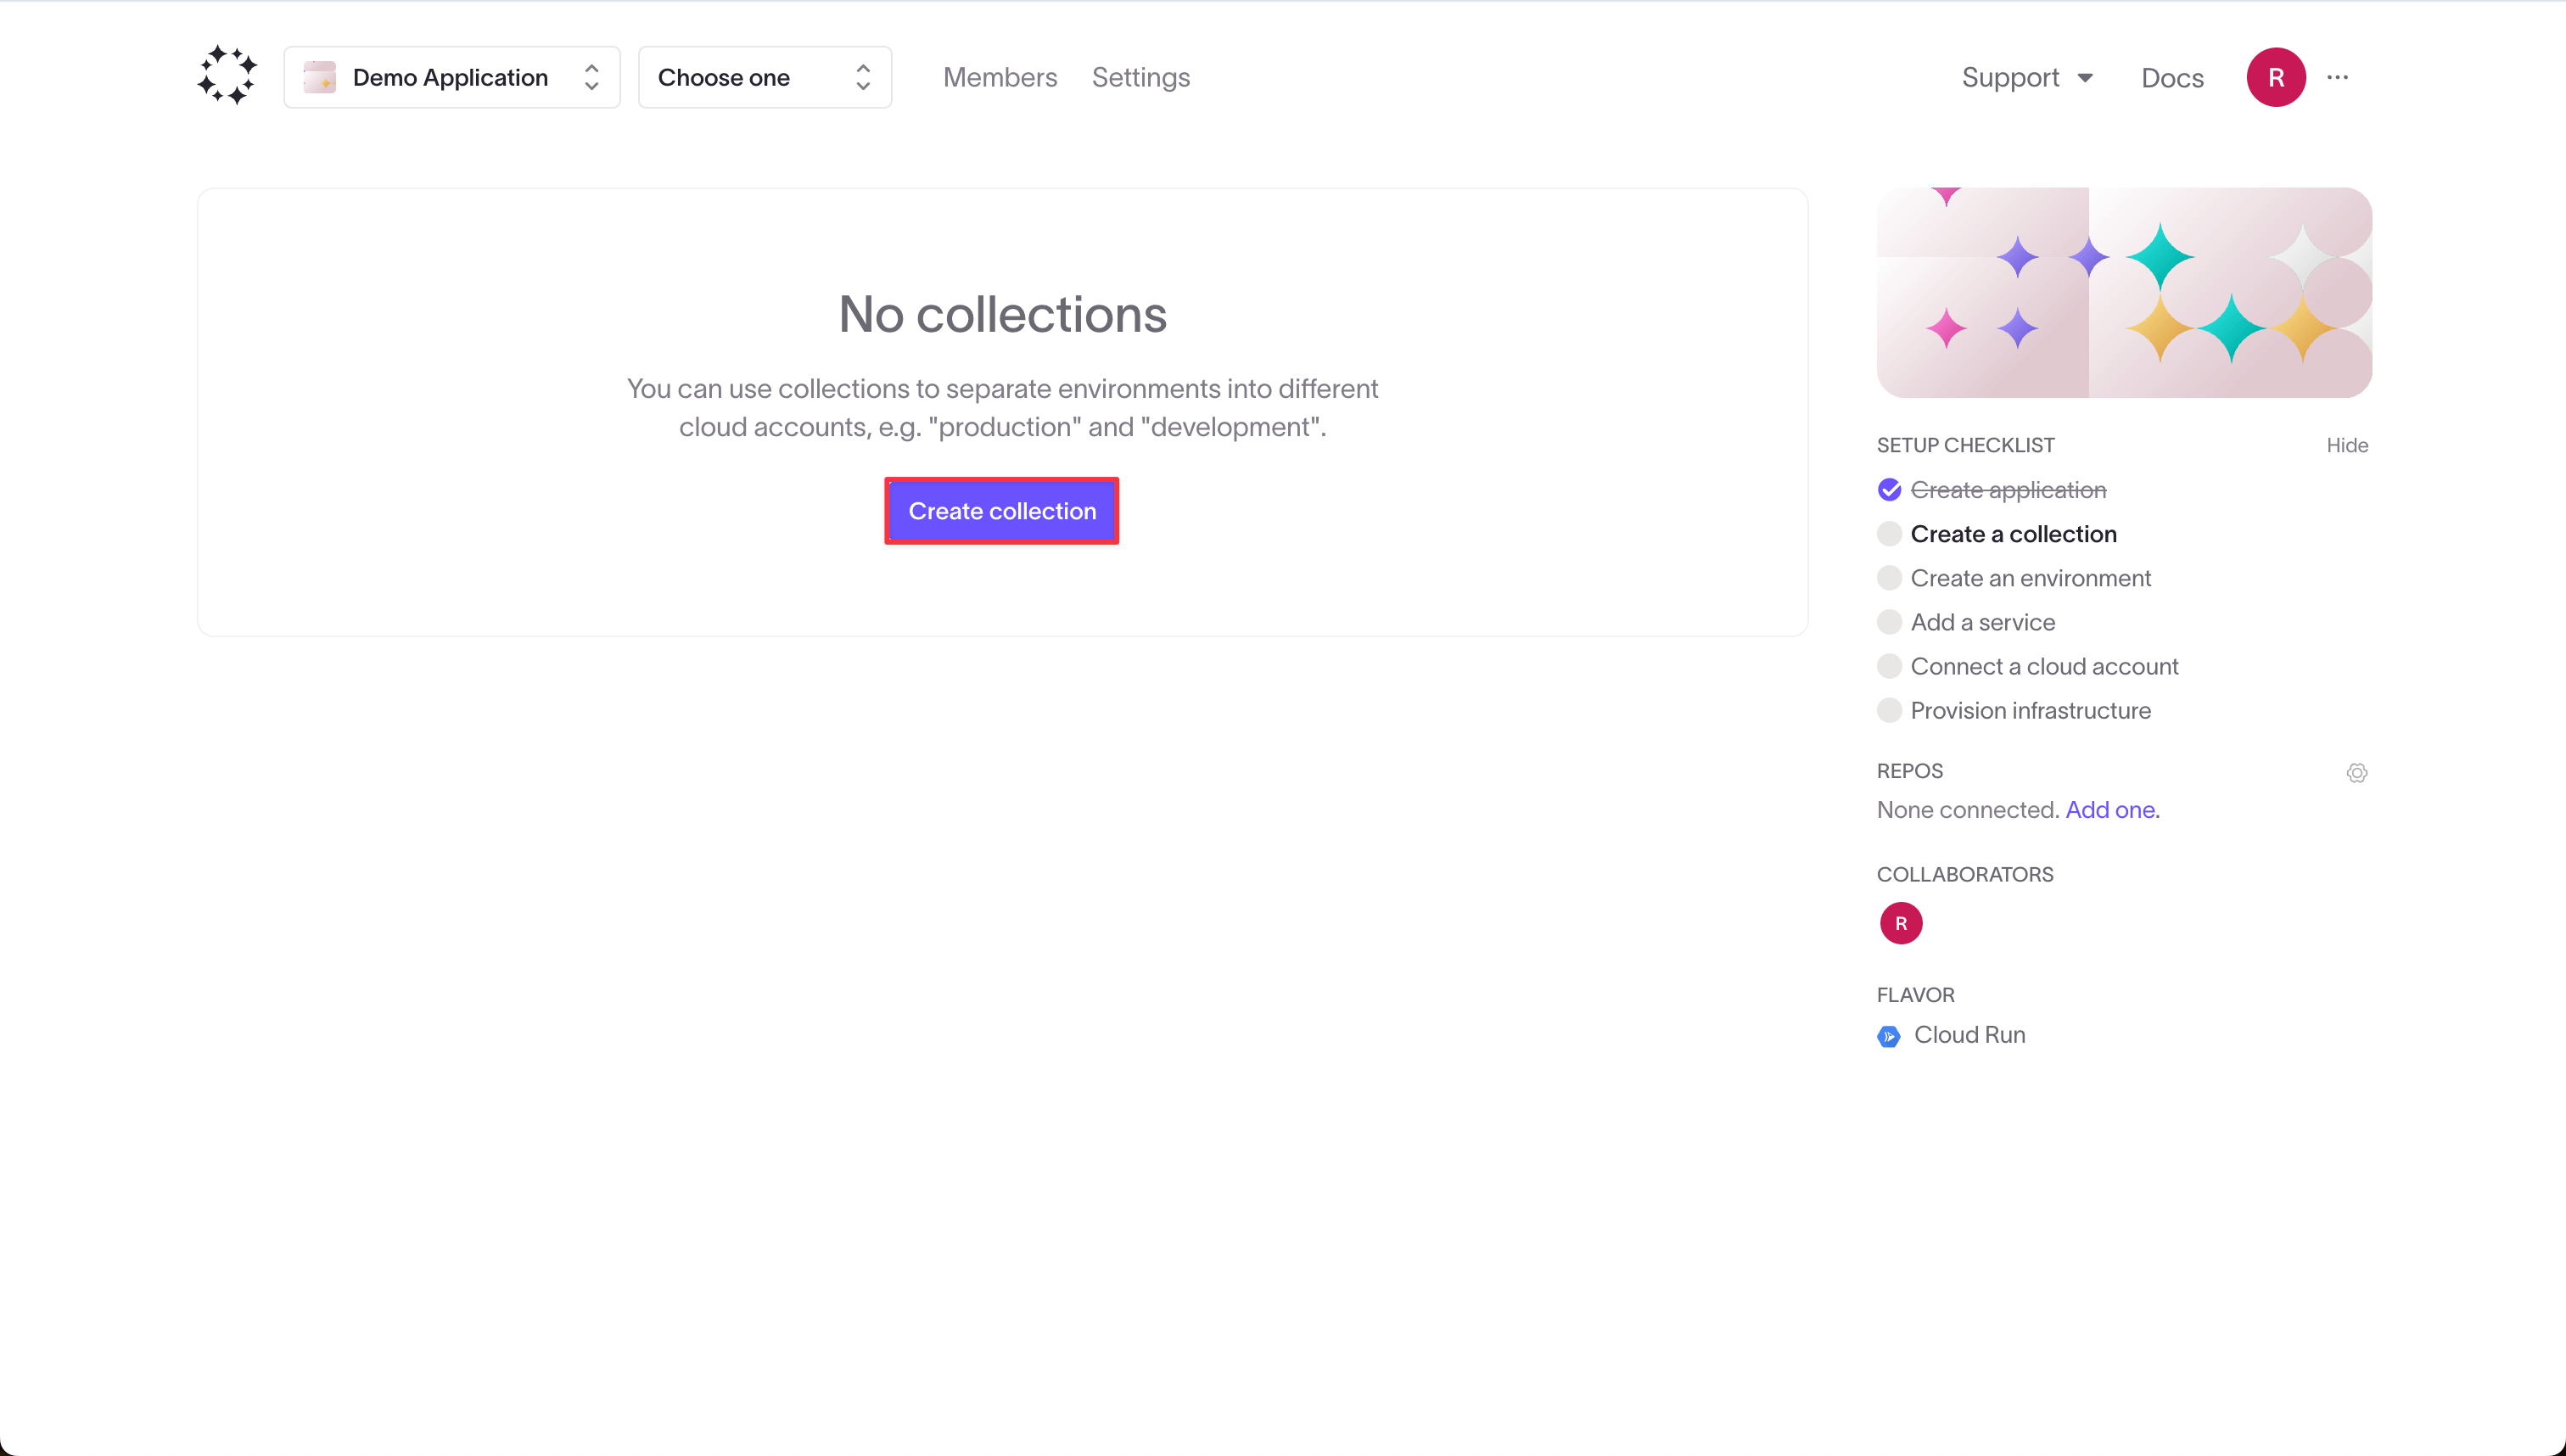
Give your collection a name, like "development".
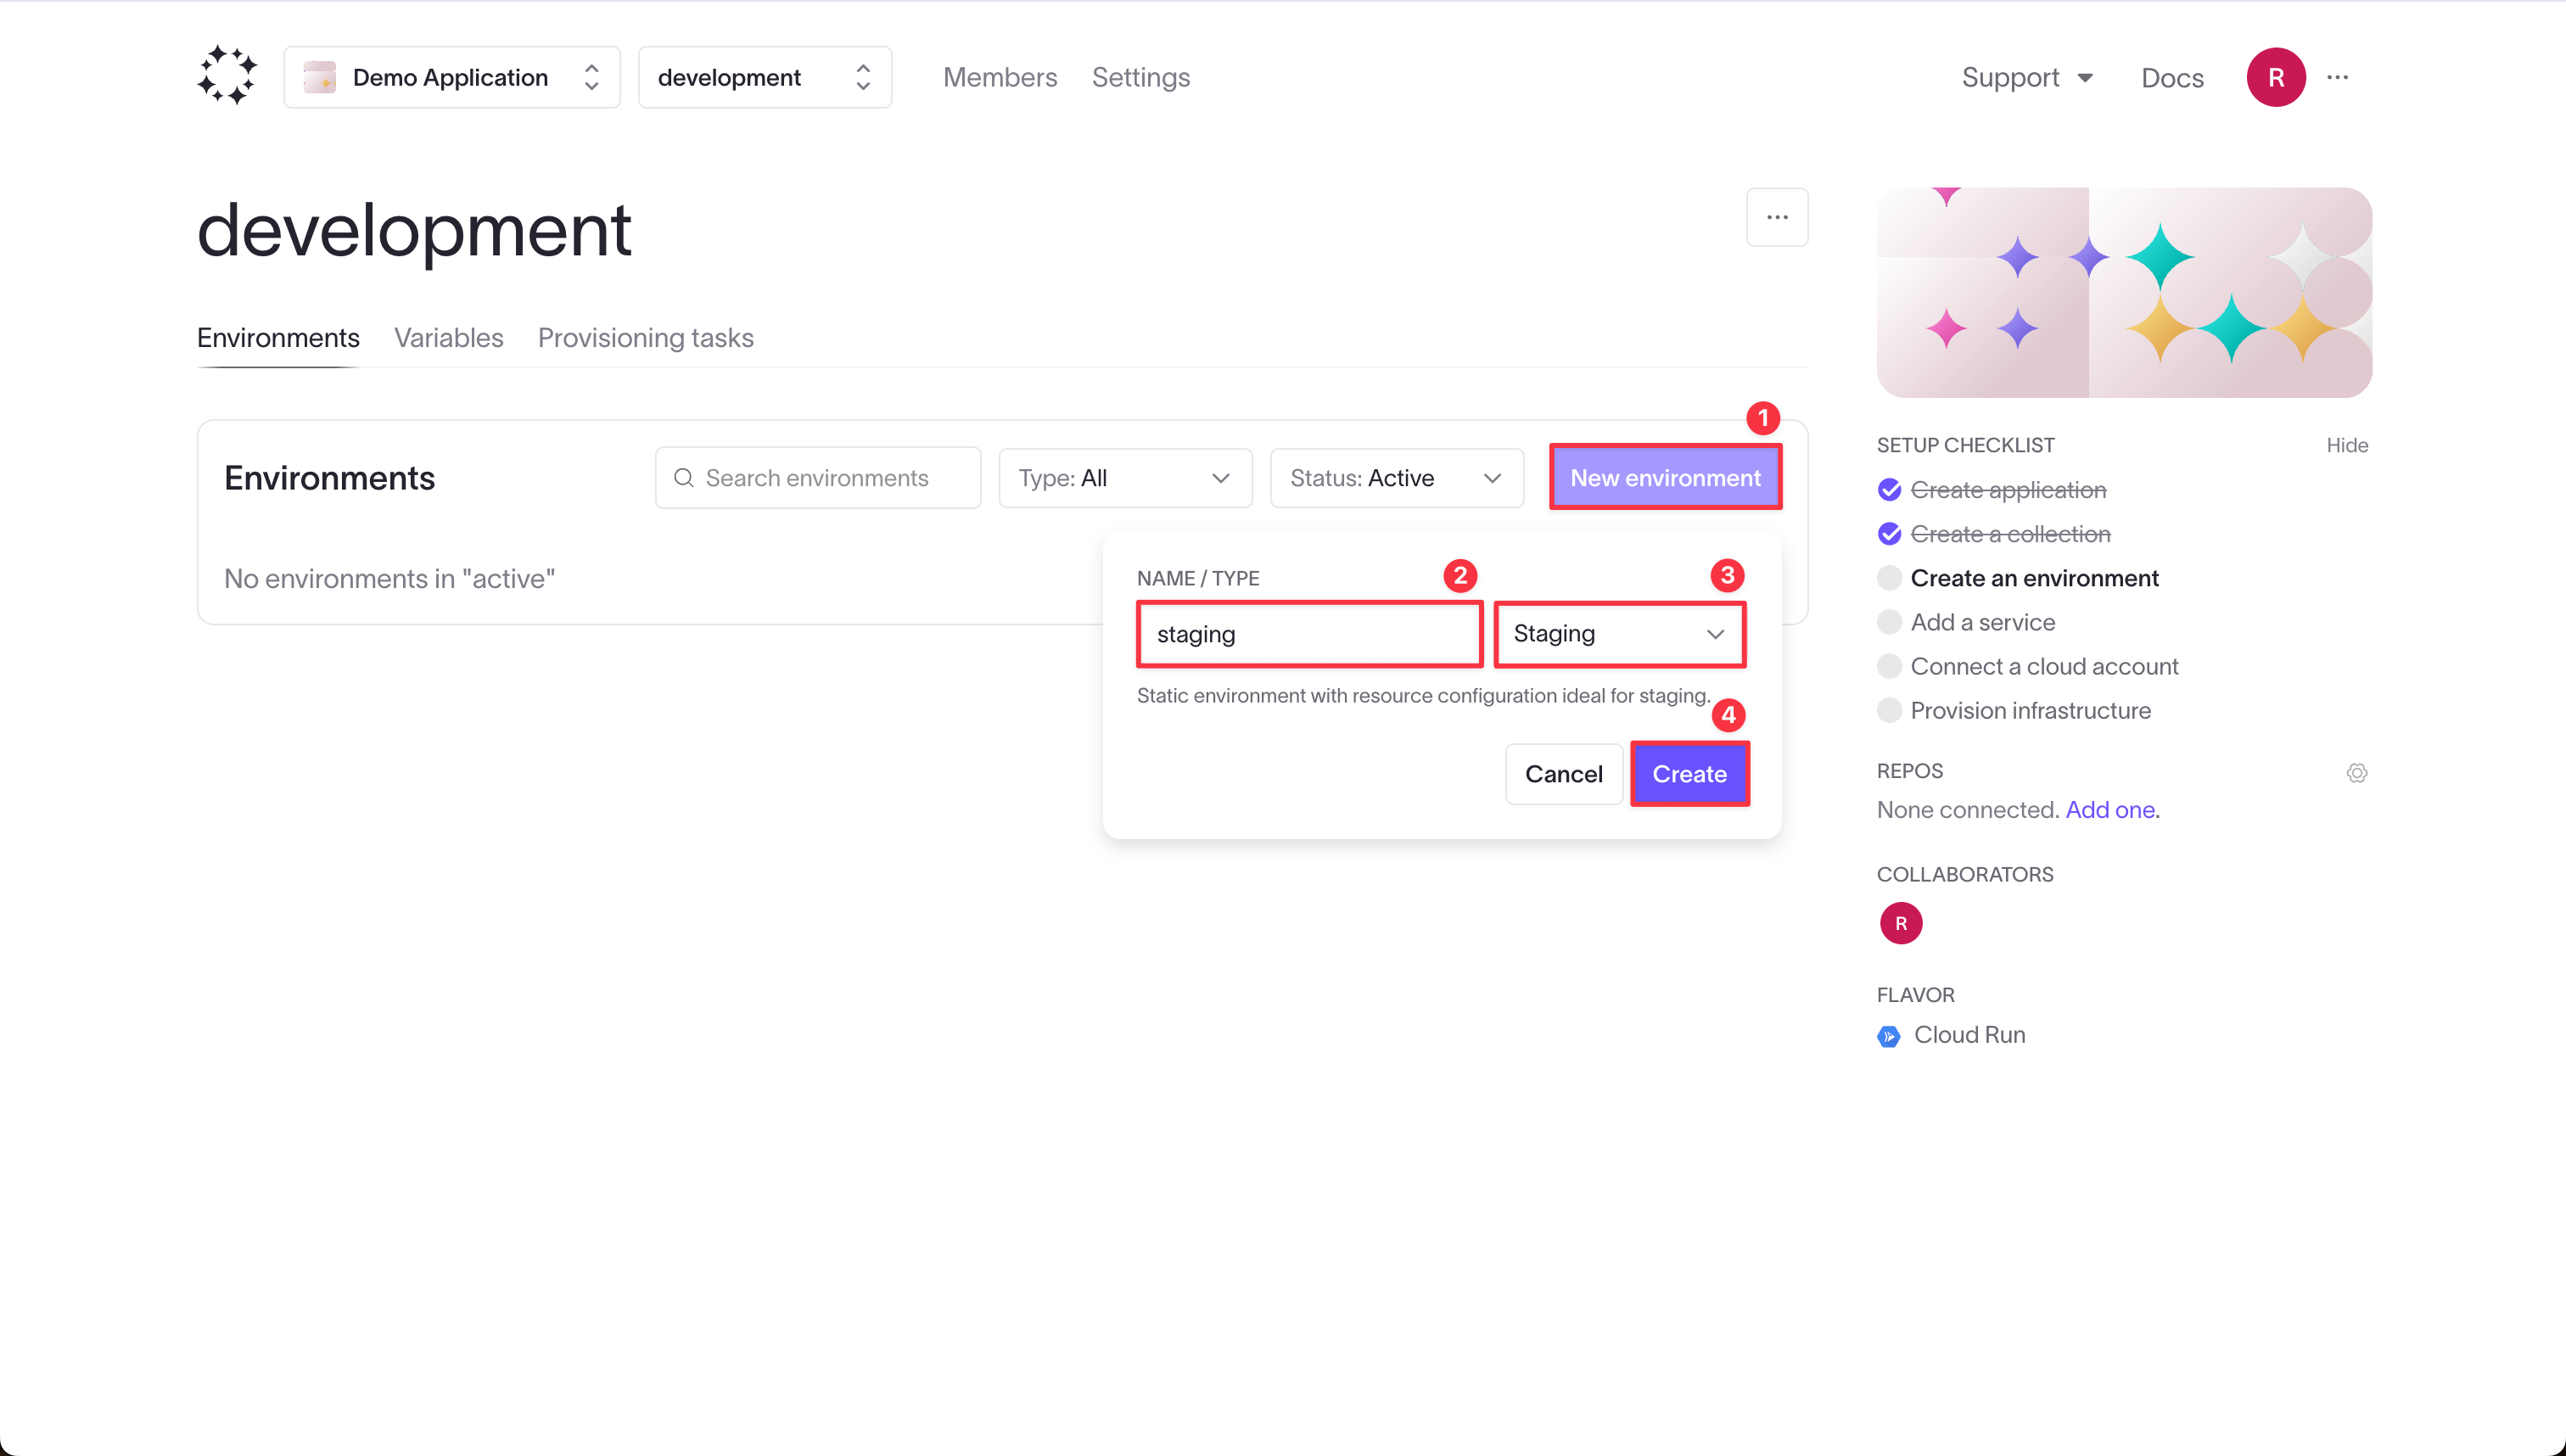
Create an environment
Each collection can have one or more environments. Environments can map to your collections but they do not have to. For example, you might have "Preview" and "Staging" environments in your "Development" collection, and a "Production" environment in your "Production" collection.
- Click New environment.
- Give your environment a name, like "staging".
- Choose "Staging" as the environment type. This is a long-lived environment that will use fewer resources than a "Production" environment.
- Press Create.
Add a service
An application can consist of multiple services (for example, "backend" and "frontend"), but we'll only use one for this demonstration.
Click on your environment, navigate to the Services tab, and click to create a new frontend.
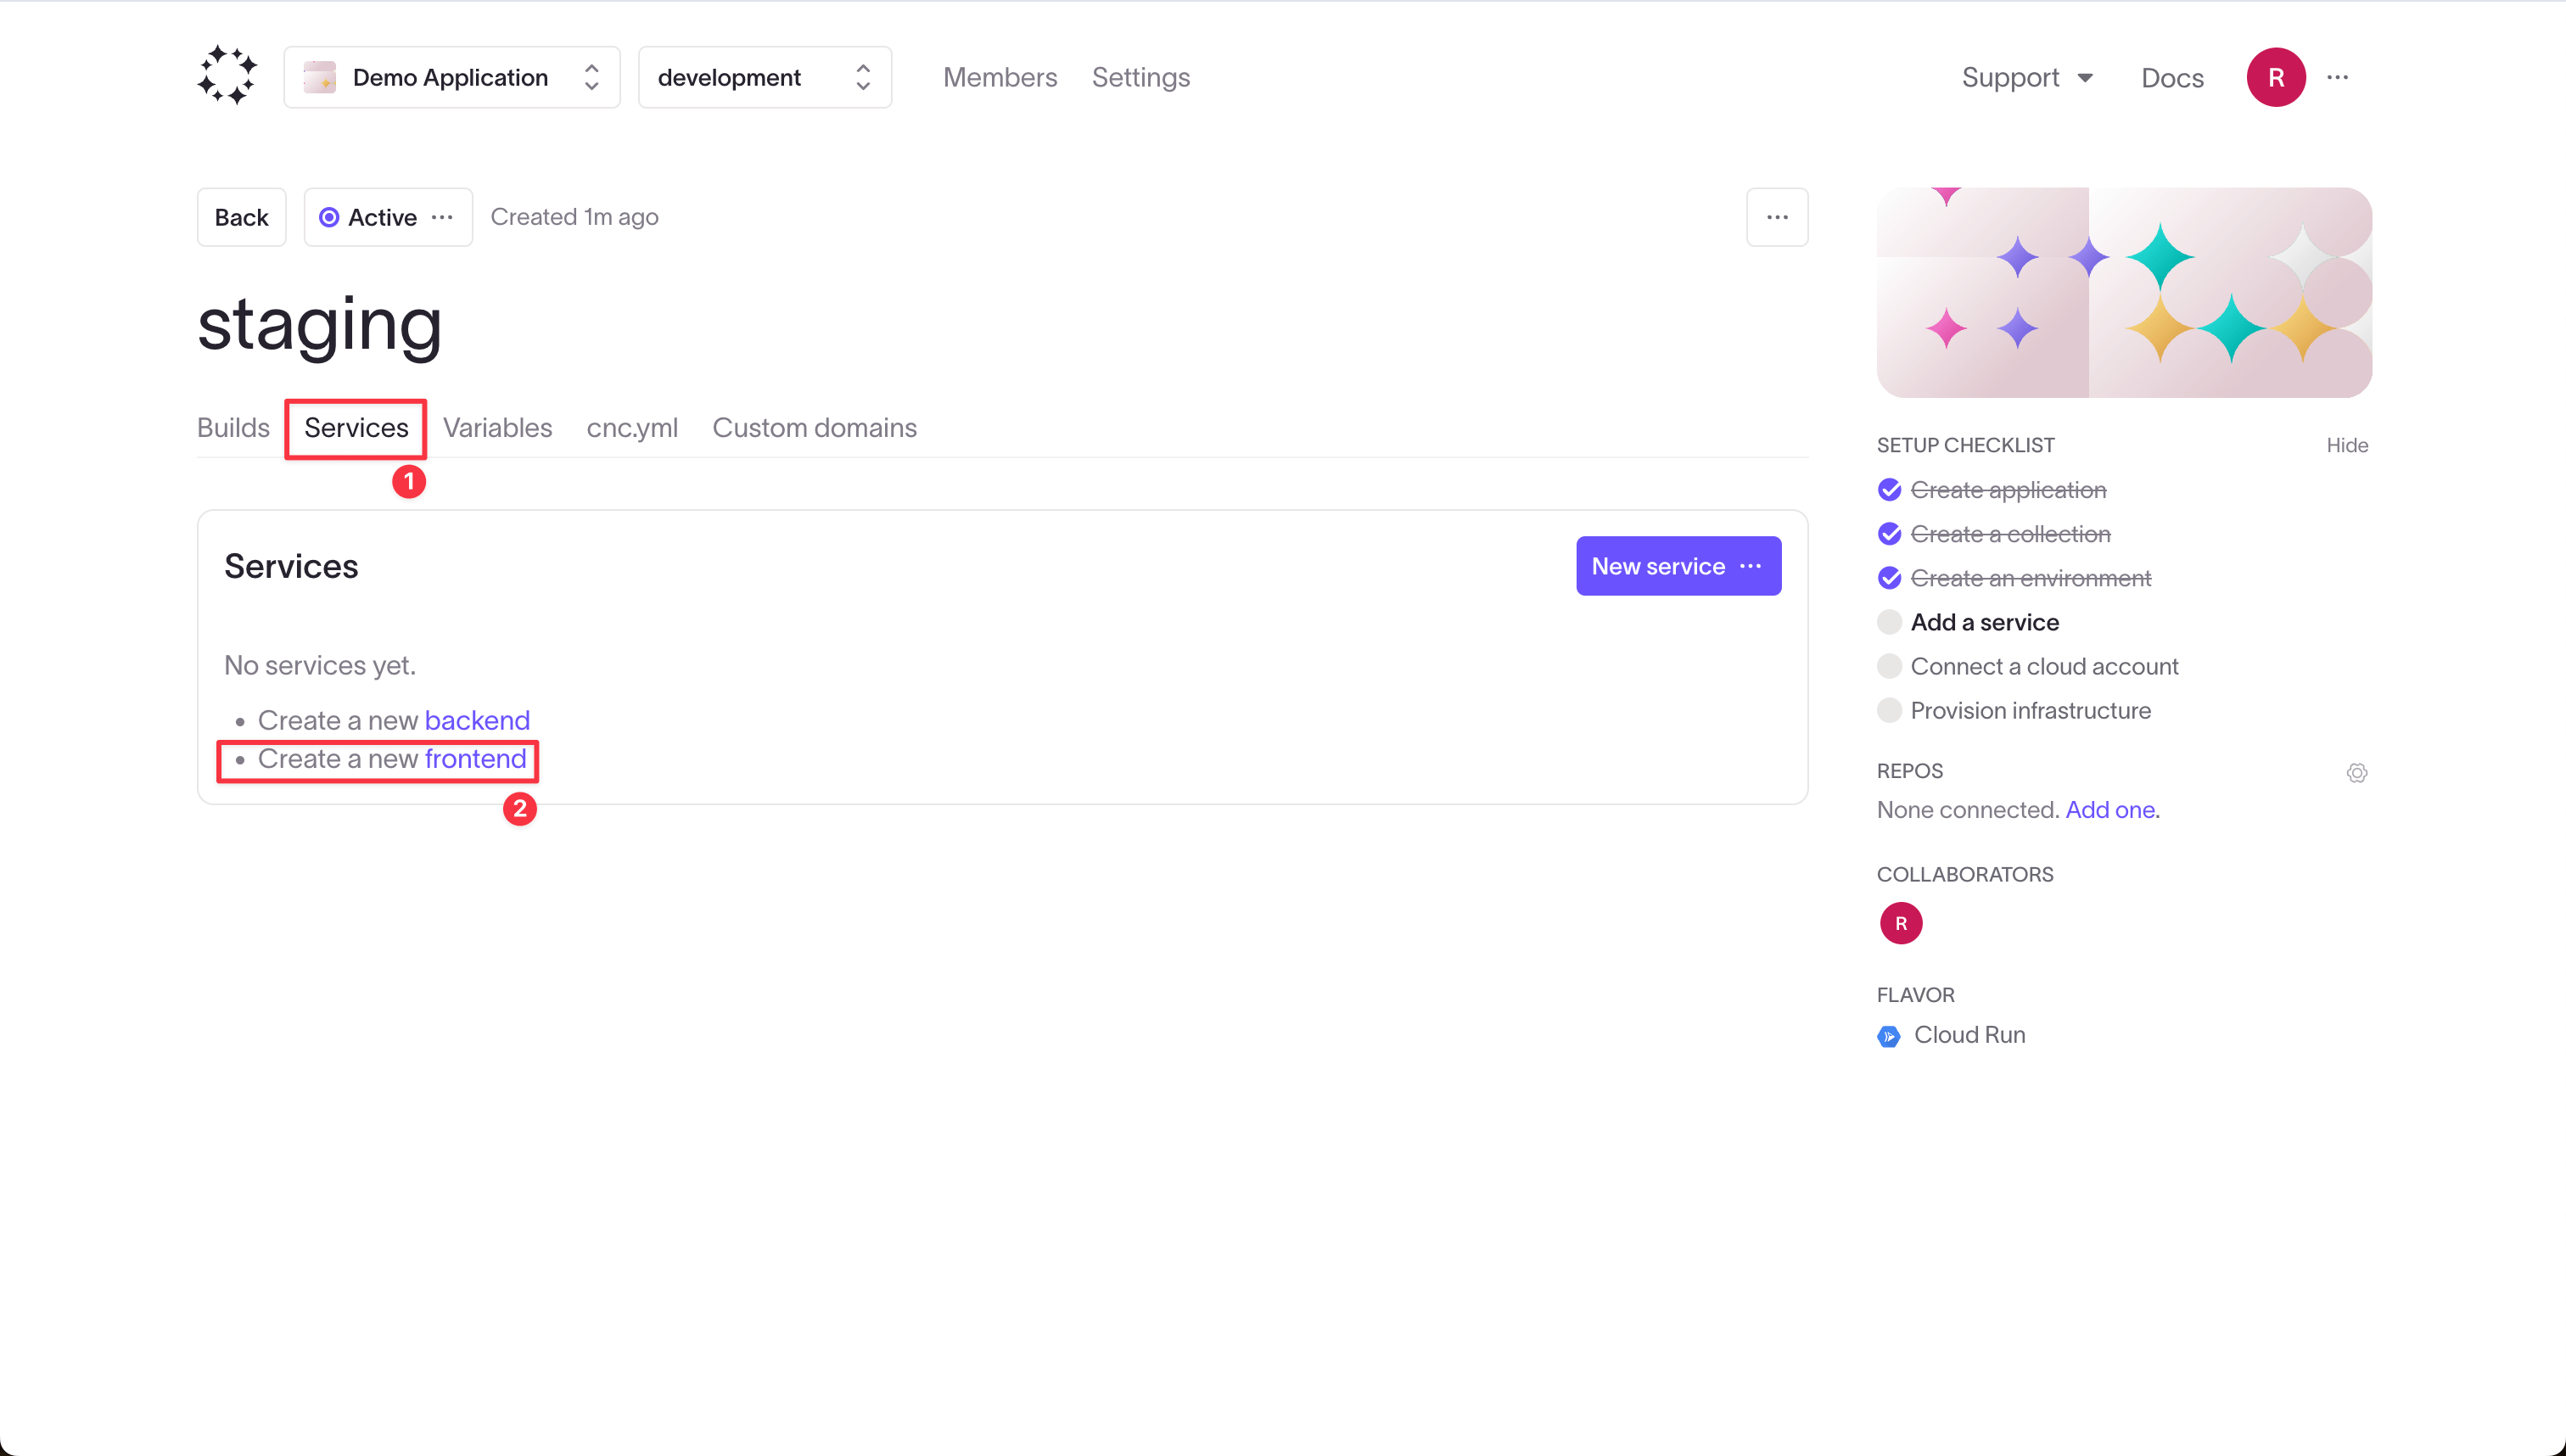
The next step will build the cnc.yaml file that defines your application.
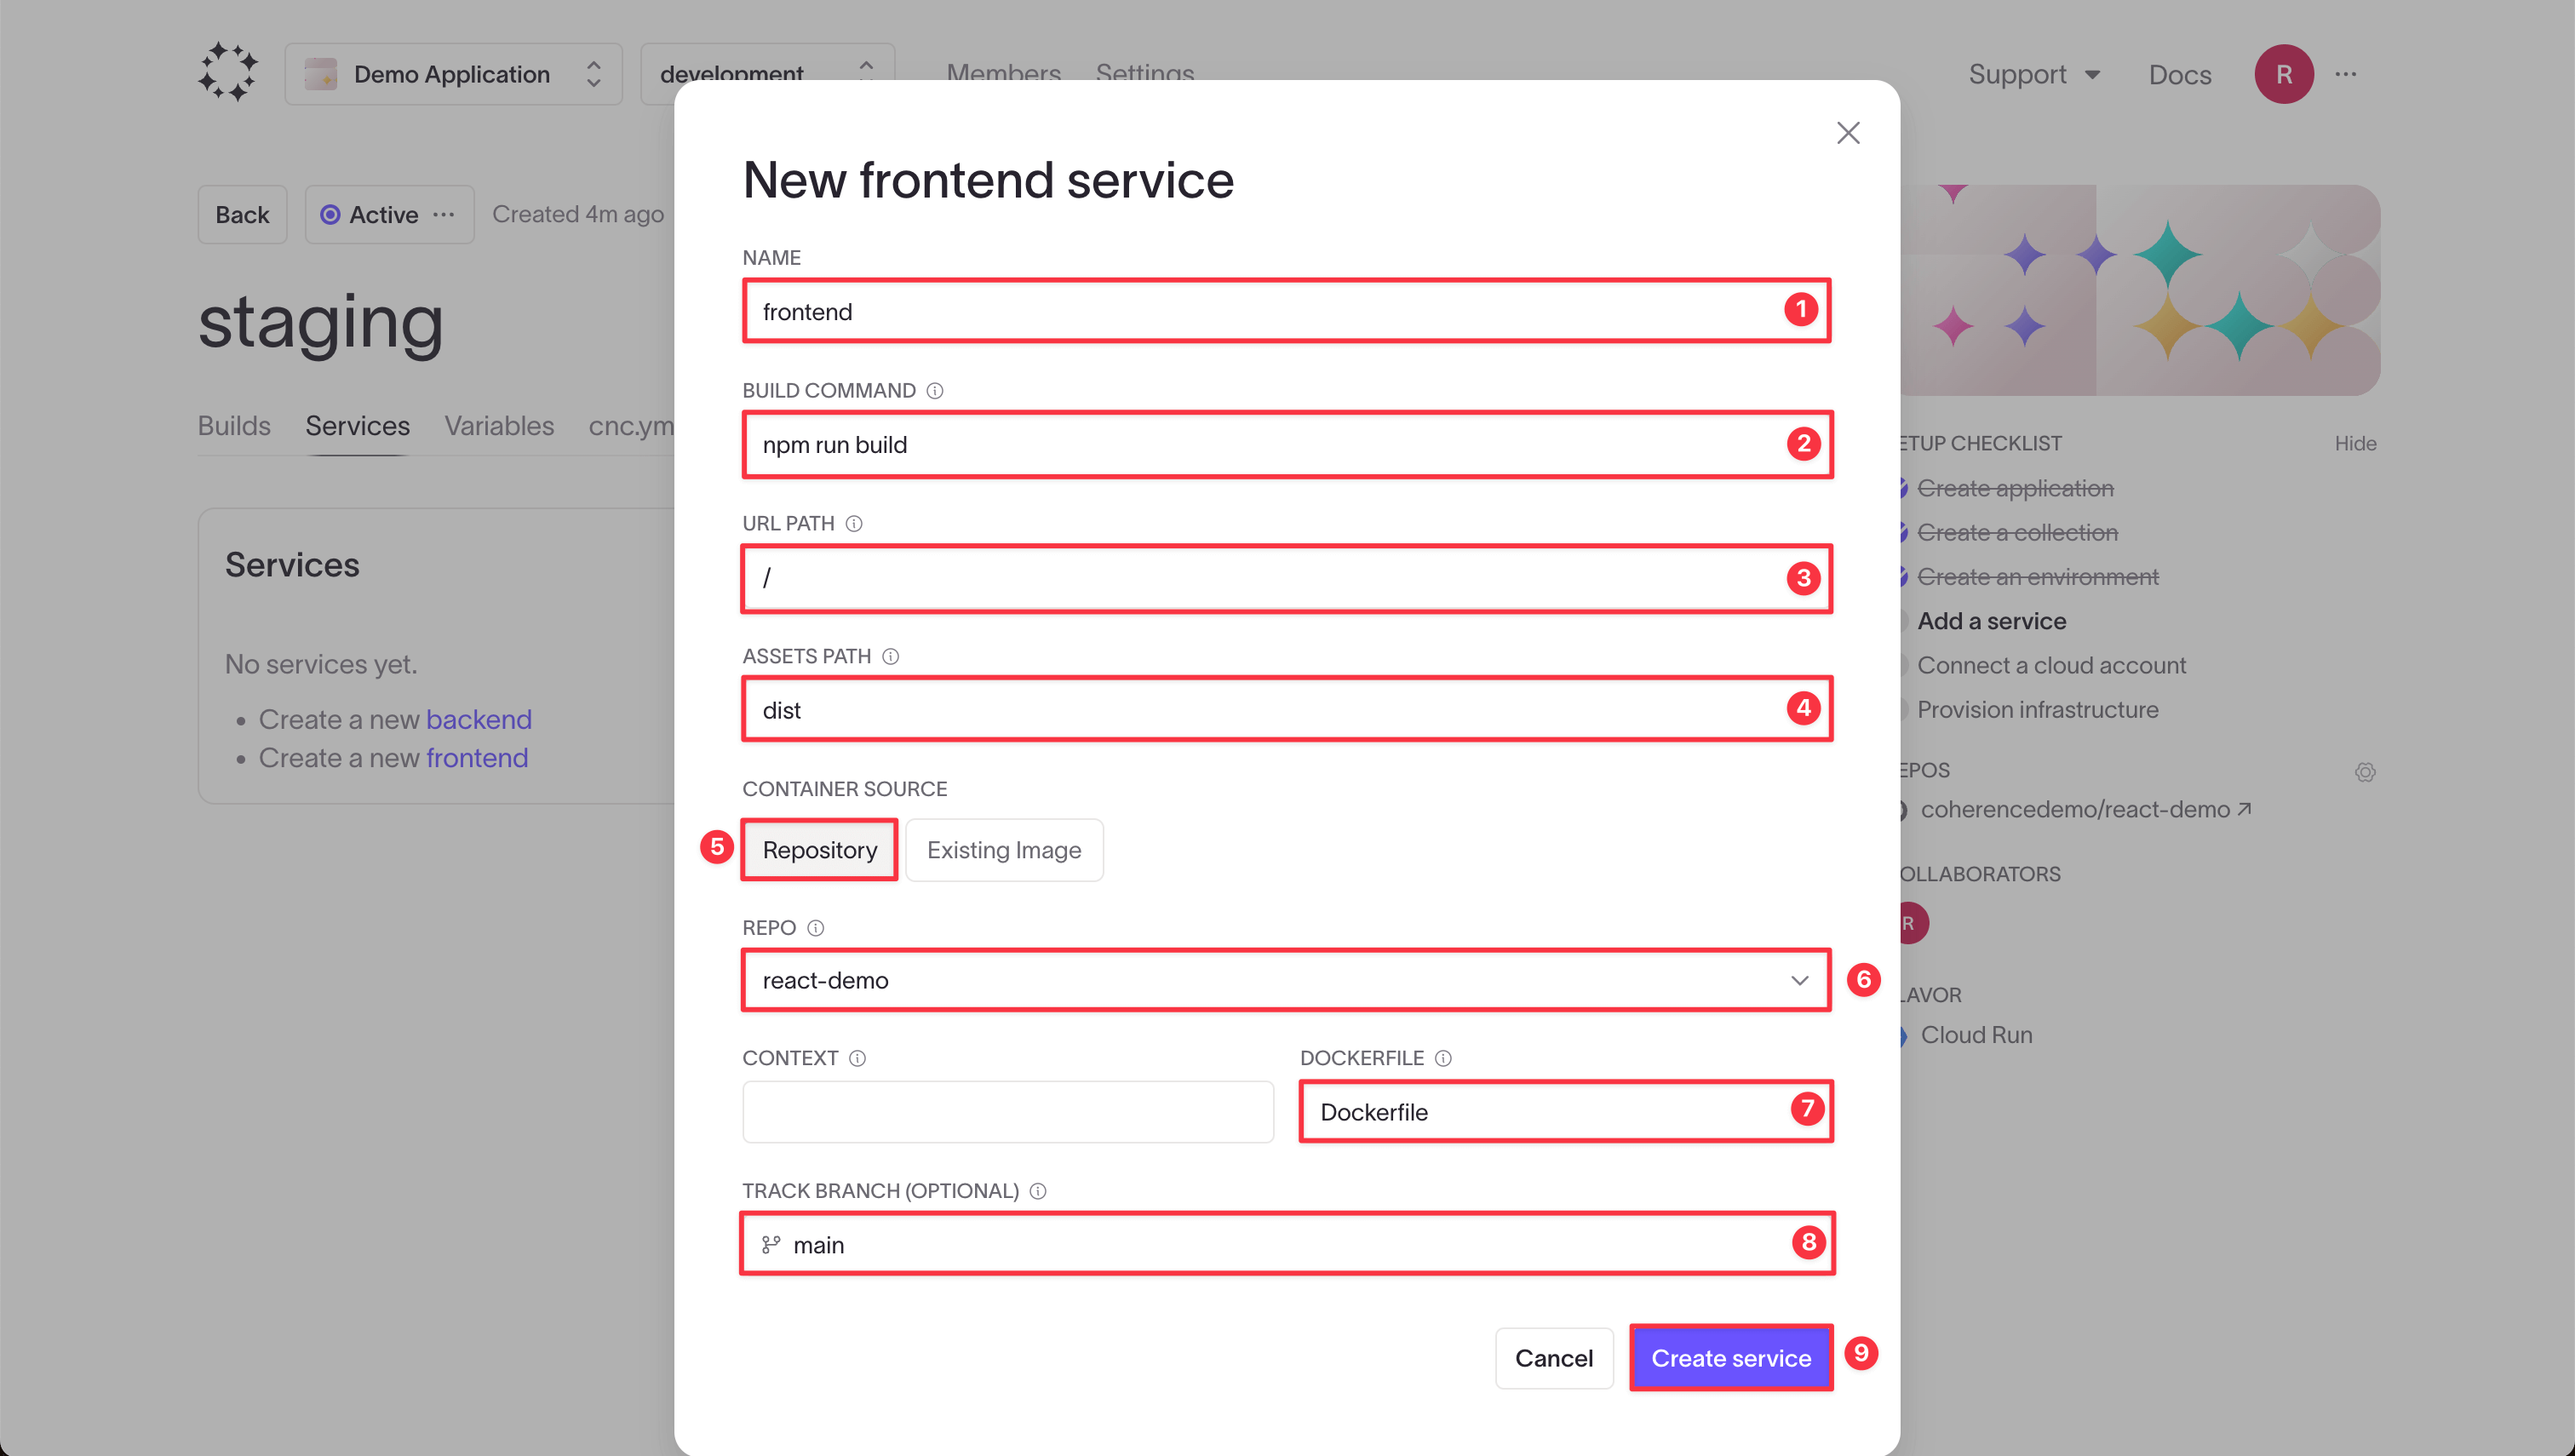
- Give your service a name, like "frontend".
- In the build command field, add the command that builds the production version of your site. For the React application we use in this demonstration, the build command is
npm run build. - Add the URL path your application will be served from. More complicated applications might have
/backendand/frontend, but for our example, the entire application is served from the root URL, so enter/. - Specify the folder containing your built application. For our React application, this is
/dist. - Select Repository to define where your source code can be found.
- Under Repo, next to "None connected yet", click Add one and paste in the link to your GitHub repository. You'll be prompted to install the Coherence GitHub application if you haven't already.
- Leave the Context field blank and enter "Dockerfile" if your Dockerfile is at the root of your repository.
- Choose the branch of your repository to build, often
main. - Click Create service.
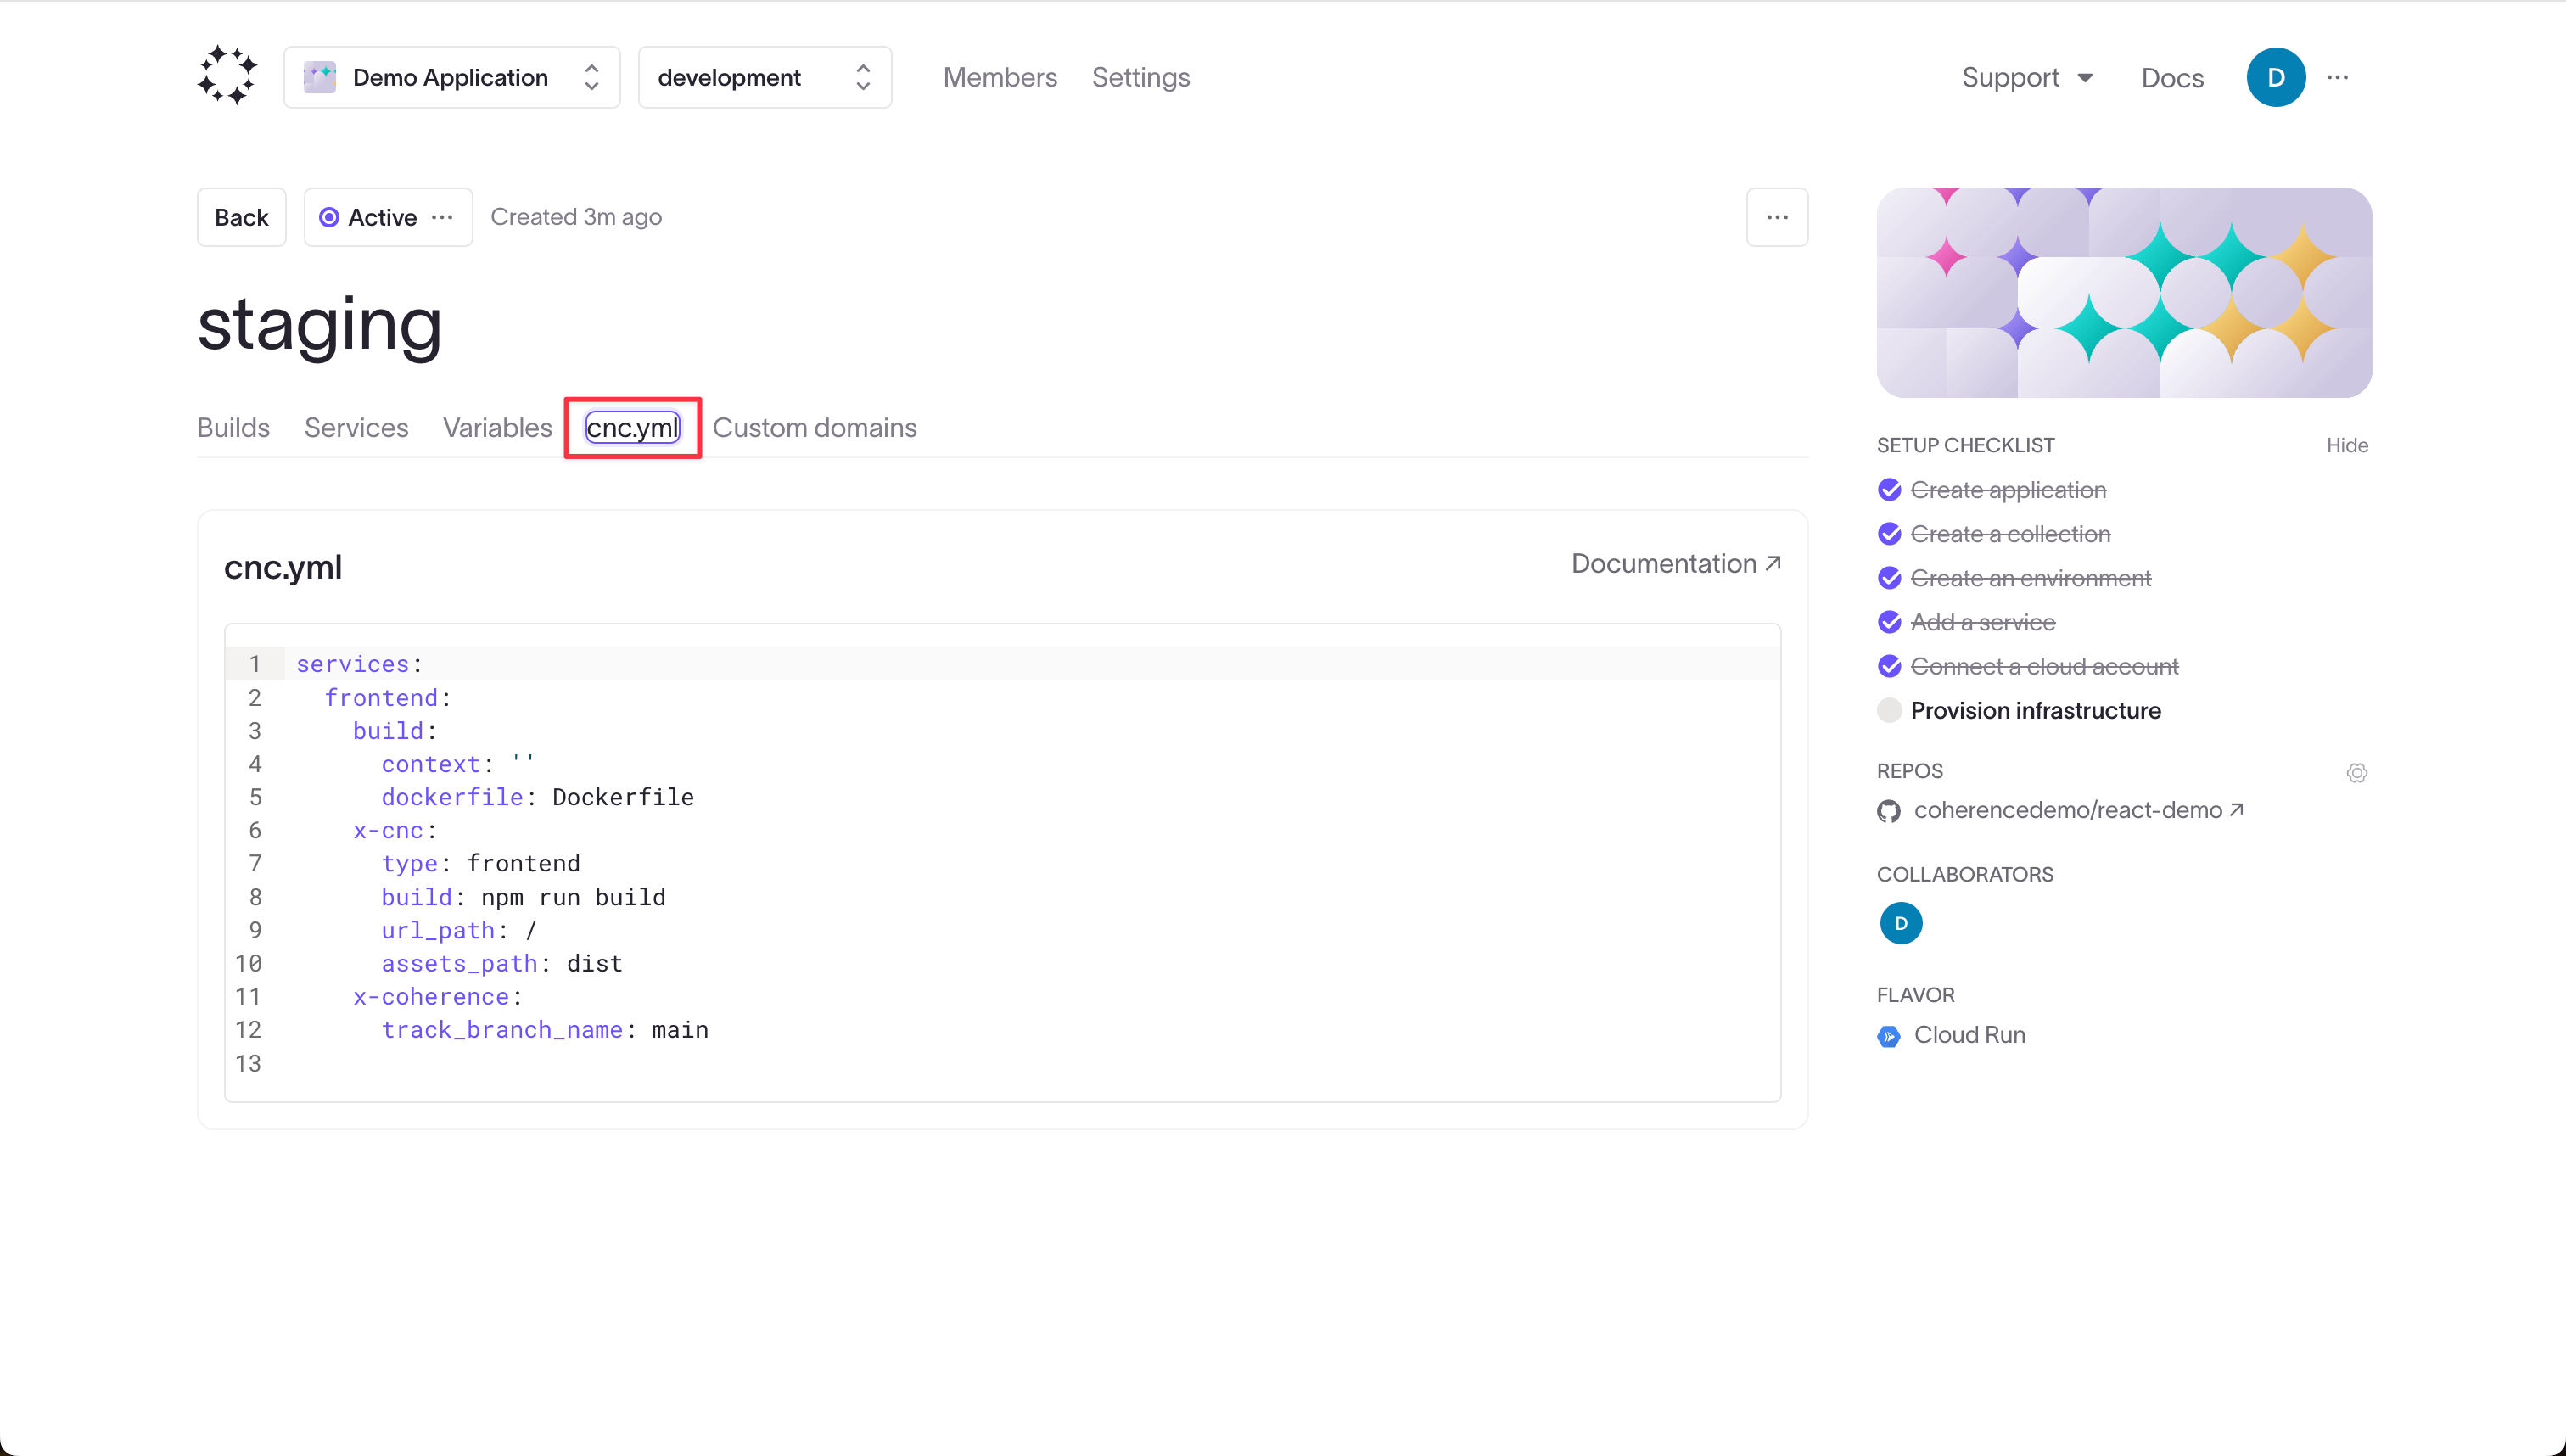
If you navigate to the cnc.yml tab, you'll see that this configuration has been used to build the cnc.yml file.
Connect your cloud account
Next you'll be prompted to connect your cloud account. The steps for connecting to your cloud account will differ depending on which provider and flavor you selected when creating the application.
Navigate to the relevant page below and follow the guidance there.
Build and deploy your application
Once you've connected to a cloud and provisioned your infrastructure, you can build your application.
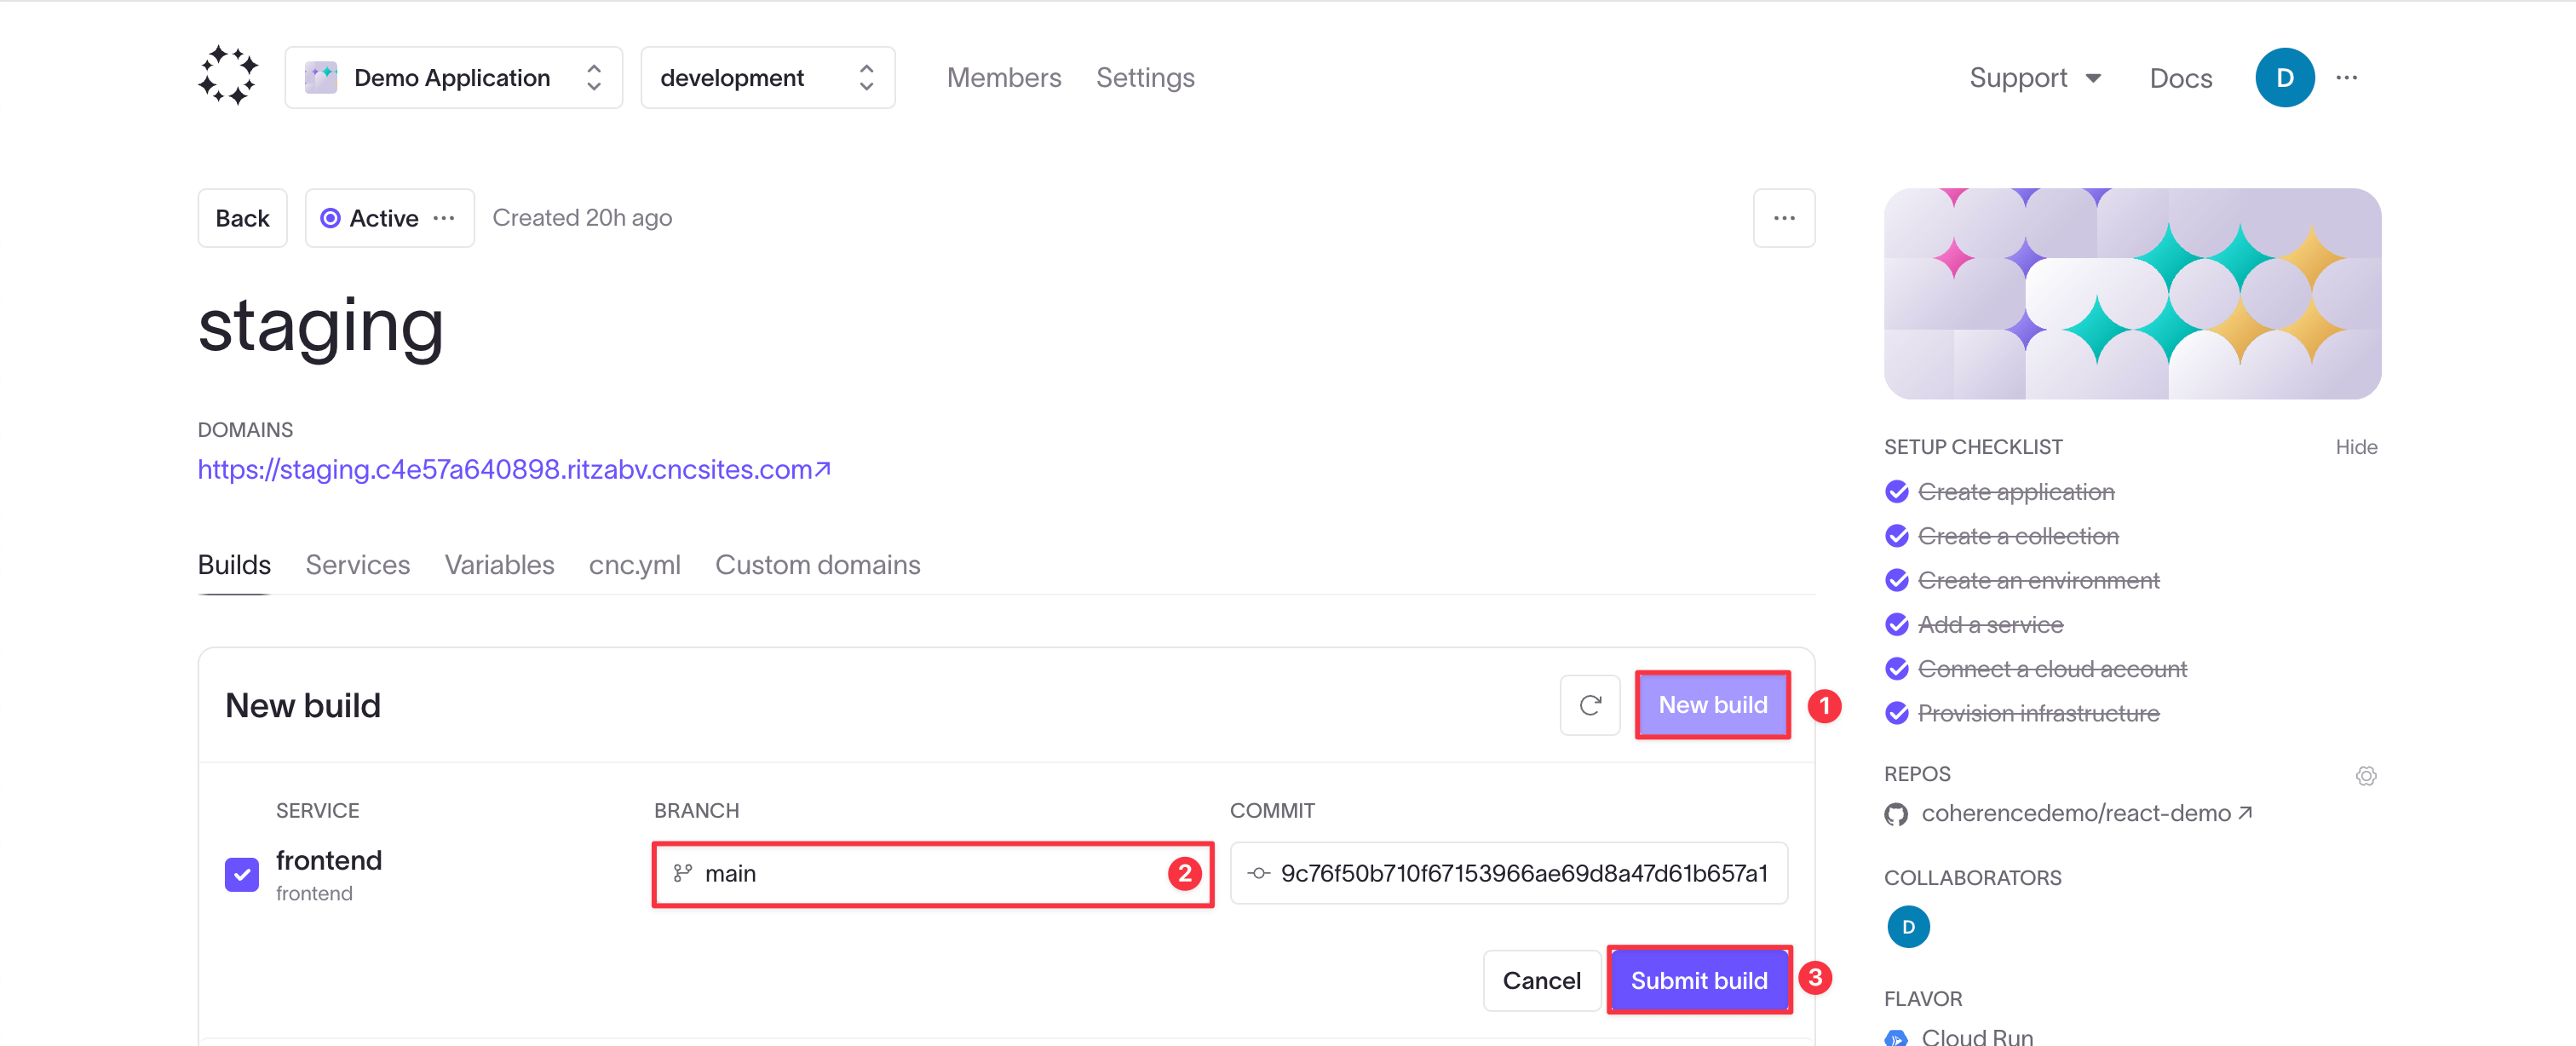
- Click New build.
- Choose the branch to build.
- Click Submit build.
Wait for the process to complete and then you should see your application deployed at the URL shown under Domains.